Administration Manual ip500pbxw – English
97
1.
Type a unique pass phrase in the
Pass
phrase
text box. Your pass phrase should be at least 20 characters
long in order to deter potential intruders.
Once you have typed a pass phrase, click
Next>
.
If you are following the
First
Time
Settings
wizard, the next page in the wizard sequence is displayed, which
allows you to
Configure
Wireless
Address
Authentication.
If you have accessed this page from the
General
Settings
section of the
Wireless
Network
page, click on the
Confirm
Changes
button to apply changes and return to the
Wireless
Network
page.
WARNING
It is strongly recommended that you enable Wireless Security to
help protect your wireless network from unauthorised access.
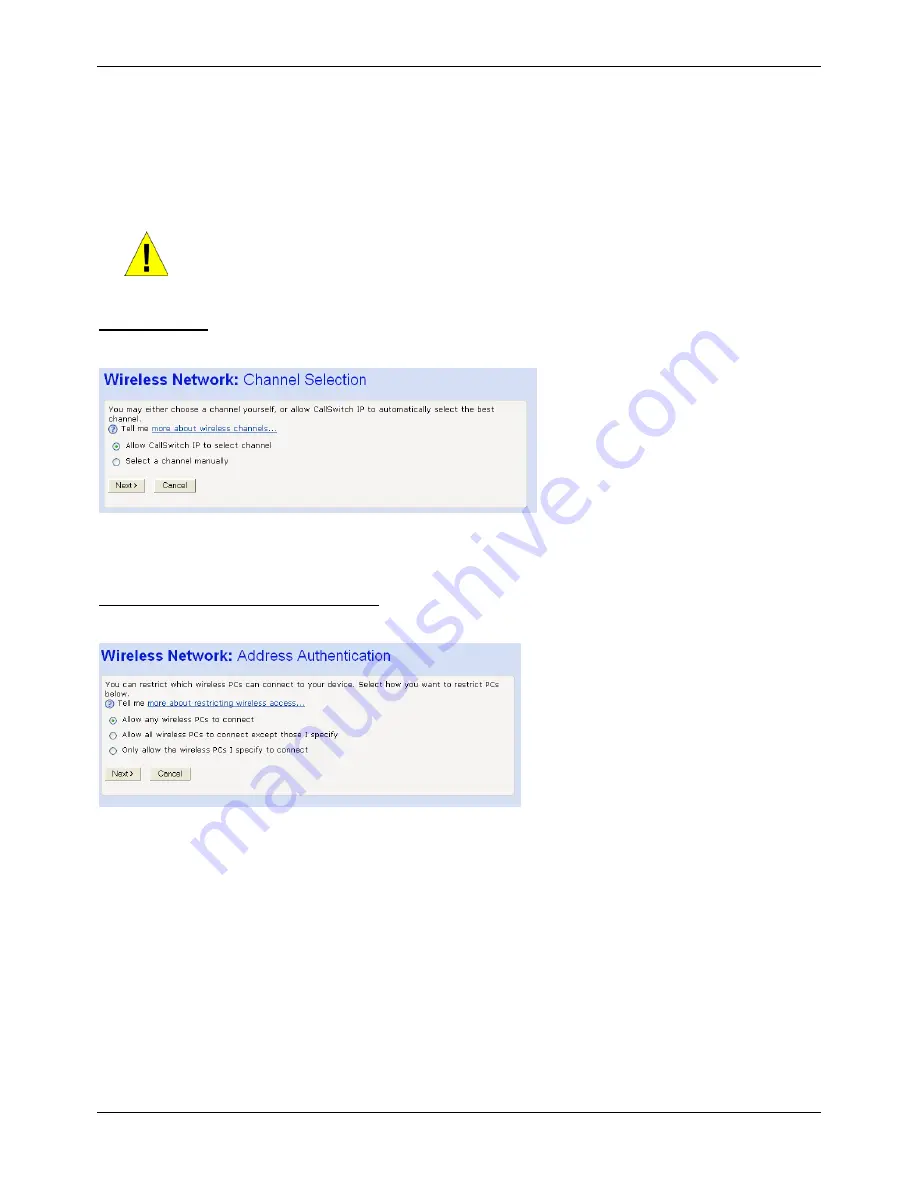
Select a Channel
The following page allows you to select a network channel:
The next page in the wizard sequence is displayed, which allows you to Configure Wireless Network Security.
If you have accessed this page from the
General
Settings
section of the
Wireless
Network
page, click on the
Confirm
Changes
button to apply changes and return to the
Wireless
Network
page.
Configure Wireless Address Authentication
The following page allows you to configure which wireless PCs that can access the ip500pbxw:
By default, any wireless PC that is configured with your network’s SSID and channel number can connect to your system.
You may want to increase the security of your wireless network by creating one of the following lists of wireless PCs:
A wireless PC blacklist; PCs on this list
cannot
access the system, but all other wireless PCs
can
.
A wireless PC whitelist; PCs on this list
can
access the system, but all other wireless PCs
cannot
.
The Wireless PCs added to either list are identified by their unique MAC address. This is made up of six pairs of characters,
with each character either a number between 0 and 9, or a letter between A and F. For example,
00:20:2b:80:2f:30
.
To configure which wireless PCs that can access your system, choose one of the following options:
If you want any wireless PCs to have access to your system, click on the
Allow
any
wireless
PCs
to
connect
radio button. Click
Next
>.
If you are following the First Time Settings wizard, the final page in the wizard sequence is displayed, which allows you to
Confirm Wireless network changes.
If you have accessed this page from the General Settings section of the Wireless Network page, click on the Confirm
changes button to apply changes and return to the Wireless Network page.


