35
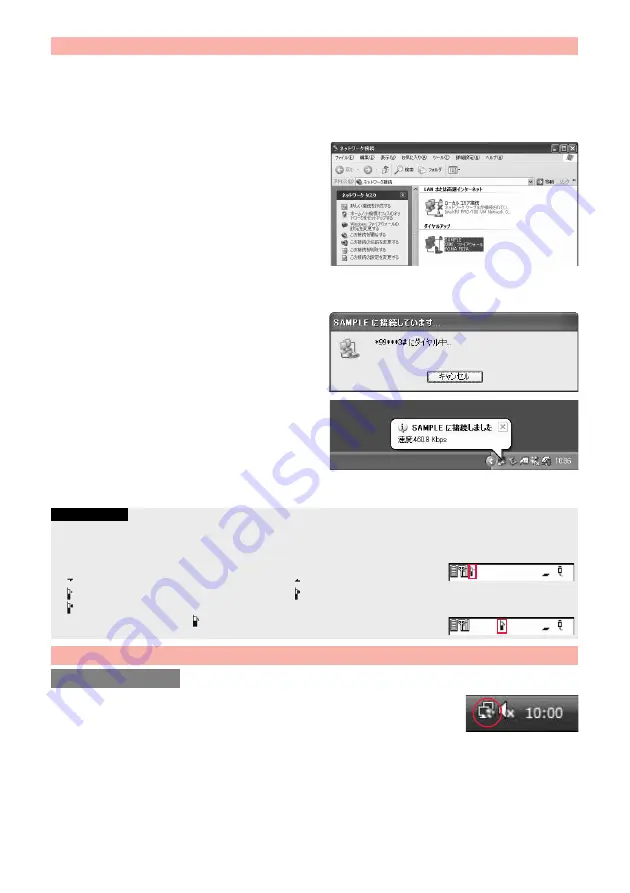
Perform the operation on page 6 to connect the FOMA terminal to your personal computer.
1
“
スタート
(Start)”
1
“
すべてのプログラム
(All programs)”
1
“
アクセサリ
(Accessories)”
1
“
通信
(Communications)”
1
Open “
ネットワーク接続
(Network connection)”.
2
Open the access point to be used.
Select the access point icon of the ISP name (see page 27)
you specified in “Set Dial-up Network”, then “
ネットワークタ
スク
(Network task)”
→
“
この接続を開始する
(Start this
connection)”.
Otherwise, double-click the access point icon.
3
Confirm the contents and click “
ダイヤル
(Dial)”.
≥
When connecting to “mopera U” or “mopera”, you can leave the user name and password fields blank.
4
The display appears to indicate
the connecting state.
In this period, the system performs logon processing to
confirm the user name and password.
5
The connection is completed.
After the connection is completed, the message appears from
the indicator of the task bar for a few seconds.
≥
You can start the browser software to browse websites, use
e-mail and so on.
≥
If this message does not appear, confirm the setting of the
access point again.
1
Click the dial-up icon on the task tray.
2
Select “
接続または切断
(Connect or disconnect)” and click “
切断
(Disconnect)”, then click “
閉じる
(Close)”.
<For Windows XP, Windows 2000>
Click “
切断
(Disconnect)”.
Making Dial-up Connection for Windows XP
Information
≥
For dial-up connection, use the FOMA terminal with the dial-up setting completed. To connect another FOMA terminal, you may need to
reinstall the FOMA communication configuration file (driver).
≥
The power consumption of the FOMA terminal increases during communication.
≥
During packet communication, the communication state appears on the FOMA terminal.
“
” (Communicating, data sending)
“
” (Communicating, data receiving)
“
” (Communicating, no data sending/receiving)
“
” (Outgoing or being disconnected)
“
” (Incoming or being disconnected)
≥
During 64K data communication, “
” appears on the FOMA terminal.
Disconnecting Communication Line
For Windows Vista
Continued to Next Page
Summary of Contents for P-07A Prime Series
Page 146: ...144...
Page 222: ...220...
Page 316: ...314...
Page 328: ...326...
Page 472: ...470...
Page 541: ...539 Index Quick Manual Index 540 Quick Manual 550...
Page 551: ...549 Index Quick Manual...
Page 582: ...17 8 Click Install Installation starts 9 Click Finish Installation is completed...
Page 613: ...Kuten Code List P 07A...


