


167
Camera
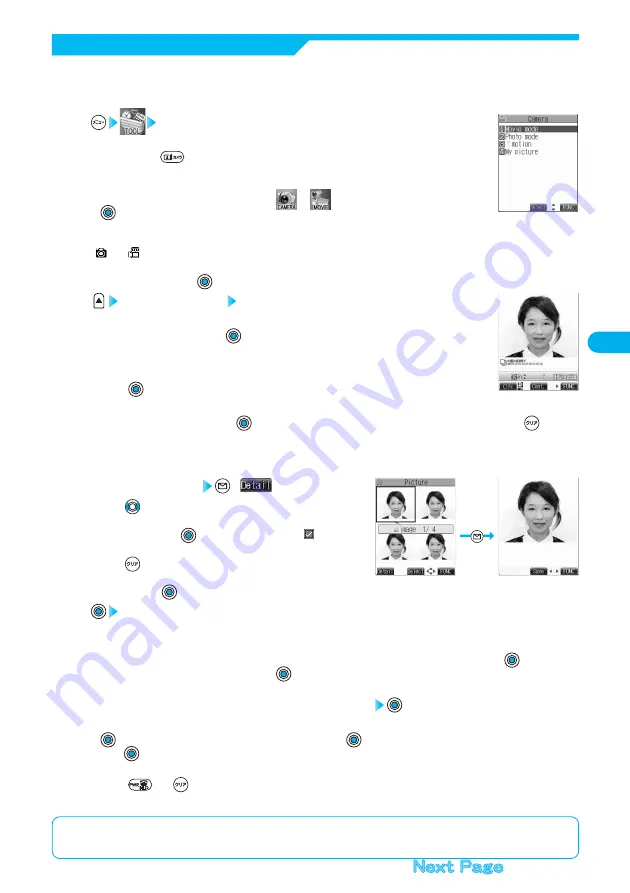
<Finder display>
<Detailed display>
You can use a camera to automatically or manually take a continuous shot of a still image. The image sizes
that you can set are CIF (352 x 288), Stand-by (240 x 320), QCIF (176 x 144), and Sub-QCIF (128 x 96). See
“Interval/Number” for how to set the number of shot or the shooting interval for auto-continuous shooting.
Continuous Shooting
Camera
The Camera menu is displayed.
●
Press and hold
for at least one second from the Stand-by display to start up the camera in the
mode you previously activated. However, the camera starts up in Photo Mode if you previously
operated the camera in Continuous Mode. Go to step 3.
●
You can start up the camera also by selecting
or
from the Shortcut menu and pressing
. Go to step 3.
1
Photo mode or Movie mode
“
” or “
” is displayed.
●
When an unsaved still image in the last shooting remains, the confirmation display appears asking whether to save it. Select
“YES” or “NO” and press
.
2
Continuous mode Auto or Manual
●
You can switch to Continuous Mode also by selecting “Continuous mode” from “CHG camera-mode” in
the Function menu and pressing
.
●
Press “Manual” to display the number of frames for continuous shooting.
3
Press .
Continuous shooting starts.
If you select “Manual” in step 3, press
the number of times of shooting frames. Not to shoot all frames, press
.
●
The image appears horizontally flipped (mirrored) when you take a shot with the inside camera; however the image is
correctly displayed when playing back.
●
When “Auto save set” is set to “ON”, the images are automatically saved. Go to step 8.
4
Select a still image
(
)
●
Press
from the detailed display to bring up the previous or
following still image.
●
Each time you press
on the Post View display, “
” is displayed
and you can select the still image.
●
Press
from the Post View display and the confirmation display
appears asking whether to cancel the shot still image. Select “YES” or
“NO” and press
.
5
YES
The selected still image is saved.
●
When “Store in” is set to “miniSD”, the still image is saved to the folder selected by “Select storage”. When unsaved still
images are found, the confirmation display appears asking whether to save them. Select “YES” and press
to save all the
still images. To cancel, select “NO” and press
. Go to step 8.
●
See page 171 for “Store selection” and “Store all”.
6
Select the folder to which you want to save data
●
When unsaved still images are found, the confirmation display appears asking whether to save them. Select “YES”, press
, and select the folder to save the still images to; then press
to save all the still images. To cancel, select “NO” and
press .
●
See page 346 for still image folders.
7
Press
or
to end the camera.
●
See page 347 for how to display saved still images.
8
<Post View display>
<Camera menu>
■
Post View display
“Post View display” enables you to check still or moving images you shot before they are saved.


