Chapter 1
1-40
Change the fogging removal potential (VBACK) by 10V with changing the parameter by "1".
B-3)Output the image with which the symptom occurred and confirm that the symptom no longer occurs. When the symptom has stopped to appear, then the work
is completed.
In case the symptom does not improve, go to the step B-4).
B-4)Service Mode (LEVEL2) > Mode List > COPIER > Option > IMG-DEV > Change the parameter of affected color in "ADJVPP-x" to "+2". The setting range
is between "-4" to "+2". ("0" by default).
Change the developing AC bias (VPP) by changing the parameter.
B-5) Output the image with which the symptom occurred and confirm that the symptom no longer occurs. When the symptom has stopped to appear, then the work
is completed.
In case the symptom does not improve, revert the setting set in the step B-4) back and go to the step B-6).
B-6)Service Mode (LEVEL2) > Mode List > COPIER > Adjust > V-CONT > Change the parameter of affected color in "VBACK-x", "VBACK2-x", "VBACK3-
x" to "+1". The setting range is between "-5" to "+5". ("0" by default).
Change the fogging removal potential (VBACK) by 10V with changing the parameter by "1".
[Caution] The change of this setting after the step B-2) was performed may allow the carrier of the toner attach on the high density part of the image, so that the
same part of the output comes out with textured surface.
B-7) Output the image with which the symptom occurred and confirm that the symptom no longer occurs. When the symptom has stopped to appear, then the work
is completed.
In case the symptom does not improve, revert back the settings set in the step B-2) and in B-6) and go to the step B-8).
B-8)When the symptom has occurred with black, replace the drum cleaning blade (Bk).
When the symptom has occurred with yellow/magenta/cyan, replace the drum unit.
[Note] When to replace the drum unit, perform Service Mode > SITUATION > Parts Replacement > "Drum Unit (Y,M,C) replacement".
B-9) Output the image with which the symptom occurred and confirm that the symptom no longer occurs.
1.1.1.6.13 Color displacement/scratches on image with 173mm intervals due to move of the host machine after installation
0031-8789
[ Verified by Canon Inc. ]
Symptom
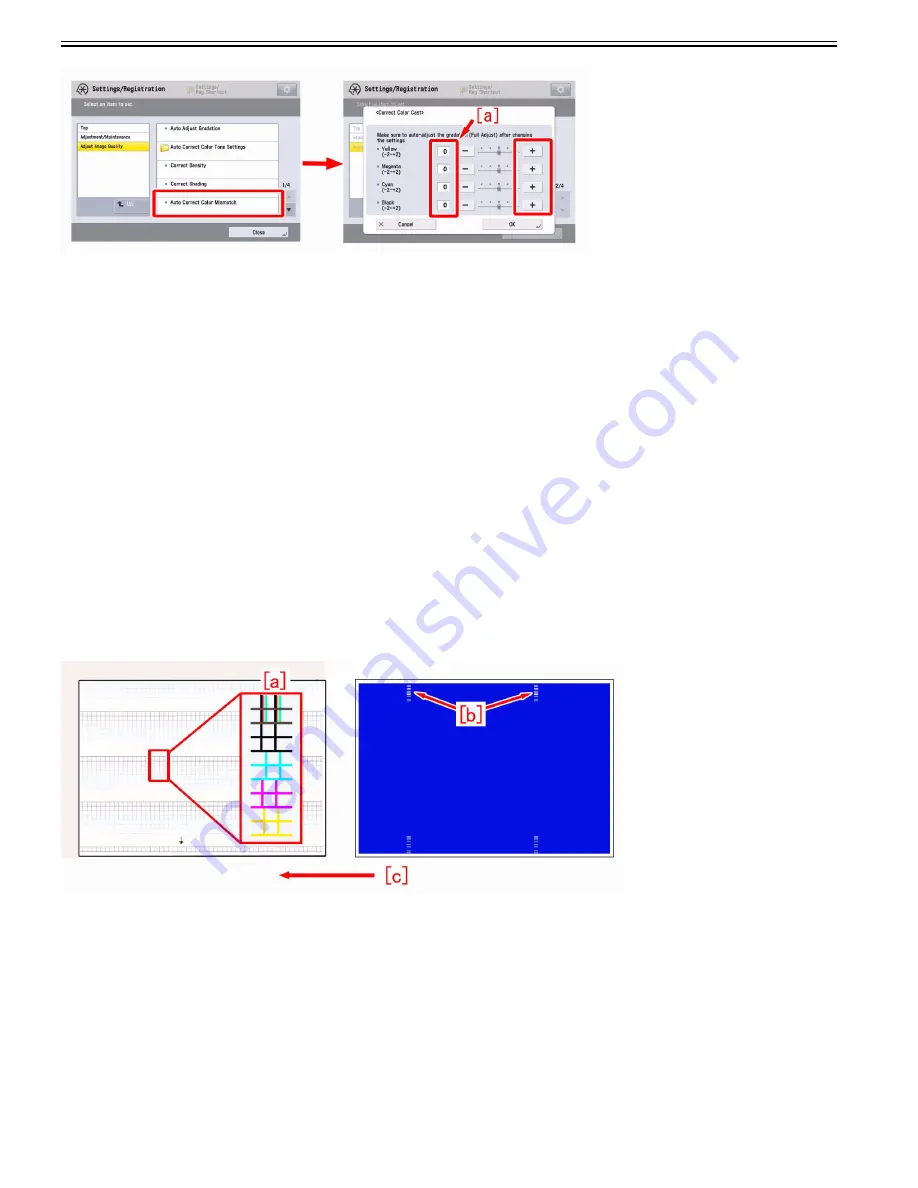
After moving the host machine to another place after installation, color displacement [a] and/or scratches on image with 173mm intervals [b] may occur.
The arrow [c] indicates the feed direction.
Cause
Vibration from move of the host machine upsets the alignment of ITB and color displacement occurs.
If the fixing belt comes in contact with the separation plate of the inner delivery unit during the move of the host machine, a small scratch is made on the fixing belt
and this generates scratches on image.
Service work
1) From Service mode > Mode List > COPIER > Function > INSTALL > Execute "INIT-ITB" to adjust ITB neutral position.
2) Go to Settings/Registration > Adjustment/Maintenance > Adjust Image Quality > Auto Correct Color Mismatch > and press "Start."
When scratches on image appears go to the step 3), when scratches on image does not appear go to the step 4).
3) From Service Mode > Mode List > COPIER > Function > CLEANING > Execute "FXD_CL_E" to refresh the fixing belt.
4) Output the image having shown the symptom and check that the symptom does not occur.
[Caution] When the host machine has to be moved to another place after installation, carry it out referring to " Installation > When moving the host machine to
another place after installation, execute the operation shown below." in Service manual. If the host machine is moved without referring it, it may lead to breakage
of parts/faulty images.
Summary of Contents for imagePRESS C800 Series
Page 1: ...Dec 2 2014 Troubleshooting Guide imagePRESS C800 Series...
Page 2: ......
Page 6: ......
Page 8: ......
Page 9: ...Chapter 1 Correcting Faulty Images...
Page 10: ......
Page 14: ......
Page 114: ...Chapter 1 1 100 7 2 Select the envelope type press OK...
Page 165: ...Chapter 1 1 151 3 Pull the Tray all the way out...
Page 167: ...Chapter 1 1 153 5 Remove the Waste Toner Container...
Page 172: ...Chapter 1 1 158 2 Pull out the staple cartridge holding it by the green tab...
Page 180: ...Chapter 1 1 166 5 Push in the new staple case until it clicks to insert it...
Page 181: ...Chapter 1 1 167 6 Close the Cover for the saddle stitch staple cartridge...
Page 199: ...Chapter 1 1 185 b 1 Take out the Waste Toner Container 1...
Page 201: ...Chapter 1 1 187 b 2 Install the Waste Toner Joint 1 to the Waste Toner Container 2...
Page 206: ...Chapter 1 1 192 b 9 Remove the Prism 1 1 Screw 2 1 Hook 3...
Page 207: ...Chapter 1 1 193 b 10 Clean the toner adhered to the 2 A parts on the prism...
Page 208: ...Chapter 1 1 194 b 11 Clean the toner adhered to the A part of the Waste Toner Container...
Page 210: ...Chapter 1 1 196 2 Pull out the punch waste tray...
Page 217: ...Chapter 1 1 203 3 Discard the staple waste...
Page 239: ...Chapter 1 1 225 3 Press Memory Media 4 Select the target memory media...
Page 250: ...Chapter 1 1 236 Select Share files and folders using SMB Windows Select the account to be used...
Page 255: ...Dec 2 2014...
Page 256: ......


