Chapter 1
1-11
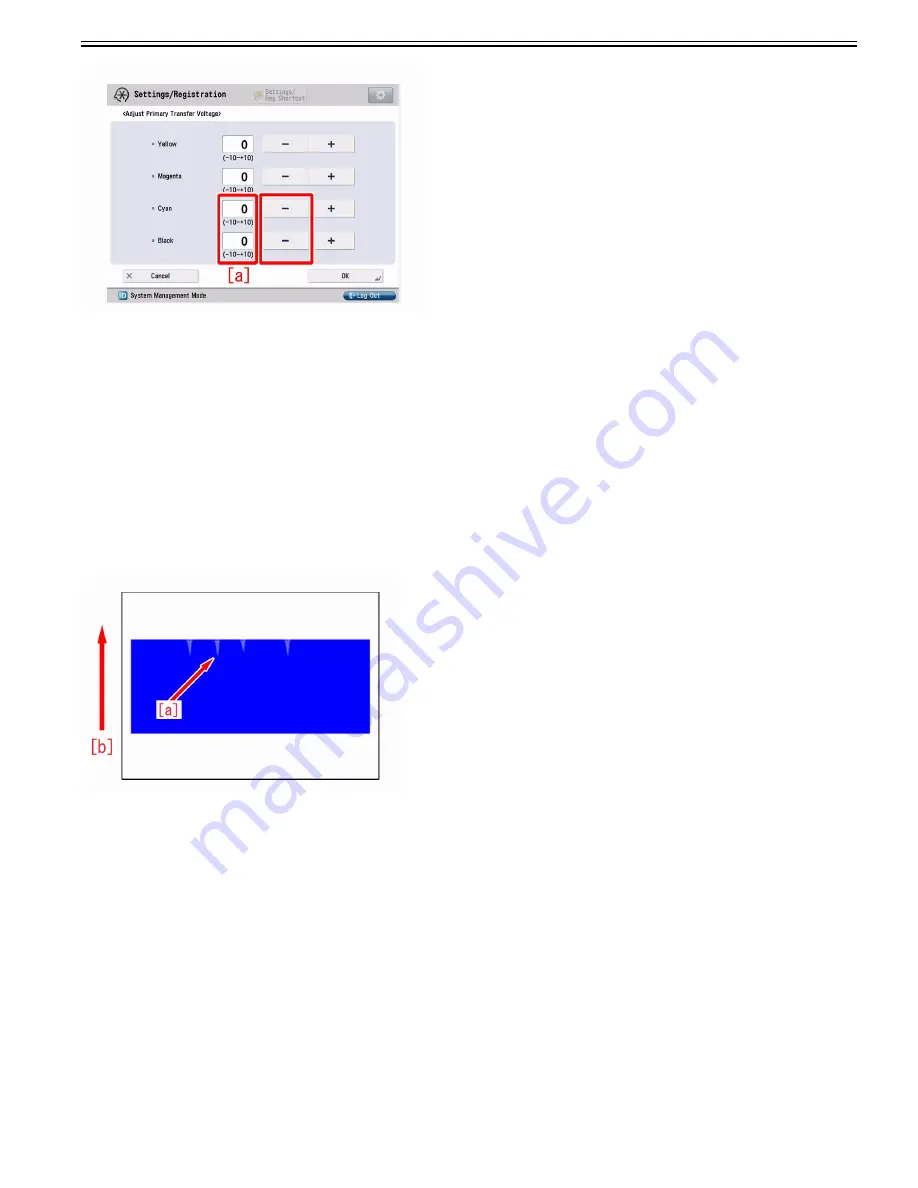
[Caution] Changing this setting may decrease the primary transfer voltage and bring poor image (poor transfer with Bk high density original, etc.).
8) Output the image having shown the symptom, and check that the symptom does not occur. If the symptom no longer occurs, the work is completed.
If the symptom does not show an improvement, go back to the step 2) and change the value of Black by one at a time down to "-5".
9) If the symptom still persists, revert the changed value in the step 2) to what it was and replace ITB.
[Note]
Perform the following operations after replacing ITB.
- Go to Service Mode > Mode List > COPIER > Function > INSTALL >, select INT-ITB and press "OK" button.
- From Settings/Registration > Adjustment/Maintenance > Adjust Image Quality >, select Auto Correct Color Mismatch and press "Start" button.
- From Settings/Registration > Adjustment/Maintenance > Adjust Image Quality >, select Auto Adjust Gradation and press "Full Adjust" button to execute full
adjust following to the message emerges on the screen.
1.1.1.3.5 Uneven gloss (Rain drop mark) in high density area
0031-7732
[ Verified by Canon Inc. ]
Symptom
In the leading edge of high density image area, 3-5 mm width uneven gloss (Rain drop mark)[a] may appear in feeding direction with about 10mm in length.[b] is
the feeding direction.
Cause
Water vapor from paper tends to stay more in the area with weak fixing nip pressure than in the area with high pressure.
When the remained water vapor moves around on the paper, it causes uneven fixing leading to the above symptom. Coated paper tends to have poor air flow making
water vapor in the area with weak fixing nip pressure not distribute and stay. This causes the symptom to easily occur.
Service Work
1) Have the customer log in to System Management Mode in user mode.
2) Go to Preferences > Paper Settings > Paper Type Management Settings, select an appropriate paper type from the list. Press "Duplicate" and then "OK".
Summary of Contents for imagePRESS C800 Series
Page 1: ...Dec 2 2014 Troubleshooting Guide imagePRESS C800 Series...
Page 2: ......
Page 6: ......
Page 8: ......
Page 9: ...Chapter 1 Correcting Faulty Images...
Page 10: ......
Page 14: ......
Page 114: ...Chapter 1 1 100 7 2 Select the envelope type press OK...
Page 165: ...Chapter 1 1 151 3 Pull the Tray all the way out...
Page 167: ...Chapter 1 1 153 5 Remove the Waste Toner Container...
Page 172: ...Chapter 1 1 158 2 Pull out the staple cartridge holding it by the green tab...
Page 180: ...Chapter 1 1 166 5 Push in the new staple case until it clicks to insert it...
Page 181: ...Chapter 1 1 167 6 Close the Cover for the saddle stitch staple cartridge...
Page 199: ...Chapter 1 1 185 b 1 Take out the Waste Toner Container 1...
Page 201: ...Chapter 1 1 187 b 2 Install the Waste Toner Joint 1 to the Waste Toner Container 2...
Page 206: ...Chapter 1 1 192 b 9 Remove the Prism 1 1 Screw 2 1 Hook 3...
Page 207: ...Chapter 1 1 193 b 10 Clean the toner adhered to the 2 A parts on the prism...
Page 208: ...Chapter 1 1 194 b 11 Clean the toner adhered to the A part of the Waste Toner Container...
Page 210: ...Chapter 1 1 196 2 Pull out the punch waste tray...
Page 217: ...Chapter 1 1 203 3 Discard the staple waste...
Page 239: ...Chapter 1 1 225 3 Press Memory Media 4 Select the target memory media...
Page 250: ...Chapter 1 1 236 Select Share files and folders using SMB Windows Select the account to be used...
Page 255: ...Dec 2 2014...
Page 256: ......


