Chapter 1
1-232
If you select [User must change password at next logon], any new users added must change their passwords in order to send a file from the machine. (You cannot
change the password from the control panel.)
Close the [Computer Management] window.
[Reference]
- In the Active Directory environment, the procedures for setting up users differ from the above. For more information, see the Windows manual.
- When a computer that one or more users log on to is restricted by the administrator in an Active Directory environment, the name of the computer must be regis-
tered in the Active Directory. Set the computer name in the user account properties dialog box to "CANON + the last 8 digits of the MAC address of the computer
+ 00". For example, if the MAC address of the computer you are using is "00:00:11:22:33:44", set "CANON1122334400".
12) Select the folder to share in Windows Explorer, etc. > right-click the folder > select [Properties].
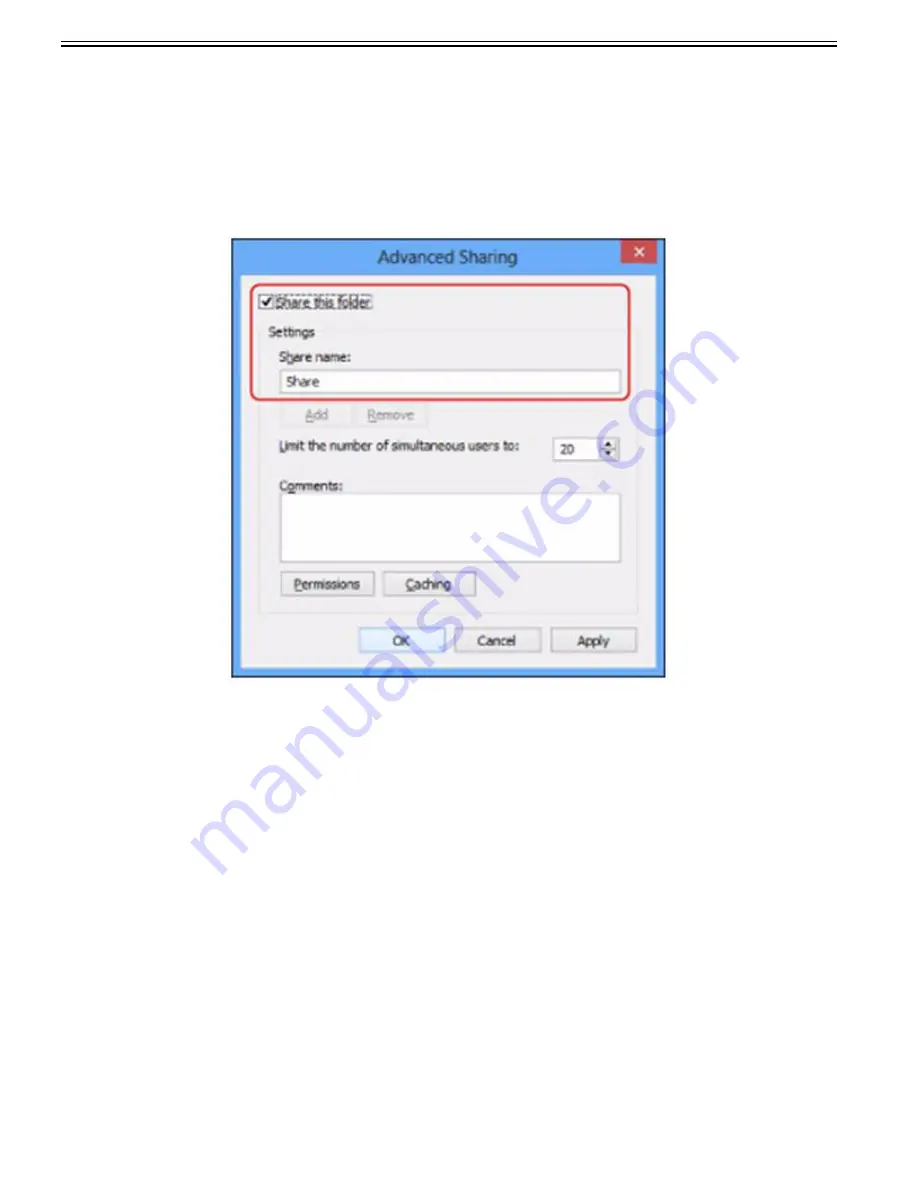
13) Enter the share name.
For Windows Vista/Server 2008/7/Server 2008 R2/8/Server 2012:
On the [Sharing] sheet, select [Advanced Sharing].
Select [Share this folder] > enter the share name in [Share name].
14) Set permissions.
- To create a shared folder on a FAT or FAT32 format disk (If the [Security] tab is not displayed):
Click [Permissions] > In the dialog box that appears, select or add the users or groups to whom you want to give access to the shared folder > in the list for setting
the access permissions, select [Allow] for both [Change] and [Read] > click [OK].
- To create a shared folder on an NTFS format disk:
Click the [Security] tab > Select the users or groups to whom you want to give access to the shared folder > press [Add]/[Edit] > in the list for setting the access
permissions, set [Allow] for access permissions [Write] and [Read & Execute] or higher.
Summary of Contents for imagePRESS C800 Series
Page 1: ...Dec 2 2014 Troubleshooting Guide imagePRESS C800 Series...
Page 2: ......
Page 6: ......
Page 8: ......
Page 9: ...Chapter 1 Correcting Faulty Images...
Page 10: ......
Page 14: ......
Page 114: ...Chapter 1 1 100 7 2 Select the envelope type press OK...
Page 165: ...Chapter 1 1 151 3 Pull the Tray all the way out...
Page 167: ...Chapter 1 1 153 5 Remove the Waste Toner Container...
Page 172: ...Chapter 1 1 158 2 Pull out the staple cartridge holding it by the green tab...
Page 180: ...Chapter 1 1 166 5 Push in the new staple case until it clicks to insert it...
Page 181: ...Chapter 1 1 167 6 Close the Cover for the saddle stitch staple cartridge...
Page 199: ...Chapter 1 1 185 b 1 Take out the Waste Toner Container 1...
Page 201: ...Chapter 1 1 187 b 2 Install the Waste Toner Joint 1 to the Waste Toner Container 2...
Page 206: ...Chapter 1 1 192 b 9 Remove the Prism 1 1 Screw 2 1 Hook 3...
Page 207: ...Chapter 1 1 193 b 10 Clean the toner adhered to the 2 A parts on the prism...
Page 208: ...Chapter 1 1 194 b 11 Clean the toner adhered to the A part of the Waste Toner Container...
Page 210: ...Chapter 1 1 196 2 Pull out the punch waste tray...
Page 217: ...Chapter 1 1 203 3 Discard the staple waste...
Page 239: ...Chapter 1 1 225 3 Press Memory Media 4 Select the target memory media...
Page 250: ...Chapter 1 1 236 Select Share files and folders using SMB Windows Select the account to be used...
Page 255: ...Dec 2 2014...
Page 256: ......


