Chapter 1
1-136
1.1.7.1.51 Overview and how to use test print (PG) in service mode
0031-6206
[ Manual-related ]
Description
This machine is able to use following test prints. With each test print, the image error can be checked by "Yes" in the following image check items.
If the image failure occurred on normal output does not reappear on the test print, it may be caused by the PDL input or reader side.
Field Remedy
a) Test print type
b) Selecting Test Print TYPE
b-1) Set the copy count, paper size, and pickup mode (single-sided or double-sided).
b-2) Select service mode > COPIER > Test > PG > TYPE.
b-3) Enter the appropriate TYPE No. using the keypad, and press the OK key.
b-4) Set the density using service mode > COPIER > Test > PG > DENS-Y/M/C/K (valid only if TYPE > 5).
b-5) Set the image mode by service mode > COPIER > Test > PG > TXPH.
b-6) Press the start key.
c) How to check test print
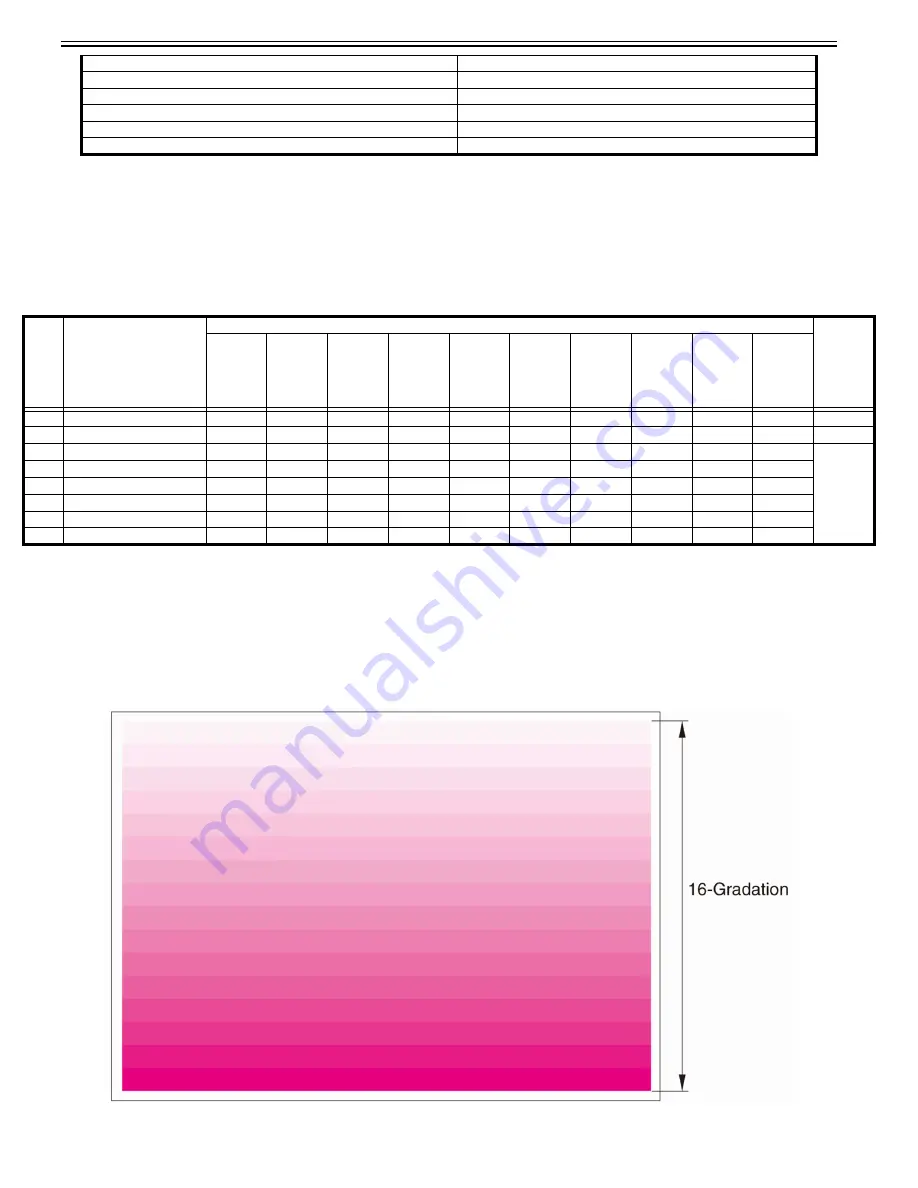
c-1) 16-Gradation (TYPE > 4)
Service Mode > COPIER > Display > FIXING > FX-MTR5
Display Fixing Motor current VL log: standby
Service Mode > COPIER > Display > FIXING > FX-R-TM
Display Fixing Refresh Roller total operation times
Service Mode > COPIER > Counter > FIXING > FX-RF-RL
Fixing Refresh Roller parts counter
Service Mode > COPIER > Counter > CLEANING > FX1-RFRL
Fixing Refresh Roller cleaning counter
Service Mode > COPIER > Counter > PRDC-1 > FXLW-TH1
Pressure Sub Thermistor 1 parts counter
Service Mode > COPIER > Counter > PRDC-1 > FXLW-TH2
Pressure Sub Thermistor 2 parts counter
PG
TYPE
TYPE Pattern
Items
Originator
Gradation
Fogging
Transfer
Fault
Black line
White line
Uneven
Density
Uneven
Density
at the
Front/Rear
Color
displaceme
nt
Right Angle
Straight
Lines
0
Normal copy/print
---
1 to 3 (For R&D)
---
4
16-Gradation
Yes
Yes
Yes
Yes
Main
controller
PCB
5
Full Area Half Tone
Yes
Yes
Yes
Yes
6
Grid
Yes
Yes
Yes
10
MCYBk Horizontal Line
Yes
Yes
12
64-Gradation
Yes
14
Full Color 16-gradation
Yes
Yes
Summary of Contents for imagePRESS C800 Series
Page 1: ...Dec 2 2014 Troubleshooting Guide imagePRESS C800 Series...
Page 2: ......
Page 6: ......
Page 8: ......
Page 9: ...Chapter 1 Correcting Faulty Images...
Page 10: ......
Page 14: ......
Page 114: ...Chapter 1 1 100 7 2 Select the envelope type press OK...
Page 165: ...Chapter 1 1 151 3 Pull the Tray all the way out...
Page 167: ...Chapter 1 1 153 5 Remove the Waste Toner Container...
Page 172: ...Chapter 1 1 158 2 Pull out the staple cartridge holding it by the green tab...
Page 180: ...Chapter 1 1 166 5 Push in the new staple case until it clicks to insert it...
Page 181: ...Chapter 1 1 167 6 Close the Cover for the saddle stitch staple cartridge...
Page 199: ...Chapter 1 1 185 b 1 Take out the Waste Toner Container 1...
Page 201: ...Chapter 1 1 187 b 2 Install the Waste Toner Joint 1 to the Waste Toner Container 2...
Page 206: ...Chapter 1 1 192 b 9 Remove the Prism 1 1 Screw 2 1 Hook 3...
Page 207: ...Chapter 1 1 193 b 10 Clean the toner adhered to the 2 A parts on the prism...
Page 208: ...Chapter 1 1 194 b 11 Clean the toner adhered to the A part of the Waste Toner Container...
Page 210: ...Chapter 1 1 196 2 Pull out the punch waste tray...
Page 217: ...Chapter 1 1 203 3 Discard the staple waste...
Page 239: ...Chapter 1 1 225 3 Press Memory Media 4 Select the target memory media...
Page 250: ...Chapter 1 1 236 Select Share files and folders using SMB Windows Select the account to be used...
Page 255: ...Dec 2 2014...
Page 256: ......


