Chapter 1
1-30
2) Output the image having shown the symptom, and check that the symptom does not occur. If the symptom no longer occurs, the work is completed. If the symp-
tom is still present, repeat Step 1) twice.
3) If the symptom does not improve, check other causes.
1.1.1.6.7 Image failure due to lines on Fixing Belt (luster streaks/patches of uneven gloss)/How to refresh Fixing Belt
0031-6904
[ Manual-related ]
Description
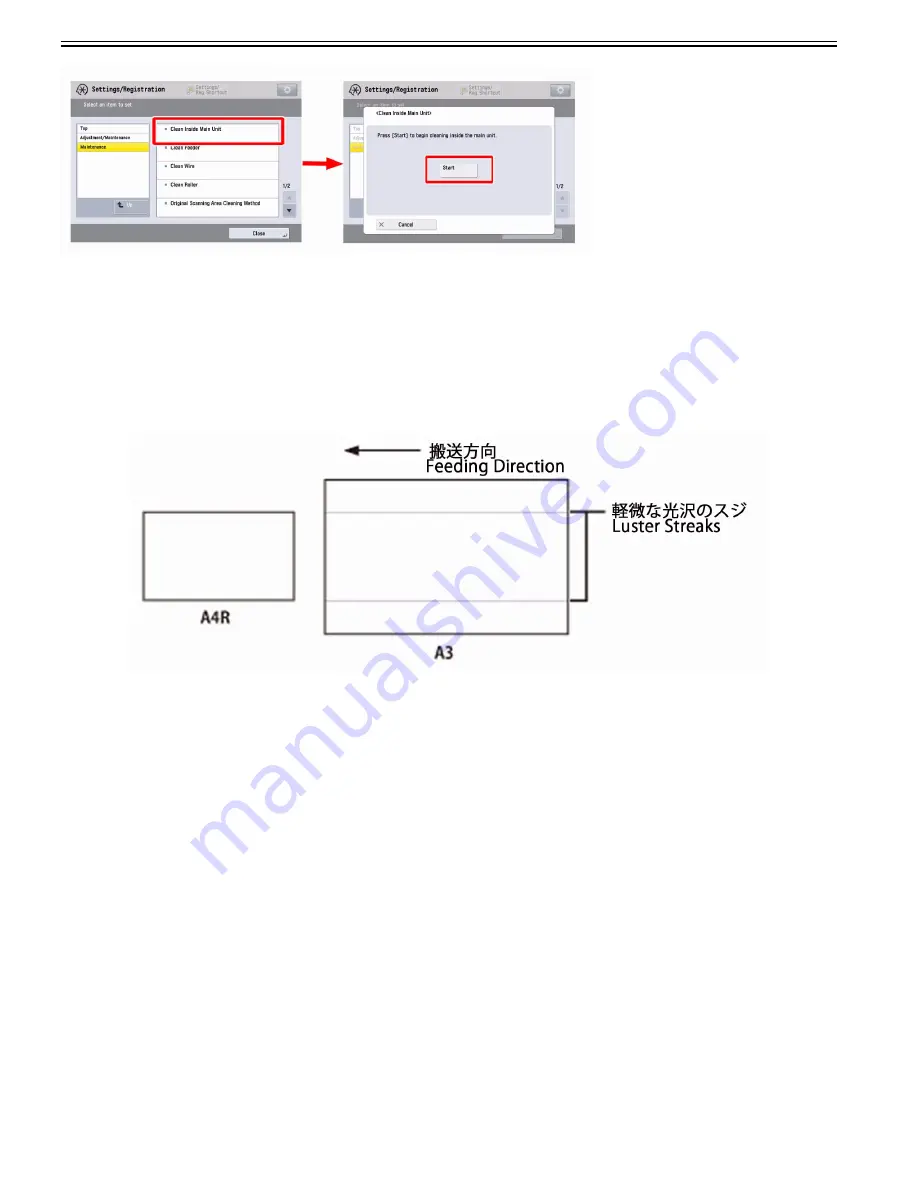
When paper with a longer width is used after copying or printing 100 or more sheets of paper with a shorter width (for example, when A3 paper is used after A4R
paper), luster streak may appear on both edges in the feeding direction.
Field Remedy
If image failures by lines (streaks and patches of uneven gloss) on the Fixing Belt occurred, these symptoms may be reduced by performing the following service
mode and refreshing the Fixing Belt.
- Service Mode > COPIER > Function > CLEANING > FXD-CL-E
[Caution]
- There is the automatic refresh control for the Fixing Belt to prevent luster streaks but this mode should be executed if luster streaks still occur.
- Be sure not to execute this mode frequently as this will reduce the life of Fixing Belt.
[Reference]
If the user performs the Refresh Fixing Belt, select and execute from Settings/Registration > Adjustment/Maintenance > Maintenance > "Refresh Fixing Belt".
Refresh Fixing Belt takes approximately 120 seconds.
1.1.1.6.8 Scratches on image due to soiled decurler unit guides
0031-7226
[ Verified by Canon Inc. ]
Symptom
When 2-sided heavy coated paper with high-density image is fed, scratches [a] may appear on the first side.
[b] shows the feed direction.
Summary of Contents for imagePRESS C800 Series
Page 1: ...Dec 2 2014 Troubleshooting Guide imagePRESS C800 Series...
Page 2: ......
Page 6: ......
Page 8: ......
Page 9: ...Chapter 1 Correcting Faulty Images...
Page 10: ......
Page 14: ......
Page 114: ...Chapter 1 1 100 7 2 Select the envelope type press OK...
Page 165: ...Chapter 1 1 151 3 Pull the Tray all the way out...
Page 167: ...Chapter 1 1 153 5 Remove the Waste Toner Container...
Page 172: ...Chapter 1 1 158 2 Pull out the staple cartridge holding it by the green tab...
Page 180: ...Chapter 1 1 166 5 Push in the new staple case until it clicks to insert it...
Page 181: ...Chapter 1 1 167 6 Close the Cover for the saddle stitch staple cartridge...
Page 199: ...Chapter 1 1 185 b 1 Take out the Waste Toner Container 1...
Page 201: ...Chapter 1 1 187 b 2 Install the Waste Toner Joint 1 to the Waste Toner Container 2...
Page 206: ...Chapter 1 1 192 b 9 Remove the Prism 1 1 Screw 2 1 Hook 3...
Page 207: ...Chapter 1 1 193 b 10 Clean the toner adhered to the 2 A parts on the prism...
Page 208: ...Chapter 1 1 194 b 11 Clean the toner adhered to the A part of the Waste Toner Container...
Page 210: ...Chapter 1 1 196 2 Pull out the punch waste tray...
Page 217: ...Chapter 1 1 203 3 Discard the staple waste...
Page 239: ...Chapter 1 1 225 3 Press Memory Media 4 Select the target memory media...
Page 250: ...Chapter 1 1 236 Select Share files and folders using SMB Windows Select the account to be used...
Page 255: ...Dec 2 2014...
Page 256: ......


