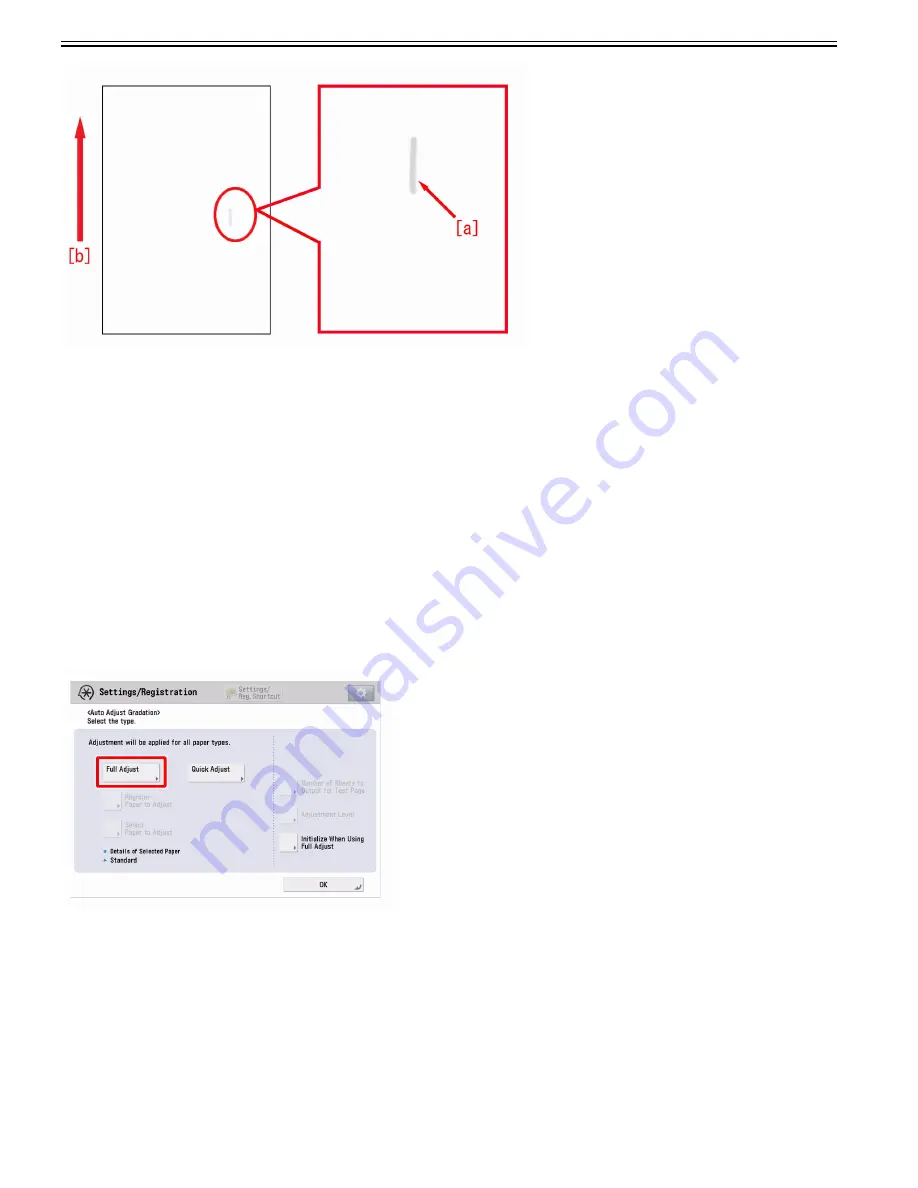
Chapter 1
1-34
Cause
The above mentioned symptom occurs when some toner does not break into pieces through the toner supply route or by stirrer inside the developing assembly
(process unit), remaining in a clumpy state and fed to the developing sleeve.
Service work
1) Go to Service Mode > Mode List > COPIER > Adjust >"DENS", and change the appropriate parameter to "1" according to the color having the symptom.
- When the symptom has occurred with yellow, change "HLMT_PTY".
- When the symptom has occurred with magenta, change "HLMT_PTM".
- When the symptom has occurred with cyan, change "HLMT_PTC".
- When the symptom has occurred with black, change "HLMT_PTB".
The setting range is between "-2" and "+6" ("0" by default). Changing the parameter in positive direction lowers the target upper limit value of the toner density
sensor.
[Caution] Changing the parameter in positive direction may bring a faulty image (coarse image and the like at the high density part due to attachment of the carrier
of toner).
2) Set more than 50 sheets of A3 or LDR in the cassette 1 and output with the following settings:
- Service Mode > Mode List > COPIER > TEST > PG > TYPE > "16"
- Service Mode > Mode List > COPIER > TEST > PG > Change the relevant color of "COLOR-x" to "1", and change the rest of colors to "0".
- Service Mode > Mode List > COPIER > TEST > PG > PG-PICK > "1"
- Service Mode > Mode List > COPIER > TEST > PG > PG-QTY > "50"
- Service Mode > Mode List > COPIER > TEST > PG > 2-SIDE > "1"
3) Output the image having shown the symptom, and check that the symptom does not occur.
If the symptom no longer occurs, go to the step 4).
In case the symptom does not show an improvement, go back to the step 1) and change the parameter by one at a time up to "3", and perform the step 2).
4) Select Settings/Registration > Adjustment/Maintenance > Adjust Image Quality > Auto Adjust Gradation, and then press the "Full Adjust" button.
5) Select a paper source of the paper type that needs to undergo the correction, and press "OK". According to the message appearing on the screen, output a test
print and scan it, and perform Full Adjust.
[Reference] The following shows recommended paper for Japan, USA, and Europe.
- JPN: GF-C081/81.4g [Oji Paper]
- USA: Color copy Digital 28lb/105g [International Paper]
- EUR: Oce SAT023 Top Colour Paper FSC 100/100g [Oce]
1.1.1.6.11 Soiling (dot soiling) on halftone images at installation
0031-7945
[ Case in the field ]
Description
If the periodical dot soiling (approx. 44mm interval) occurs on halftone images at installation, there may be soiling on the Primary Charging Roller for the Color
Process Unit. If a similar symptom occurred, clean the roller surface.
Summary of Contents for imagePRESS C800 Series
Page 1: ...Dec 2 2014 Troubleshooting Guide imagePRESS C800 Series...
Page 2: ......
Page 6: ......
Page 8: ......
Page 9: ...Chapter 1 Correcting Faulty Images...
Page 10: ......
Page 14: ......
Page 114: ...Chapter 1 1 100 7 2 Select the envelope type press OK...
Page 165: ...Chapter 1 1 151 3 Pull the Tray all the way out...
Page 167: ...Chapter 1 1 153 5 Remove the Waste Toner Container...
Page 172: ...Chapter 1 1 158 2 Pull out the staple cartridge holding it by the green tab...
Page 180: ...Chapter 1 1 166 5 Push in the new staple case until it clicks to insert it...
Page 181: ...Chapter 1 1 167 6 Close the Cover for the saddle stitch staple cartridge...
Page 199: ...Chapter 1 1 185 b 1 Take out the Waste Toner Container 1...
Page 201: ...Chapter 1 1 187 b 2 Install the Waste Toner Joint 1 to the Waste Toner Container 2...
Page 206: ...Chapter 1 1 192 b 9 Remove the Prism 1 1 Screw 2 1 Hook 3...
Page 207: ...Chapter 1 1 193 b 10 Clean the toner adhered to the 2 A parts on the prism...
Page 208: ...Chapter 1 1 194 b 11 Clean the toner adhered to the A part of the Waste Toner Container...
Page 210: ...Chapter 1 1 196 2 Pull out the punch waste tray...
Page 217: ...Chapter 1 1 203 3 Discard the staple waste...
Page 239: ...Chapter 1 1 225 3 Press Memory Media 4 Select the target memory media...
Page 250: ...Chapter 1 1 236 Select Share files and folders using SMB Windows Select the account to be used...
Page 255: ...Dec 2 2014...
Page 256: ......


