Chapter 1
1-28
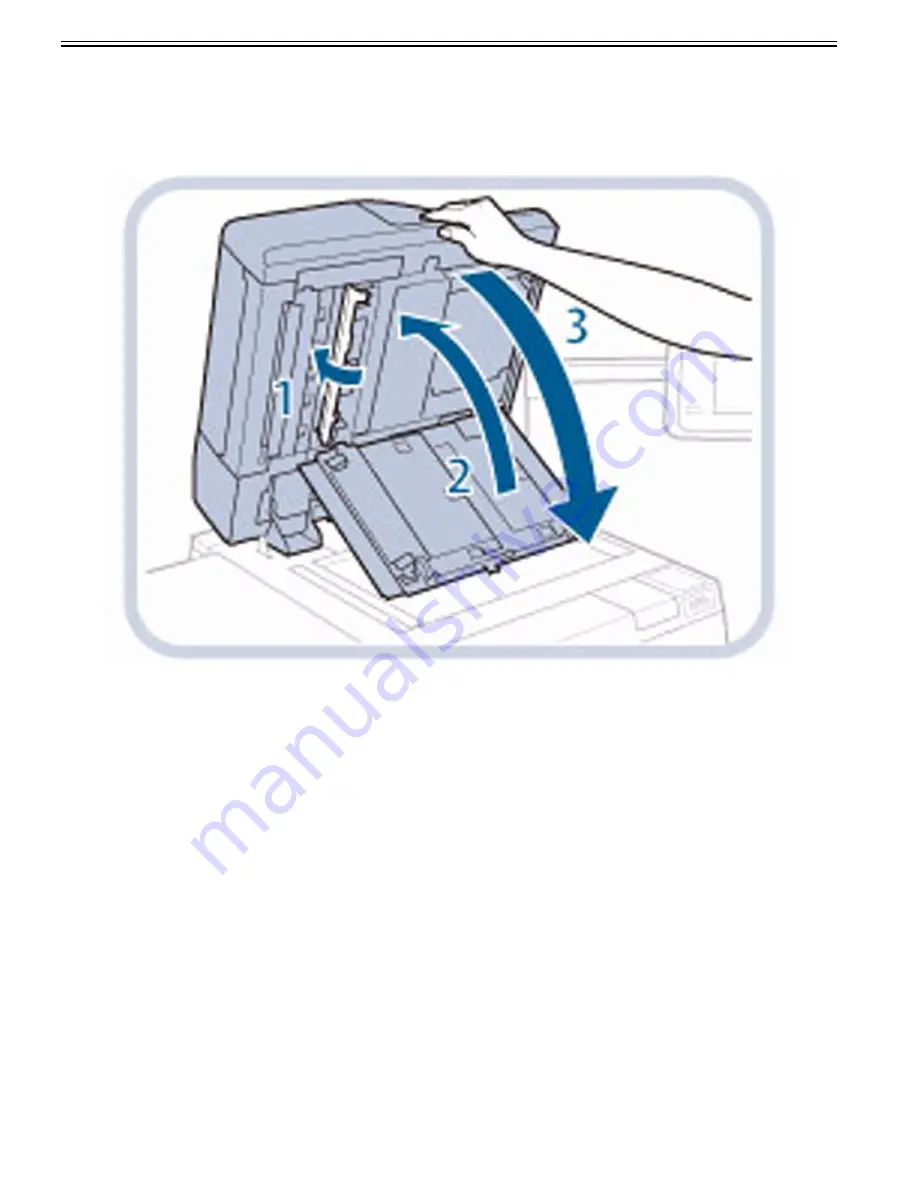
4) Close the covers and the feeder.
4-1) Close the inside cover.
4-2) Close the document scan cover.
4-3) Close the feeder.
[Caution]
- When closing the covers and the feeder, be careful not to get your fingers caught, as this may result in personal injury.
- Be aware that the light emitted from the platen glass may be very bright when closing the feeder.
[Reference]
- Use the glass cleaning cloth provided as a machine accessory of the Duplex Color Image Reader Unit-H1 When simple cleaning.
- When glass cleaning cloth becomes dirty, wash and rinse, and then spread it out to dry.
1.1.1.6.3 Soiled originals occur when picking up by feeder (Duplex Color Image Reader Unit-H1)
0031-5483
[ Manual-related ]
Description
Originals may be soiled when picking up by the feeder due to pencil dust and other foreign materials sticking to the roller. Clean by following steps.
Field Remedy
1) Load about 10 sheets of A4 size plain paper on the feeder.
2) Select Settings/Registration > Adjustment/Maintenance > Maintenance > Clean Feeder, and press Start.
[Reference]
- It takes approximately 20 seconds to clean the feeder.
- When cleaning the feeder is complete, try scanning again.
- A feeder cleaning cannot be performed during printing.
- To cancel feeder cleaning while it is in progress, press "Cancel".
1.1.1.6.4 Streak-like soiling/blank on images
0031-5484
[ Manual-related ]
Description
If the streak-like soiling or blank occurs on images, inside of the machine may be soiled. Clean by following steps.
Field Remedy
1) Select Settings/Registration > Adjustment/Maintenance > Maintenance > Clean Inside Main Unit, and press Start.
2) Select Settings/Registration > Adjustment/Maintenance > Maintenance > Clean Wire, and press Start.
[Reference]
- It takes approximately 20 seconds to clean the wire.
- A wire cleaning cannot be performed during printing.
[Caution]
- Do not turn off the main power switch or open the Front Cover while the wire cleaning is performed.
Summary of Contents for imagePRESS C800 Series
Page 1: ...Dec 2 2014 Troubleshooting Guide imagePRESS C800 Series...
Page 2: ......
Page 6: ......
Page 8: ......
Page 9: ...Chapter 1 Correcting Faulty Images...
Page 10: ......
Page 14: ......
Page 114: ...Chapter 1 1 100 7 2 Select the envelope type press OK...
Page 165: ...Chapter 1 1 151 3 Pull the Tray all the way out...
Page 167: ...Chapter 1 1 153 5 Remove the Waste Toner Container...
Page 172: ...Chapter 1 1 158 2 Pull out the staple cartridge holding it by the green tab...
Page 180: ...Chapter 1 1 166 5 Push in the new staple case until it clicks to insert it...
Page 181: ...Chapter 1 1 167 6 Close the Cover for the saddle stitch staple cartridge...
Page 199: ...Chapter 1 1 185 b 1 Take out the Waste Toner Container 1...
Page 201: ...Chapter 1 1 187 b 2 Install the Waste Toner Joint 1 to the Waste Toner Container 2...
Page 206: ...Chapter 1 1 192 b 9 Remove the Prism 1 1 Screw 2 1 Hook 3...
Page 207: ...Chapter 1 1 193 b 10 Clean the toner adhered to the 2 A parts on the prism...
Page 208: ...Chapter 1 1 194 b 11 Clean the toner adhered to the A part of the Waste Toner Container...
Page 210: ...Chapter 1 1 196 2 Pull out the punch waste tray...
Page 217: ...Chapter 1 1 203 3 Discard the staple waste...
Page 239: ...Chapter 1 1 225 3 Press Memory Media 4 Select the target memory media...
Page 250: ...Chapter 1 1 236 Select Share files and folders using SMB Windows Select the account to be used...
Page 255: ...Dec 2 2014...
Page 256: ......


