


Chapter 4: Connecting External Equipment (Optional)
72
Combining Regular Asset Strips
Each tag port on the regular asset strips corresponds to a rack unit and
can be used to locate IT devices in a specific rack (or cabinet).
For each rack, you can attach asset strips up to 64U long, consisting of
one MASTER and multiple SLAVE asset strips.
The difference between the master and slave asset strips is that the
master asset strip has an RJ-45 connector while the slave does not.
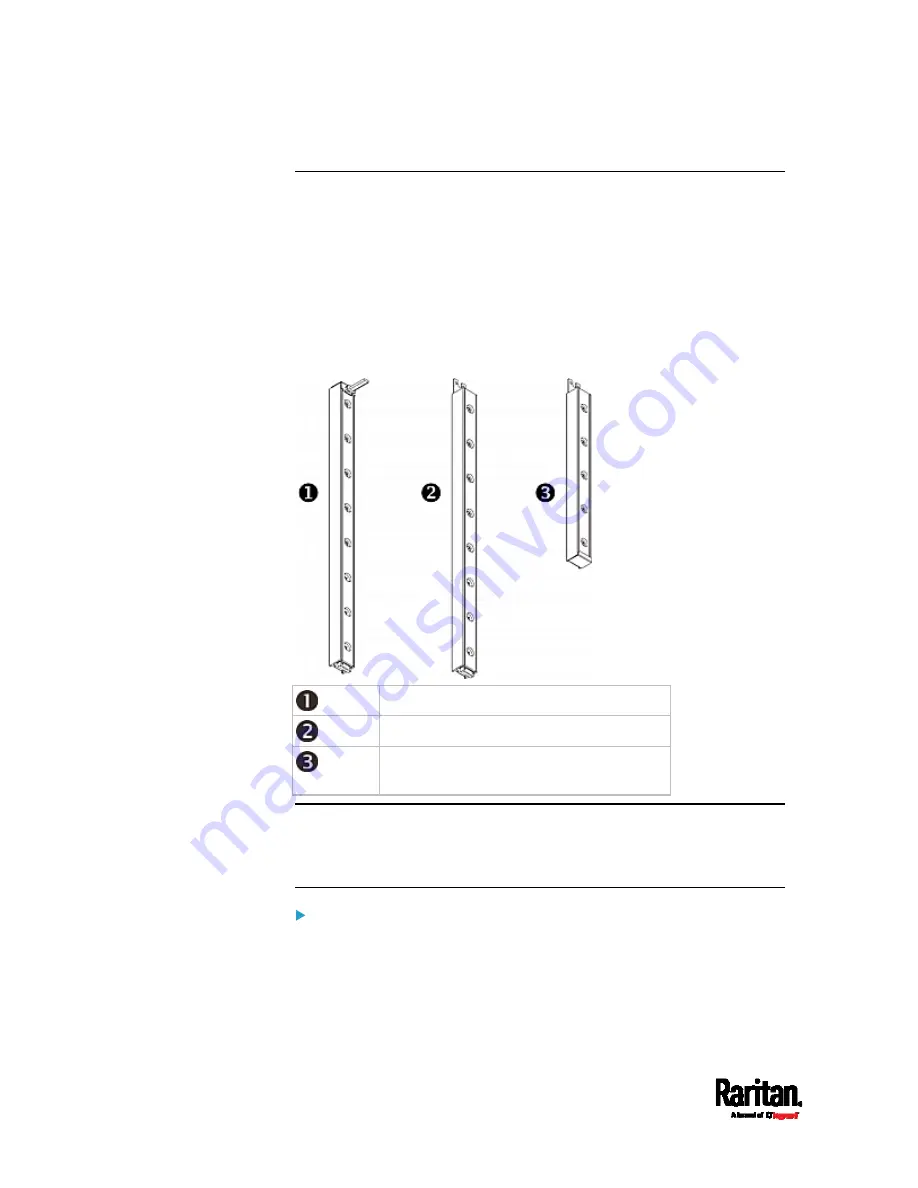
The following diagram illustrates some asset strips. Note that Raritan
provides more types of asset strips than the diagram.
8U MASTER asset strip with 8 tag ports
8U SLAVE asset strip with 8 tag ports
5U "ending" SLAVE asset strip with 5 tag
ports
Note: Unlike general slave asset strips, which have one DIN connector
respectively on either end, the ending slave asset strip has one DIN
connector on only one end. An ending asset strip is installed at the end of
the asset strip assembly.
To assemble asset strips:
1.
Connect a MASTER asset strip to an 8U SLAVE asset strip.
Plug the white male DIN connector of the slave strip into the
white female DIN connector of the master strip.
Содержание Raritan PX3-3000 Series
Страница 5: ......
Страница 62: ...Chapter 3 Initial Installation and Configuration 41 Number Device role Master device Slave 1 Slave 2 Slave 3 ...
Страница 90: ...Chapter 4 Connecting External Equipment Optional 69 ...
Страница 423: ...Chapter 6 Using the Web Interface 402 If wanted you can customize the subject and content of this email in this action ...
Страница 424: ...Chapter 6 Using the Web Interface 403 ...
Страница 447: ...Chapter 6 Using the Web Interface 426 ...
Страница 448: ...Chapter 6 Using the Web Interface 427 Continued ...
Страница 885: ...Appendix K RADIUS Configuration Illustration 864 Note If your PX3 uses PAP then select PAP ...
Страница 886: ...Appendix K RADIUS Configuration Illustration 865 10 Select Standard to the left of the dialog and then click Add ...
Страница 887: ...Appendix K RADIUS Configuration Illustration 866 11 Select Filter Id from the list of attributes and click Add ...
Страница 890: ...Appendix K RADIUS Configuration Illustration 869 14 The new attribute is added Click OK ...
Страница 891: ...Appendix K RADIUS Configuration Illustration 870 15 Click Next to continue ...
Страница 921: ...Appendix L Additional PX3 Information 900 ...
Страница 954: ...Appendix M Integration 933 3 Click OK ...


