Appendix H: Old Generations of PX3 Models
820
Section
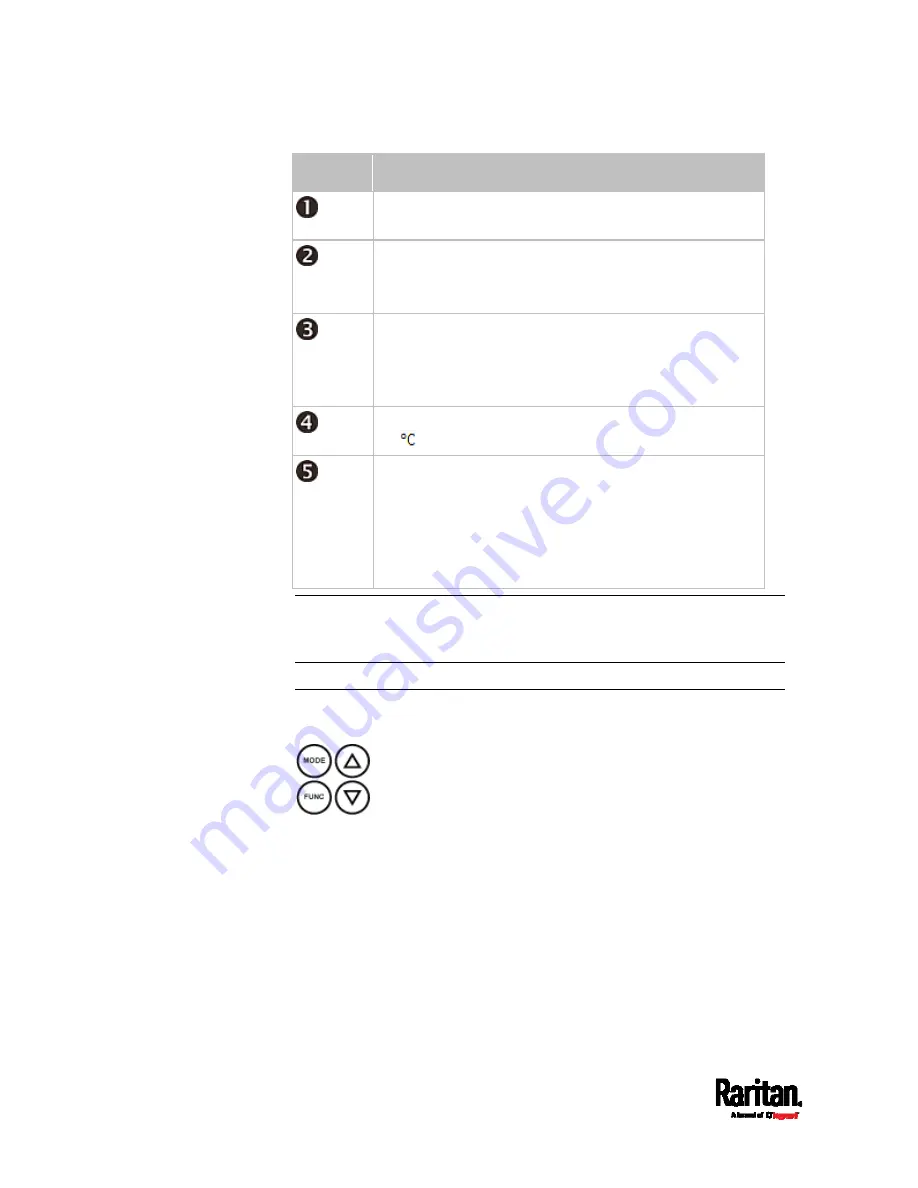
Information shown
The selected mode and target, such as INLET 1, OUTLET
1, SENSOR 1, SENSOR 2, and so on.
The following information is displayed:
Readings, data or state of the selected target.
During the firmware upgrade, "FUP" is displayed.
Two types of information may be displayed:
The "ALARM" status of the selected target.
The selected inlet line number if your PX3 is a
3-phase model.
The measurement unit of the displayed data, such as %
or
.
This section indicates:
The Asset Strip mode if an asset strip has been
connected to the PX3.
The device's USB-cascading state -
MASTER or
SLAVE. If it is a standalone device, neither MASTER
nor SLAVE is displayed.
Note: During the firmware upgrade, some PX3 models may show b
x
in
the section 1 to indicate the relay or meter board numbered
x
is being
updated.
Control Buttons
There are four control buttons.
Up and Down buttons for selecting a specific target, which can be an
inlet, outlet, overcurrent protector, environmental sensor or a device
setting
MODE button for switching between various modes, including:
- Inlet mode
- Outlet mode
- Overcurrent Protector mode
- Device mode
- Sensor mode
Содержание Raritan PX3-3000 Series
Страница 5: ......
Страница 62: ...Chapter 3 Initial Installation and Configuration 41 Number Device role Master device Slave 1 Slave 2 Slave 3 ...
Страница 90: ...Chapter 4 Connecting External Equipment Optional 69 ...
Страница 423: ...Chapter 6 Using the Web Interface 402 If wanted you can customize the subject and content of this email in this action ...
Страница 424: ...Chapter 6 Using the Web Interface 403 ...
Страница 447: ...Chapter 6 Using the Web Interface 426 ...
Страница 448: ...Chapter 6 Using the Web Interface 427 Continued ...
Страница 885: ...Appendix K RADIUS Configuration Illustration 864 Note If your PX3 uses PAP then select PAP ...
Страница 886: ...Appendix K RADIUS Configuration Illustration 865 10 Select Standard to the left of the dialog and then click Add ...
Страница 887: ...Appendix K RADIUS Configuration Illustration 866 11 Select Filter Id from the list of attributes and click Add ...
Страница 890: ...Appendix K RADIUS Configuration Illustration 869 14 The new attribute is added Click OK ...
Страница 891: ...Appendix K RADIUS Configuration Illustration 870 15 Click Next to continue ...
Страница 921: ...Appendix L Additional PX3 Information 900 ...
Страница 954: ...Appendix M Integration 933 3 Click OK ...