Chapter 5: Introduction to PDU Components
93
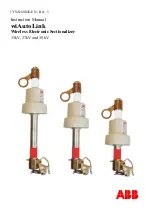
Port
Used for...
ETH 10/100/1000,
ETH 10/100
PX3 has two Ethernet ports.
ETH 10/100/1000 (marked in
green) supports up to 1000 Mbps.
This is "ETH1".
ETH 10/100 (marked in
white) supports up to 100 Mbps. This is
"ETH2".
Connecting the PX3 to your company's network via a standard network
patch cable (Cat5e/6). This connection is necessary to administer or
access the PX3 remotely.
There are two small LEDs adjacent to the port:
Green indicates a physical link and activity.
Yellow indicates communications at 10/100 BaseT speeds.
Note that the yellow LED of the ETH 10/100 port has NO
function so it will not be lit regardless of the communication
status.
You can use either Ethernet port for network connection or cascading.
See
Extended Cascading with PX3 Devices
(on page 40).
Note: Network connection to this port is not required if wireless
connection is preferred, or if the PX3 is a slave device in the cascading
configuration.
EXPANSION
Connecting to the EXPANSION port of another PX3 so that the power
supply to either PX3 controller will continue whenever power failure
occurs on the inlet of one PX3 PDU.
See
Power-Sharing Restrictions and Connection
(on page 45).
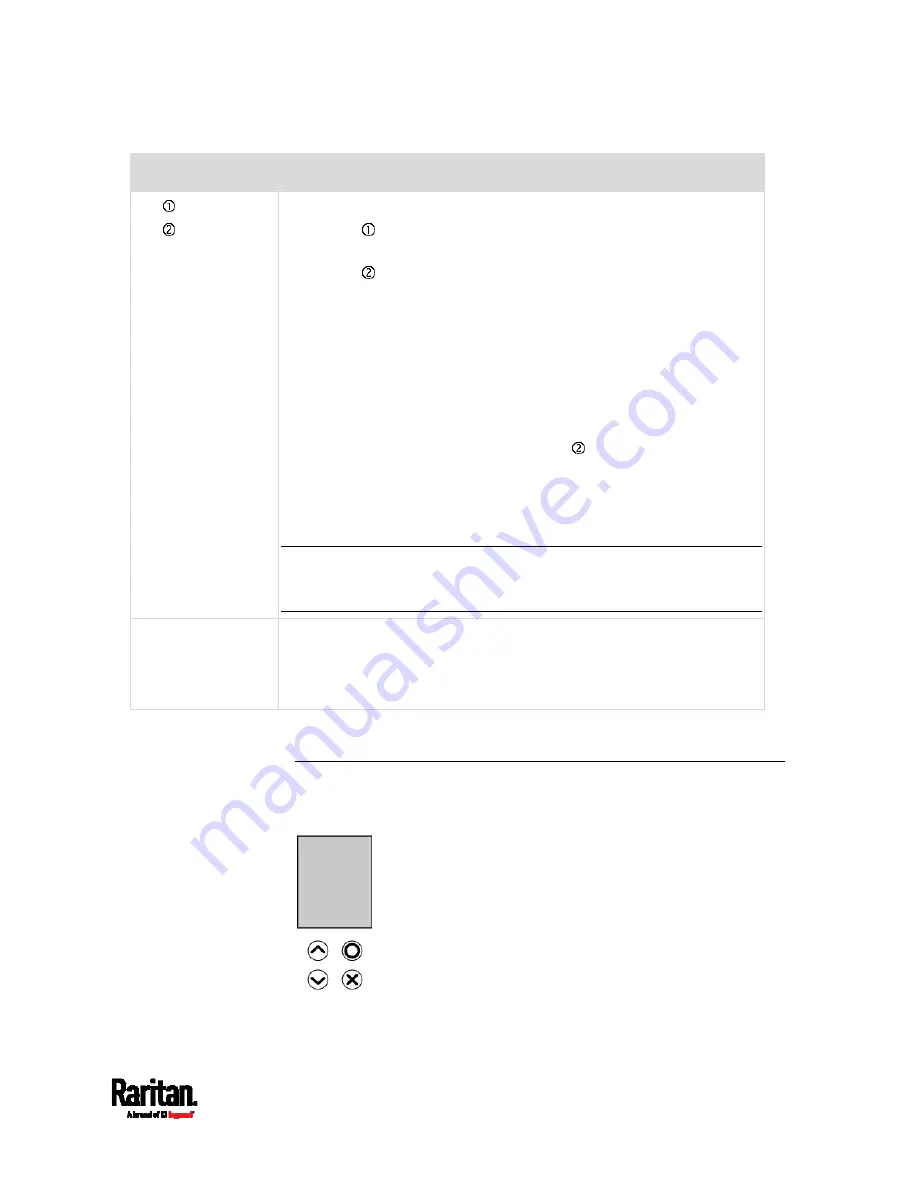
Dot-Matrix LCD Display
The following diagram shows the dot-matrix LCD display panel on Zero U
models.
Содержание Raritan PX3-3000 Series
Страница 5: ......
Страница 62: ...Chapter 3 Initial Installation and Configuration 41 Number Device role Master device Slave 1 Slave 2 Slave 3 ...
Страница 90: ...Chapter 4 Connecting External Equipment Optional 69 ...
Страница 423: ...Chapter 6 Using the Web Interface 402 If wanted you can customize the subject and content of this email in this action ...
Страница 424: ...Chapter 6 Using the Web Interface 403 ...
Страница 447: ...Chapter 6 Using the Web Interface 426 ...
Страница 448: ...Chapter 6 Using the Web Interface 427 Continued ...
Страница 885: ...Appendix K RADIUS Configuration Illustration 864 Note If your PX3 uses PAP then select PAP ...
Страница 886: ...Appendix K RADIUS Configuration Illustration 865 10 Select Standard to the left of the dialog and then click Add ...
Страница 887: ...Appendix K RADIUS Configuration Illustration 866 11 Select Filter Id from the list of attributes and click Add ...
Страница 890: ...Appendix K RADIUS Configuration Illustration 869 14 The new attribute is added Click OK ...
Страница 891: ...Appendix K RADIUS Configuration Illustration 870 15 Click Next to continue ...
Страница 921: ...Appendix L Additional PX3 Information 900 ...
Страница 954: ...Appendix M Integration 933 3 Click OK ...