


Chapter 6: Using the Web Interface
233
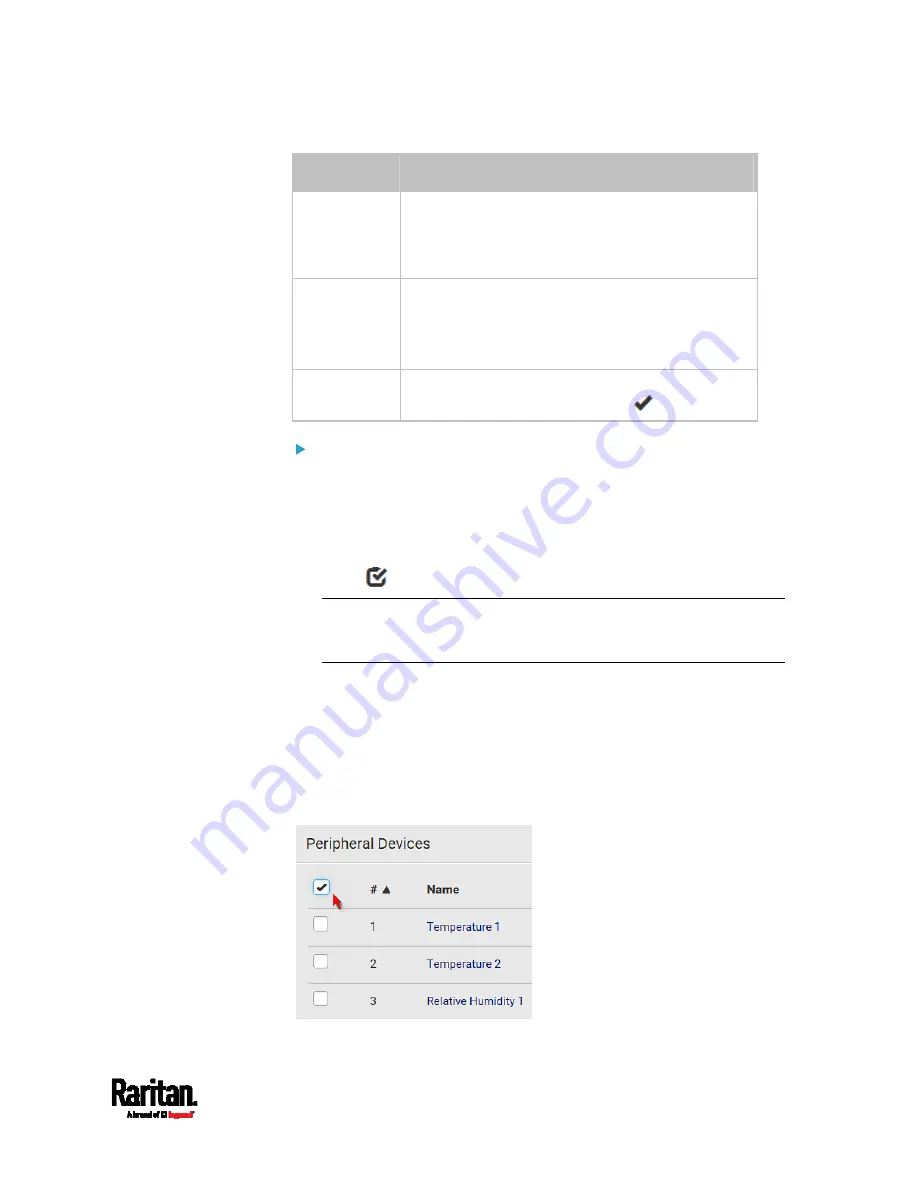
Column
Description
Serial Number This is the serial number printed on the sensor
package's label. It helps to identify your Raritan
sensors/actuators. See
Finding the Sensor's Serial
Number
(on page 242).
Position
The data indicates where this sensor or actuator is
located in the sensor chain.
See
Identifying the Sensor Position and Channel
(on page 243).
Actuator
Indicates whether this sensor package is an
actuator or not. If yes, the symbol
is shown.
To release or manage sensors/actuators:
When the total of managed sensors/actuators reaches the maximum
value, you cannot manage additional ones. The only way to manage any
sensor/actuator is to release or replace the managed ones. To replace a
managed sensor/actuator, see
Managing One Sensor or Actuator
(on
page 245). To release any one, follow this procedure.
1.
Click
to make checkboxes appear in front of sensors/actuators.
Tip: To perform the desired action on only one sensor/actuator,
simply click that sensor/actuator without making the checkboxes
appear.
2.
Select multiple sensors/actuators.
To release sensors/actuators, you must select "managed" ones
only. See
Sensor/Actuator States
(on page 240).
To manage sensors/actuators, you must select "unmanaged"
ones only.
To select ALL sensors/actuators, select the topmost checkbox in
the header row.
Содержание Raritan PX3-3000 Series
Страница 5: ......
Страница 62: ...Chapter 3 Initial Installation and Configuration 41 Number Device role Master device Slave 1 Slave 2 Slave 3 ...
Страница 90: ...Chapter 4 Connecting External Equipment Optional 69 ...
Страница 423: ...Chapter 6 Using the Web Interface 402 If wanted you can customize the subject and content of this email in this action ...
Страница 424: ...Chapter 6 Using the Web Interface 403 ...
Страница 447: ...Chapter 6 Using the Web Interface 426 ...
Страница 448: ...Chapter 6 Using the Web Interface 427 Continued ...
Страница 885: ...Appendix K RADIUS Configuration Illustration 864 Note If your PX3 uses PAP then select PAP ...
Страница 886: ...Appendix K RADIUS Configuration Illustration 865 10 Select Standard to the left of the dialog and then click Add ...
Страница 887: ...Appendix K RADIUS Configuration Illustration 866 11 Select Filter Id from the list of attributes and click Add ...
Страница 890: ...Appendix K RADIUS Configuration Illustration 869 14 The new attribute is added Click OK ...
Страница 891: ...Appendix K RADIUS Configuration Illustration 870 15 Click Next to continue ...
Страница 921: ...Appendix L Additional PX3 Information 900 ...
Страница 954: ...Appendix M Integration 933 3 Click OK ...


