Chapter 5: Introduction to PDU Components
111
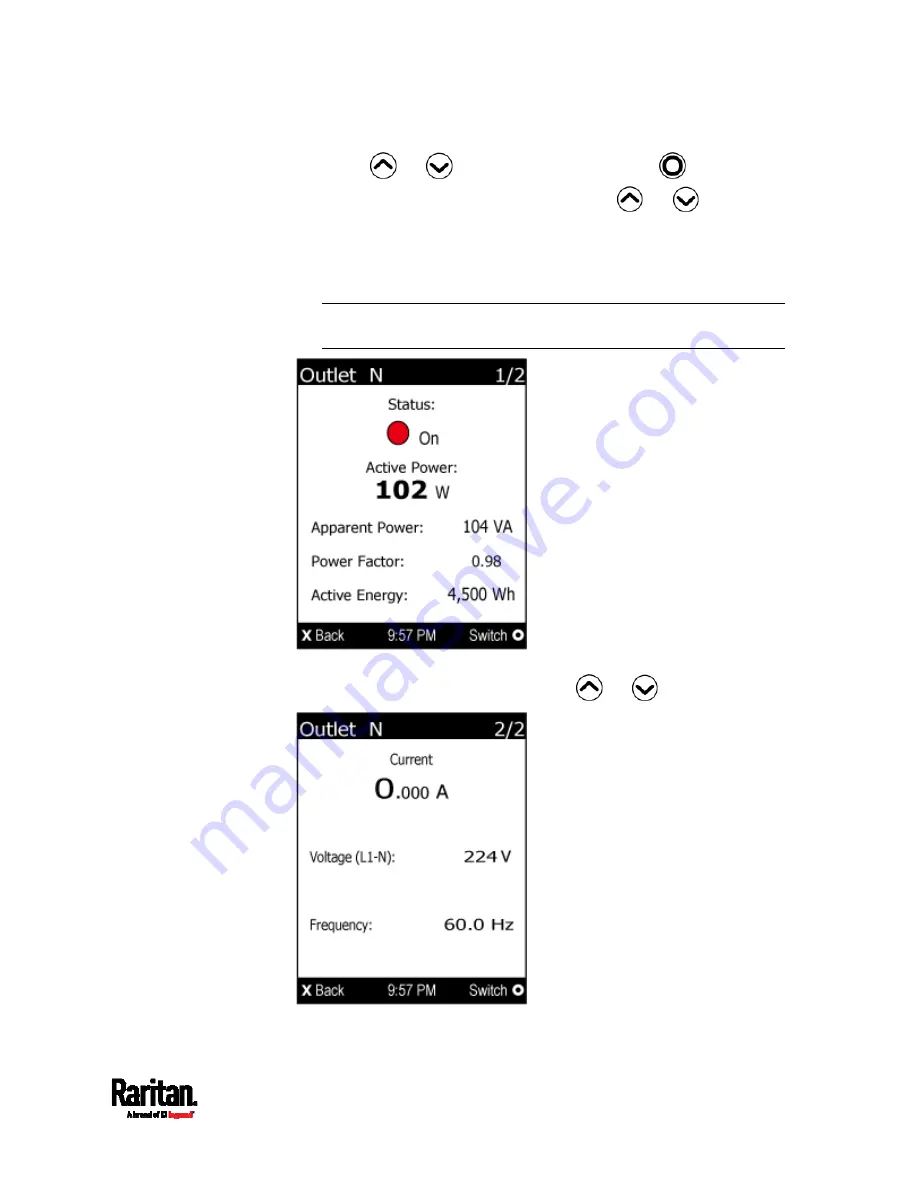
3.
Press
or
to select an outlet, and press
.
If the desired outlet is not visible, press
or
to scroll up
or down.
4.
The LCD display shows the selected outlet's power state, active
power (W), apparent power (VA), power factor (PF) and active energy
(Wh).
Note: In the following diagrams, N represents the selected outlet's
number.
5.
To go to the next page which shows the outlet's voltage (V),
frequency (Hz) and current (A), press
or
.
Содержание Raritan PX3-3000 Series
Страница 5: ......
Страница 62: ...Chapter 3 Initial Installation and Configuration 41 Number Device role Master device Slave 1 Slave 2 Slave 3 ...
Страница 90: ...Chapter 4 Connecting External Equipment Optional 69 ...
Страница 423: ...Chapter 6 Using the Web Interface 402 If wanted you can customize the subject and content of this email in this action ...
Страница 424: ...Chapter 6 Using the Web Interface 403 ...
Страница 447: ...Chapter 6 Using the Web Interface 426 ...
Страница 448: ...Chapter 6 Using the Web Interface 427 Continued ...
Страница 885: ...Appendix K RADIUS Configuration Illustration 864 Note If your PX3 uses PAP then select PAP ...
Страница 886: ...Appendix K RADIUS Configuration Illustration 865 10 Select Standard to the left of the dialog and then click Add ...
Страница 887: ...Appendix K RADIUS Configuration Illustration 866 11 Select Filter Id from the list of attributes and click Add ...
Страница 890: ...Appendix K RADIUS Configuration Illustration 869 14 The new attribute is added Click OK ...
Страница 891: ...Appendix K RADIUS Configuration Illustration 870 15 Click Next to continue ...
Страница 921: ...Appendix L Additional PX3 Information 900 ...
Страница 954: ...Appendix M Integration 933 3 Click OK ...