


15.10
Using data management utility
15
[Web Management Tool]
15-26
15.10.3
Managing the stamp data
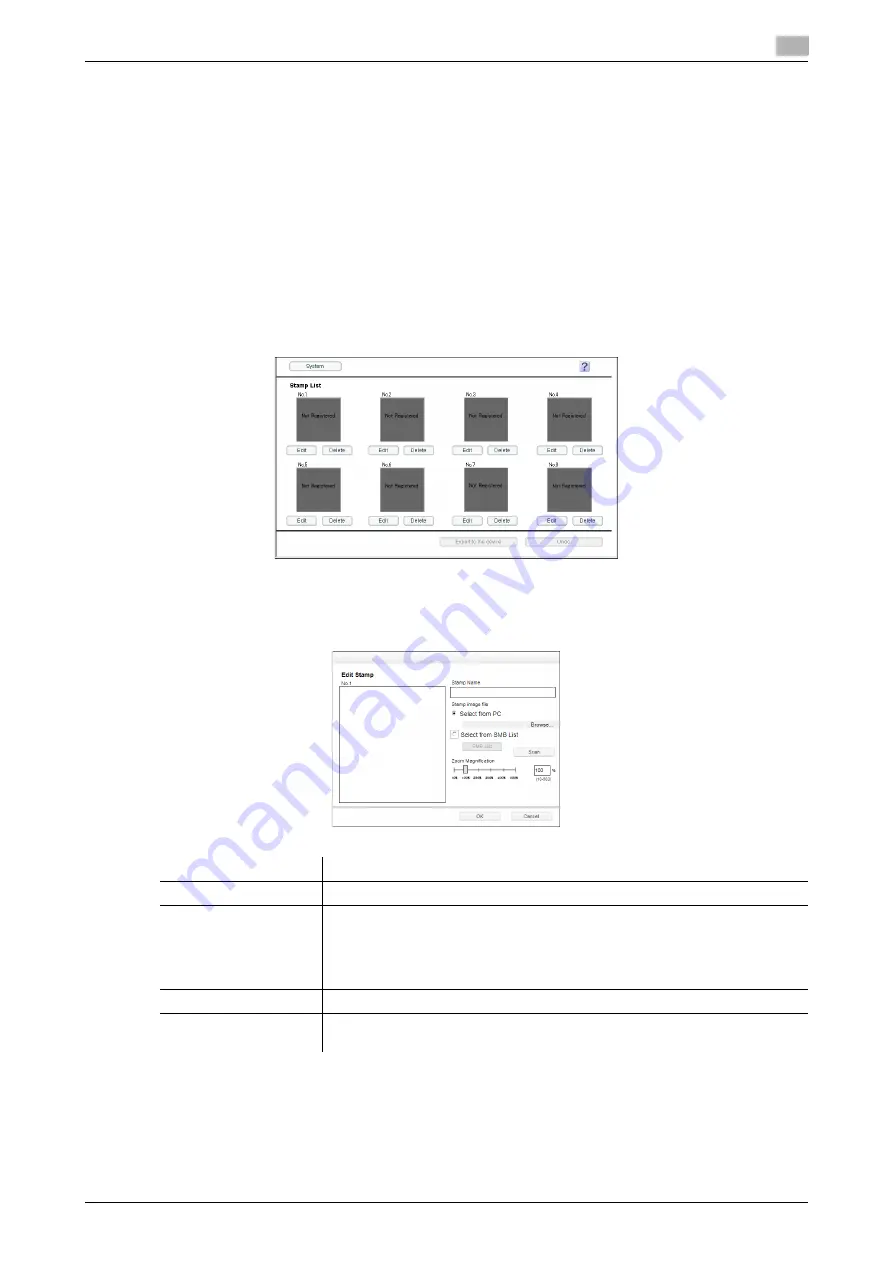
You can register or edit stamp data using Data Managing Utility. Up to eight units of stamp data can be man-
aged. You cannot edit or delete stamp data that was registered on this machine when it was shipped.
0
This function is available when the Web browser function is disabled. When the optional
Extension
Memory
is installed, this function is available regardless of whether the Web browser function is ena-
bled or disabled.
1
In the
Web Connection
login page, start the [Manage Stamp Data].
The stamp data list registered on this machine appears.
2
To register or edit the stamp data, click [Edit].
%
Clicking [Delete] deletes the registered stamp data. The stamp data will not be deleted until you click
[Export to the device] and write it to this machine.
3
Register or edit the stamp data, and click [OK].
%
You can edit data while checking the result in the preview.
4
Click [Export to the device].
%
Clicking [Undo] returns to the state before the change.
The registered or edited stamp data is written to this machine.
Settings
Description
[Stamp Name]
Enter the stamp name (using up to 16 characters).
[Stamp image file]
Specify the location of the image file (BMP) to be used as a stamp.
•
[Select from PC]: Click [Browse...], then select an image file to be imported
from your computer.
•
[Select from SMB List]: Click [SMB List], then select an image file to be im-
ported from the SMB sharing folder.
[Scan]
Enlarges a stamp image. You can check the image details.
[Zoom Magnification]
Specify the zoom ratio of the stamp image. The ratio can be adjusted in incre-
ments of 1%.
Summary of Contents for D310 Series
Page 12: ...1 Web Connection...
Page 14: ...2 Operations Required to Use Web Connection...
Page 18: ...3 Basic Usage...
Page 40: ...4 ConfiguringBasicInformation Settings of this Machine...
Page 44: ...5 Configuring Network Settings of this Machine...
Page 56: ...6 Setting up the Operating Environment of Web Connection...
Page 61: ...6 4 Changing the time period until automatic log out 6 Web Management Tool 6 6...
Page 62: ...7 Configuring the Scan Environment...
Page 82: ...8 Configuring the Printing Environment...
Page 106: ...9 Configuring the Fax Environment...
Page 120: ...10 Configuring the Network Fax Environment...
Page 132: ...11 Configuring the User Box Environment...
Page 148: ...12 Restricting Users from Using this Device...
Page 199: ...12 22 Using a mobile terminal for authentication purposes 12 Web Management Tool 12 52...
Page 200: ...13 Reinforcing Security...
Page 226: ...14 Managing the Machine Status...
Page 264: ...15 Registering Various Types of Information...
Page 292: ...16 Associating with External Application...
Page 324: ......