4 Installation
4.2 Electrical Connection
Manual
SIPART DR21
C73000-B7476-C143-08
127
D
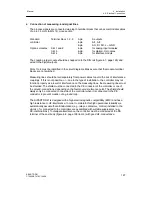
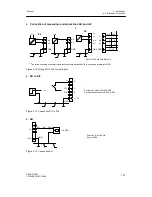
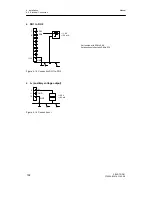
Connection of measuring- and signal lines
The process signals are connected via plug-in terminal blocks that can accommodate cables
of up to 1.5 mm
2
(AWG 14) cross-section.
Standard
controller
Terminal block 1, 2, 3
3-pin
4-pin
8-pin
S-outputs
AI1, AI2
AO, DI, DO, L
+
, GND
Options modules
Slot 1 and 2
Slot 3
Slot 4
4-pin
6-pin
9-pin
for analog input modules
for digital I-O-modules
for interface module
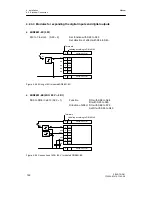
The coupling relay module should be snapped onto the DIN rail (figure 4-7, page 125) and
wired to the digital outputs.
Slots 1 to 4 must be identified in the circuit diagrams. Makes sure that the module-terminal
blocks are not switched.
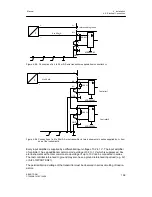
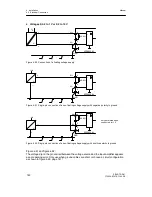
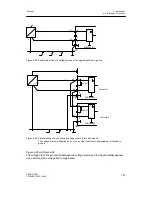
Measuring lines should be laid separately from power cables to avoid the risk of interference
couplings. If this is not possible, or -- due to the type of installation -- the controller may not
function properly as a result of interference on the measuring lines, the measuring lines must
be shielded. The shield must be connected to the PE conductor of the controller or one of
the ground-connections, depending on the fault source’s reference point. The shield should
always only be connected to one side of the controller when it is connected to the PE
conductor to prevent creation of a ground loop.
The SIPART DR21 is designed with a high electromagnetic compatibility (EMC) and has a
high resistance to HF-interference. In order to maintain this high operational reliability we
automatically assume that all inductances (e.g. relays, contactors, motors) installed in the
vicinity of or connected to the controllers are assembled with suitable suppressors (e.g.
RC-combinations)! To dissipate interference, the controller must be connected at the PE-
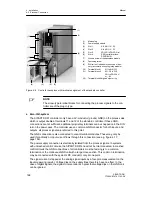
terminal of the cast body (figure 4-8, page 128 item 5) with good HF-conductance.
Summary of Contents for SIPART DR21
Page 1: ...SIPART DR21 C73000 B7476 C143 08 1 SIPART DR21 6DR 210 Edition 08 2010 Manual ...
Page 2: ...SIPART DR21 C73000 B7476 C143 08 2 ...
Page 148: ...4 Installation 4 2 Electrical Connection Manual 148 SIPART DR21 C73000 B7476 C143 08 ...
Page 180: ...5 Operation 5 5 CPU self diagnostics Manual 180 SIPART DR21 C73000 B7476 C143 08 ...
Page 242: ...Manual 242 SIPART DR21 C73000 B7476 C143 07 ...

