Chapter 12
On-Screen Measurement
149
Addi
ng Ann
ota
tions
and Me
asuri
ng
12.2.3
Measuring Angle
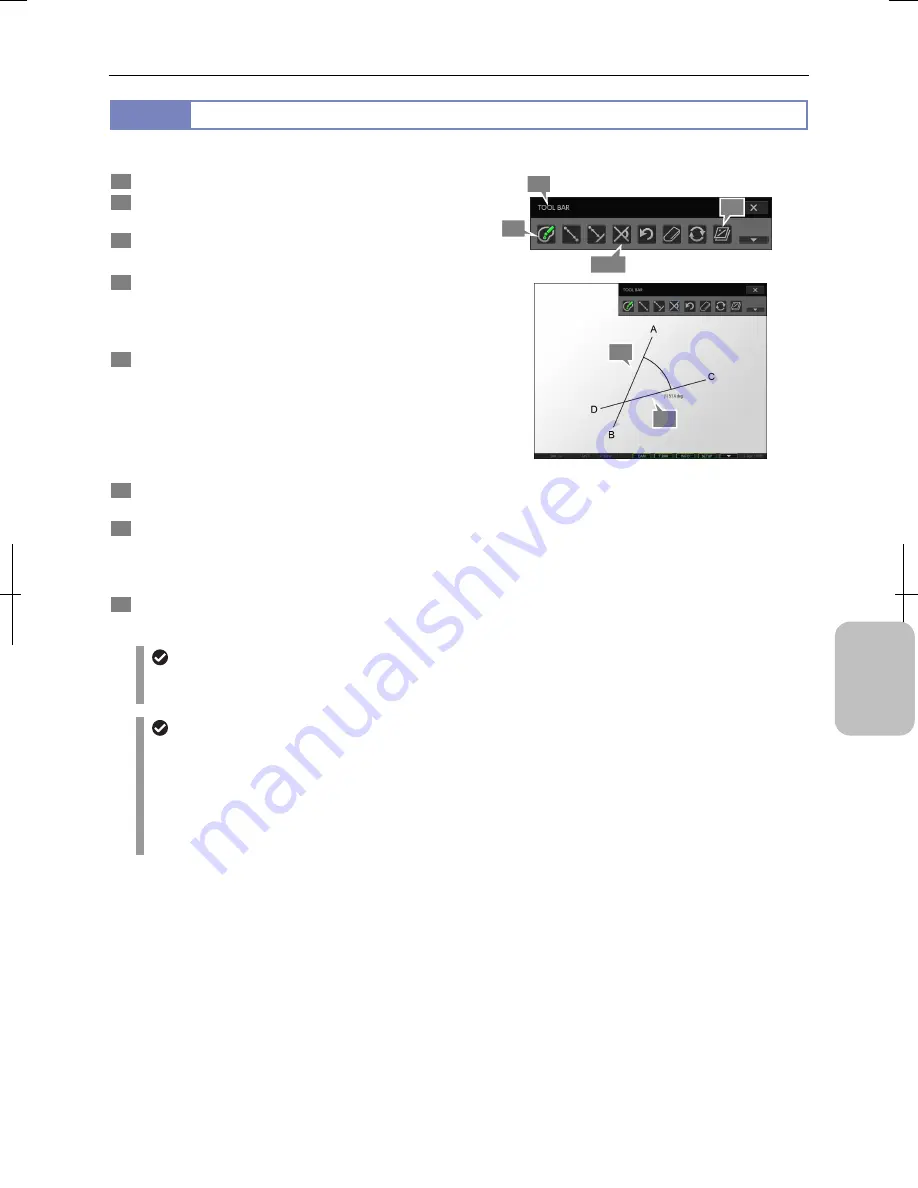
You can measure angle between two straight lines drawn on the screen.
1
Display the toolbar.
2
Press the [COLOR] button to select color of
measurement results.
3
Press the [ANGULAR MEASUREMENT] button.
A blue frame appears around the button.
4
Draw the first line by specifying two arbitrary points (A
and B on the figure) on the screen.
If you specify the starting and end points, a line for
measurement is drawn between them.
5
Draw the second line by specifying two arbitrary points
(C and D on the figure) on the screen.
If you draw two lines, an angle surrounded by two
intersecting lines is shown.
If an angle cannot be measured such as when you specify
the same point for starting and ending points of a line or two
lines are completely parallel, “NG” is displayed.
6
Repeat steps 4 and 5 to continue measuring another
angle.
7
To display or hide the measured result, switch to
display or hide overlay.
You cannot selectively display or hide only the measured
result. Switch to display or hide the entire overlay.
8
To end measurement, press the [ANGULAR
MEASUREMENT] button to deselect the tool.
Measuring Angle
Undoing and redoing measurement
You can cancel and redo measurement by pressing the [UNDO MEASUREMENT] or [REDO MEASUREMENT]
button respectively.
Measurement result display
•
If the setting of calibration is changed, all measured results are cleared.
•
The line width and character size of measurement result can be changed on the [TOOL SET: MAIN] screen.
•
When lines for measurement are drawn on the screen so that they do not cross, measurement results are
displayed at the end of the screen or behind the toolbar in some cases
•
When stylus operation is not easy or accurate positioning is required, mouse operation is recommended. Use a
commercially available USB mouse for operation.
3, 8
4
5
2
1
7
Summary of Contents for DS-L3
Page 2: ......


