Chapter 11
Adding Lines and Annotations to an Image
142
Addi
ng Ann
ota
tions
and Me
asuri
ng
11.4.2
Drawing Straight Lines and Arrows
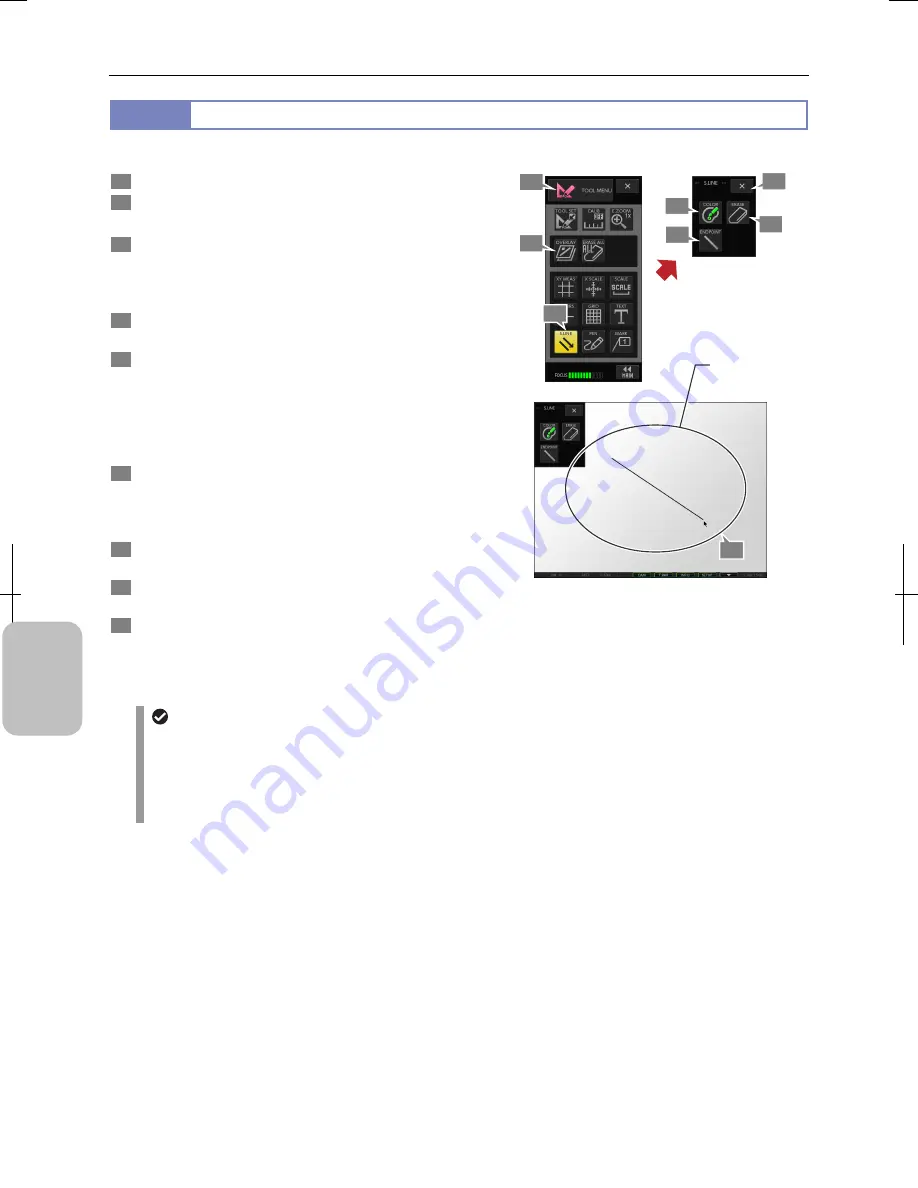
You can draw a straight line or arrow by specifying two points on the screen.
1
Display the [TOOL MENU]
2
Press the [S LINE] button.
The [S LINE] menu appears.
3
Press the [COLOR] button to select color.
The color selected here applies to lines that are drawn from
the next time. You cannot change color of the lines already
drawn.
4
Press the [ENDPOINT] button on the [S LINE] menu.
Select shape of an endpoint from [LINE] or [ARROW].
5
Move the stylus on the screen from the starting point to
ending point to draw a straight line.
Move the stylus slowly. If you move the stylus fast, the line
may be broken in the middle.
If you have selected [ARROW] for the endpoint shape, the
end of the line will have arrow shape.
6
To erase the line you have drawn, press the [ERASE]
button on the [S LINE] menu.
Pressing the [ERASE] button deletes all the straight lines
you have drawn.
7
Repeat steps 3 to 5 if you want to continue drawing
another line.
8
Press the [X] button on the [S LINE] menu to return to
the [TOOL MENU].
9
To display or hide a rendered line, switch to display or
hide overlay.
You cannot selectively display or hide only straight lines.
Switch to display or hide the entire overlay.
Drawing Straight Line
Straight line display
•
The display of straight lines does not change even when the setting of unit and calibration is changed.
•
The width of the straight lines can be changed on the [TOOL SET: MAIN] screen. Note that the width of the
straight lines already drawn does not change.
•
When stylus operation is not easy or accurate positioning is required, mouse operation is recommended. Use a
commercially available USB mouse for operation.
1
2
[S.LINE] Menu
3
6
8
9
4
5
Draw a straight
line from start
point to end point.
Summary of Contents for DS-L3
Page 2: ......


