iPECS eMG80/100& eMG800 & UCP & vUCP
Administration and Programming Manual
Issue 2.3
21
3.3.2.2
Device IP Address Plan -PGM 103
TDM board is registered with own slot number. It is registered automatically without any configuration.
To register an IP device:
As IP gateway/board and terminals register to the iPECS, a logical slot number is assigned, which indicates
the order of registration. Also, based on the type of device (CO/IP gateway/board, Terminal) the system
assigns a logical Sequence Number.
Thus, Sequence Numbers for CO gateway/board, Terminals are independently assigned based on the type of
gateway/board. These Sequence Numbers are employed to provide a relationship between the physical MAC
address and the logical port numbers of the device.
The system may assign a default private IP address to each Sequence Number. If desired, this program may
be used to modify the assigned IP address for each gateway/board and iPECS Phone.
Each local gateway/board and terminal can be assigned for “Direct Send”. With Direct Send enabled, the
system will employ the Ethernet MAC address, layer 2 switching to eliminate the need for IP traffic overhead,
reducing overall LAN traffic.The system normally employs IP multi-cast protocol to respond to a registration
request from a gateway/board or terminal.
When the device is separated from the system by a router, the system must use the IP uni-cast protocol. This
is established by the “Local Device” assignment.When disabled (Off), the system will send an IP uni-cast
message to the device in response to a registration request.
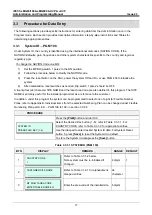
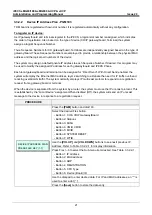
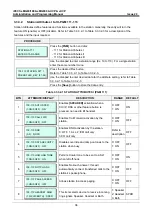
PROCEDURE
DEVICE IP ADDRESS PLAN
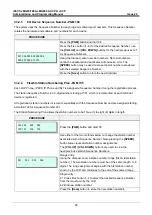
PRESS FLEX KEY (1-7)
Press the
[PGM]
button and dial 103.
Select the desired Flex button.
- Button 1: CO & VOIP Gateway/Board
- Button 2: Stations
- Button 3: MISU
- Button 4: VMIU, VMIB
- Button 5: MCIB
- Button 6: SYSTEM RESET
- Button 7: WTIB
Use the
[VOL UP]
and
[VOL DOWN]
buttons to see next/ previous IP
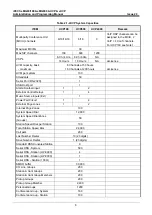
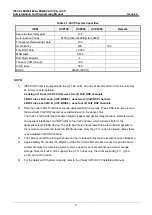
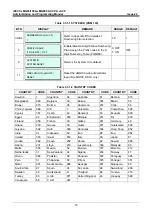
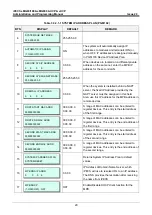
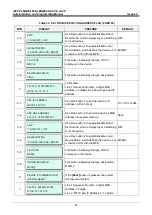
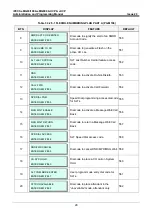
Address. Refer to Table 3.3.2.2-1 for display information.
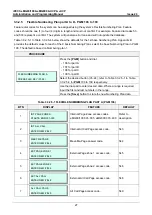
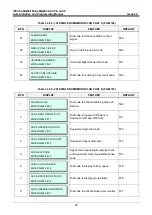
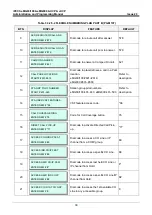
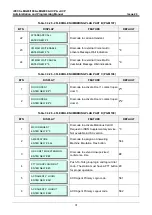
Press Flex 1~6 to select the Sub-menu item desired. See Table 3.3.2.2-1.
- Button 1: IP address
- Button 2: MAC address
- Button 3: ARP
- Button 4: REGISTRATION
- Button 5: CPU Type
- Button 6: Device (Board) ID
Use the dial-
pad to enter desired data. For IP and MAC addresses, an “*” is
used to enter a
dot (“.”)
Press the
[Save]
button to store the data entry.


