20
Chapter
1
Setting Up The Printer
5.
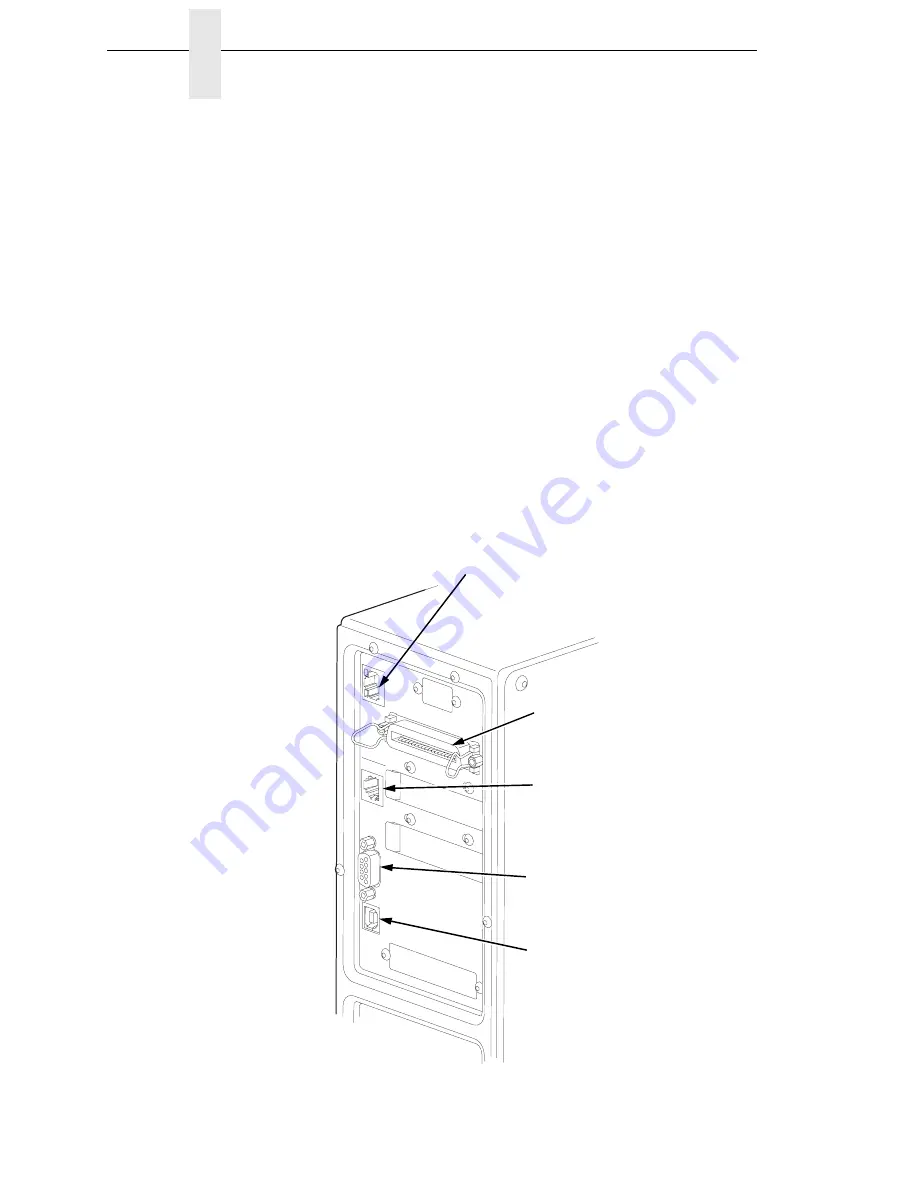
Attach Interface:
a.
Parallel Interface
Attach a suitable parallel printer cable from the computer to the
Centronics/IEEE 1284 interface connector at the back of the printer.
Snap the bail locks to the Centronics connector to secure the
interface cable to the printer.
b.
Serial Interface
Attach a suitable serial printer cable from the computer to the DB-9
RS-232 serial interface connector at the back of the printer. For
additional information on serial cable wiring, refer to “Diagnostics And
Troubleshooting” on page 289.
NOTE:
The printer supports simultaneous connection of the parallel, serial,
and USB interfaces using the Auto Switching feature. Auto Switching
is described on page 279. In the standard printer configuration, the
optional ethernet port is present but disabled. To enable the ethernet
port, the ethernet option must be purchased.
183383a
STATUS
DEBUG
PARALLEL
ETHERNET
RS232
GPI0
USB
Parallel
Interface
Serial
Interface
Debug
Interface
Standard Interface Panel
USB
Connection
Ethernet Port
(see Note above)
Summary of Contents for 5504-R40
Page 1: ...InfoPrint 6700 ES Series Thermal Printer G550 1271 01 User s Manual...
Page 2: ......
Page 3: ...InfoPrint 6700 ES Series Thermal Printer G550 1271 01 User s Manual...
Page 10: ...Table of Contents...
Page 163: ...163 IPDS Setup Print IPDS Fonts cont Figure 4 IPDS Fonts 3816 Emulation Sample Printout...
Page 266: ...266 Chapter 3 DATE...
Page 278: ...278 Chapter 4 Select And Print Downloaded TrueType Fonts...
Page 288: ...288 Chapter 5 RS 232 And Optional RS 422 Serial Interfaces...
Page 332: ...332 Chapter 6 Restore The Printer To Operation...
Page 340: ...340 Appendix A...
Page 362: ...362 Appendix D Removing The Media Cutter...
Page 366: ...366 Appendix E Installing The Media Cutter Tray...
Page 378: ...378 Communication statements...
Page 384: ...384 Appendix...
Page 401: ......


