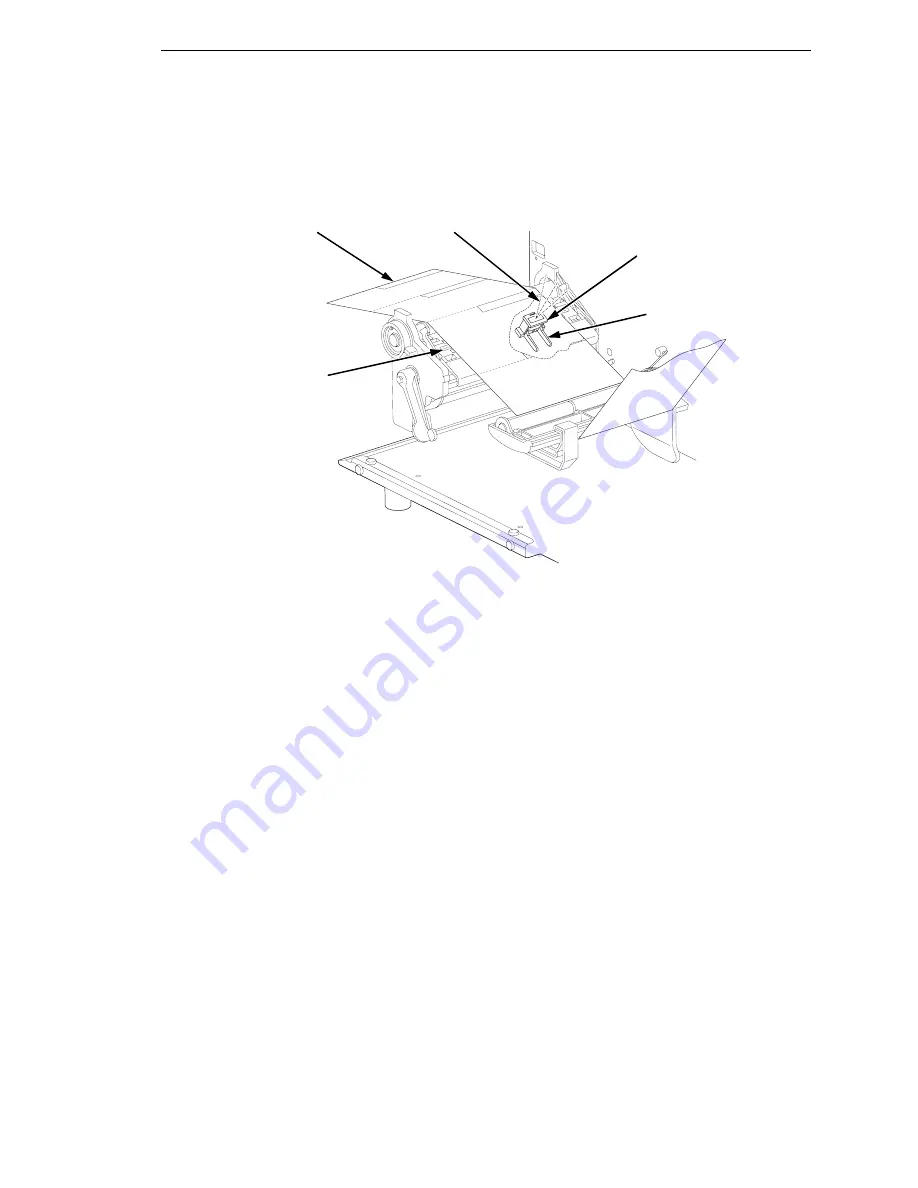
Positioning The Media Sensors
55
Sensing Media with Horizontal Black Marks (Mark) or
Media with No Label Length Indicators (Disable)
Sensing Media with Horizontal Black Marks
Position the lower media sensor for detecting horizontal black marks located
on the underside of media, and position the upper sensor above the lower
sensor to provide a consistent background.
1.
Check the position of the sensor by looking through the long, narrow
opening in the media guard. Use the visible red light emitting from the
lower sensor as a reference pointer.
2.
Use the sensor handle to manually position the sensor to the center of the
black mark on the media.
3.
Select “Mark” in the Gap/Mark Sensor submenu under the CALIBRATE
CTRL menu. See “Sensing Different Media Types” on page 59.
4.
Perform an Auto Calibrate. See “Running Auto Calibrate” on page 60.
Sensing Media with No Label Length Indicators
1.
When using media without label length indicators (no gaps, notches,
holes, or marks) or when you want to ignore all existing length indicators,
place the lower sensor in the center of the media so it can detect when a
Paper Out condition exists. Also set the upper sensor above it.
2.
Select “Disable” in the Gap/Mark Sensor submenu under CALIBRATE
CTRL. See “Sensing Different Media Types” on page 59.
3.
Perform an Auto Calibrate. See “Running Auto Calibrate” on page 60.
183408a
Lower Sensor
Media Guard
Opening
Black Mark
(underside
of media)
Sensor Handle
Visible Red Beam
from Lower Sensor
Summary of Contents for 5504-R40
Page 1: ...InfoPrint 6700 ES Series Thermal Printer G550 1271 01 User s Manual...
Page 2: ......
Page 3: ...InfoPrint 6700 ES Series Thermal Printer G550 1271 01 User s Manual...
Page 10: ...Table of Contents...
Page 163: ...163 IPDS Setup Print IPDS Fonts cont Figure 4 IPDS Fonts 3816 Emulation Sample Printout...
Page 266: ...266 Chapter 3 DATE...
Page 278: ...278 Chapter 4 Select And Print Downloaded TrueType Fonts...
Page 288: ...288 Chapter 5 RS 232 And Optional RS 422 Serial Interfaces...
Page 332: ...332 Chapter 6 Restore The Printer To Operation...
Page 340: ...340 Appendix A...
Page 362: ...362 Appendix D Removing The Media Cutter...
Page 366: ...366 Appendix E Installing The Media Cutter Tray...
Page 378: ...378 Communication statements...
Page 384: ...384 Appendix...
Page 401: ......


