54
Chapter
2
Printing Adjustments
3.
Press the
↵
key to start the Grey test pattern. The pattern will start and
continue to print.
4.
Press
↵
again to stop printing.
5.
Check the test pattern. If necessary reposition the pressure blocks to
obtain a uniform print density across the media width. In most cases, only
the right pressure block may need to be adjusted.
6.
Whenever you reposition a pressure block, run the Grey test pattern to
verify the print pattern is acceptable.
Positioning The Media Sensors
Your printer is equipped with upper and lower media sensors that detect the
top-of-form position on media with label length indicators (gaps, notches,
holes, or black marks). These sensors also detect when a Paper Out
condition exists.
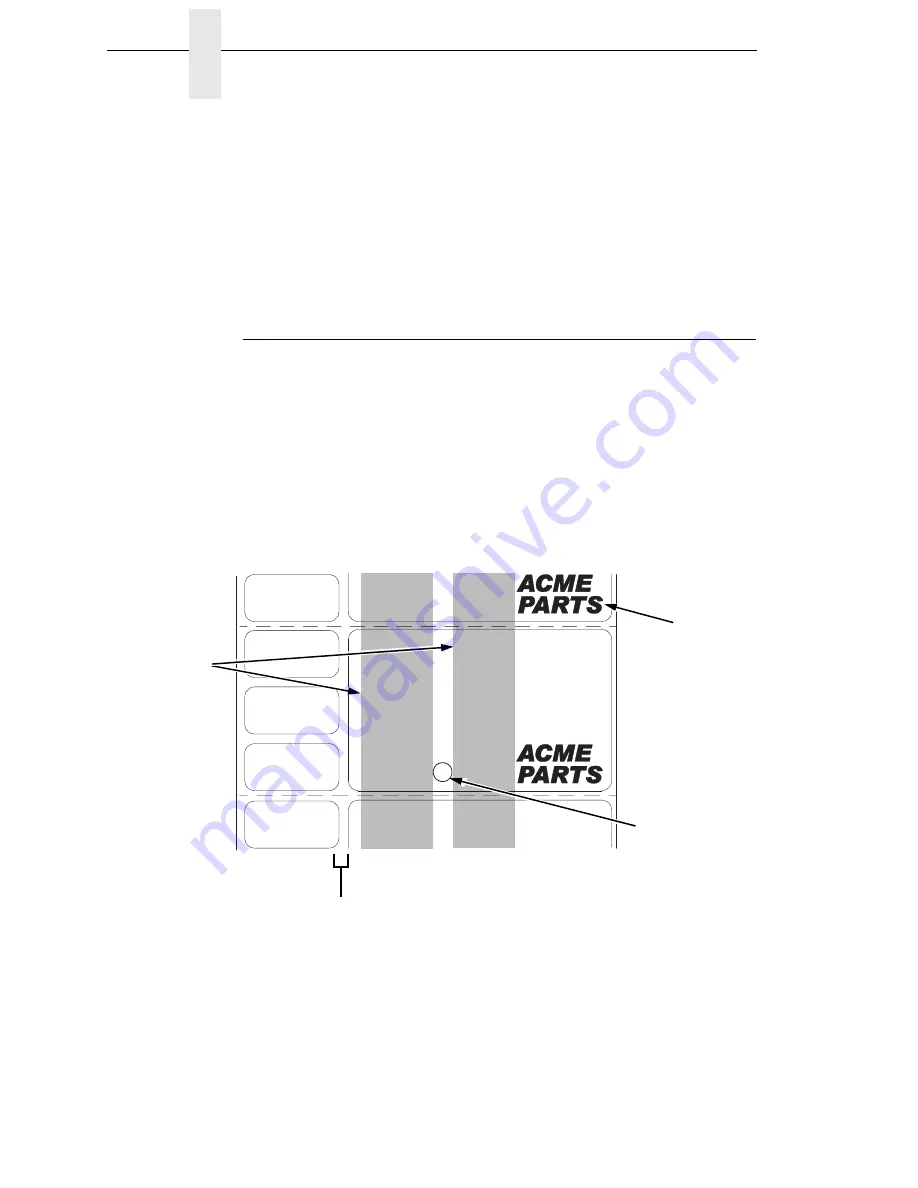
The media sensors should not be placed in the path of media features that
could cause false gap detection or paper out faults. Such features are dark
pre-printing, rounded die-cut label corners, vertical gaps associated with
side-by-side labels, and extraneous cut-outs, as shown below.
183407a
Vertical Gap and
Rounded Die-cut
Label Corners
Extraneous
Cut-out
Dark
Pre-printing
Position the
media sensors
in either of the
grey shaded
areas.
Summary of Contents for 5504-R40
Page 1: ...InfoPrint 6700 ES Series Thermal Printer G550 1271 01 User s Manual...
Page 2: ......
Page 3: ...InfoPrint 6700 ES Series Thermal Printer G550 1271 01 User s Manual...
Page 10: ...Table of Contents...
Page 163: ...163 IPDS Setup Print IPDS Fonts cont Figure 4 IPDS Fonts 3816 Emulation Sample Printout...
Page 266: ...266 Chapter 3 DATE...
Page 278: ...278 Chapter 4 Select And Print Downloaded TrueType Fonts...
Page 288: ...288 Chapter 5 RS 232 And Optional RS 422 Serial Interfaces...
Page 332: ...332 Chapter 6 Restore The Printer To Operation...
Page 340: ...340 Appendix A...
Page 362: ...362 Appendix D Removing The Media Cutter...
Page 366: ...366 Appendix E Installing The Media Cutter Tray...
Page 378: ...378 Communication statements...
Page 384: ...384 Appendix...
Page 401: ......


