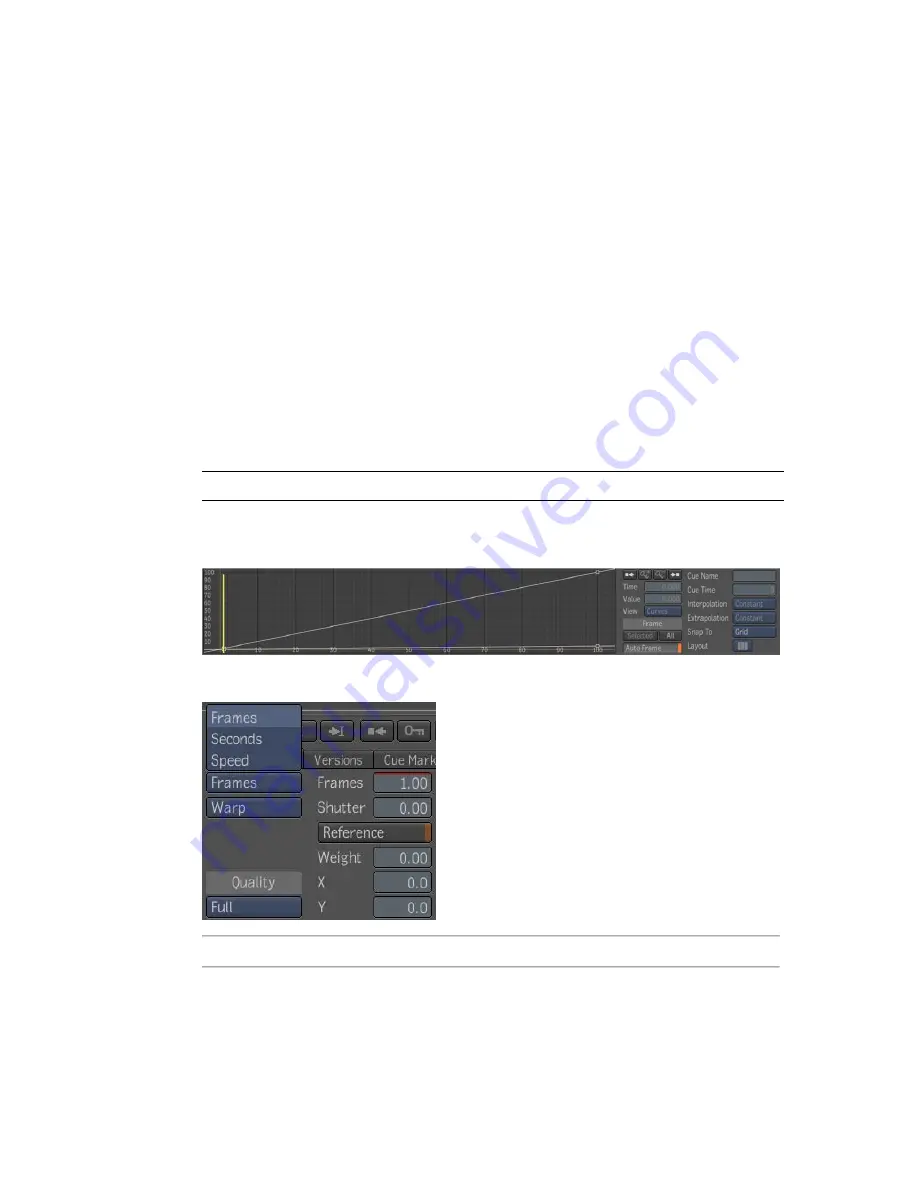
About Timing Curves
Time warps are created by modifying the timing of the source footage or by
changing its playback speed. When you change a clip's timing, you are
essentially changing the time that it takes for a clip to reach a given frame.
For example, in a 100-frame clip, you can adjust the timing so that only the
50th source frame is reached by the end of the clip's 100 frames. This halves
the clip's playback rate. A negative playback rate can be achieved by reversing
a clip's timing curve (by changing the value at the last keyframe to the value
of the first keyframe and the other way around). In the Timing Animation
editor, a steeper timing curve results in a faster playback rate.
Adjusting the clip's speed has different results. Setting the speed to 2.0 doubles
the playback rate. A speed value of .5 plays the clip at half speed (or in slow
motion). A negative speed value corresponds to playing the clip in reverse
(where a -1.0 speed value creates a clip that plays back at the normal rate, but
backward).
NOTE
To avoid indexing black frames, set clip link Repeat parameter to Loop.
Speed and time curve editors are identical to animation curve editors and have
most of the same controls.
When in Warp interpolation mode, the Retimer has the following parameters:
To:
Use:
Implement “a frame is a frame” timing. You can control the
mapping of output frames to input frames using the Animation
Frames
692 | Chapter 28 Time Tools
Summary of Contents for 495B1-05A111-1301 - 3ds Max Design 2010
Page 1: ...Composite User Guide ...
Page 16: ...4 ...
Page 18: ...6 ...
Page 88: ...76 ...
Page 92: ...6 A new composition has been created 80 Chapter 4 Start Compositing Now ...
Page 102: ...90 ...
Page 122: ...110 ...
Page 126: ...114 ...
Page 186: ...174 Chapter 9 Getting Familiar with Your Workspace ...
Page 195: ...UdaTextField XML Resource Files 183 ...
Page 196: ...UdaValueEditor UdaMenu 184 Chapter 9 Getting Familiar with Your Workspace ...
Page 197: ...UdaPushedToggle XML Resource Files 185 ...
Page 198: ...UDA Declaration 186 Chapter 9 Getting Familiar with Your Workspace ...
Page 200: ...188 ...
Page 250: ...238 ...
Page 310: ...298 ...
Page 348: ...336 ...
Page 399: ...About Blurs 387 ...
Page 411: ...Output Controls The Output UI allows you to control the following parameters About Blurs 399 ...
Page 450: ...438 ...
Page 478: ...466 ...
Page 520: ...508 ...
Page 548: ...536 ...
Page 578: ...566 ...
Page 596: ...The last step is to add the sun s reflection to the water 584 Chapter 24 Raster Paint ...
Page 606: ...594 ...
Page 670: ...658 ...
Page 710: ... a Tool time cursor b Global time frame markers 698 Chapter 28 Time Tools ...
Page 722: ...710 ...
Page 806: ...794 ...
Page 828: ...816 ...
Page 870: ...858 ...
Page 888: ...876 ...
Page 898: ...886 ...


