5
Continue to click in the image to add more control points.
6
To close the shape, click on the first control point you created, or press
Enter
. If you hold
Ctrl + Alt
, the shape will be closed in Auto Tangent
mode.
Once the first control point has been created using the Freeform tool, the
garbage mask is automatically set to edit mode.
NOTE
If you are not in Auto Tangent mode and want to create several points in
Auto Tangent, hold
Ctrl + Alt
when creating the points.
To create a rectangular mask:
1
Select the Rectangle tool button or press
S
.
2
Set initial mask parameters if necessary.
3
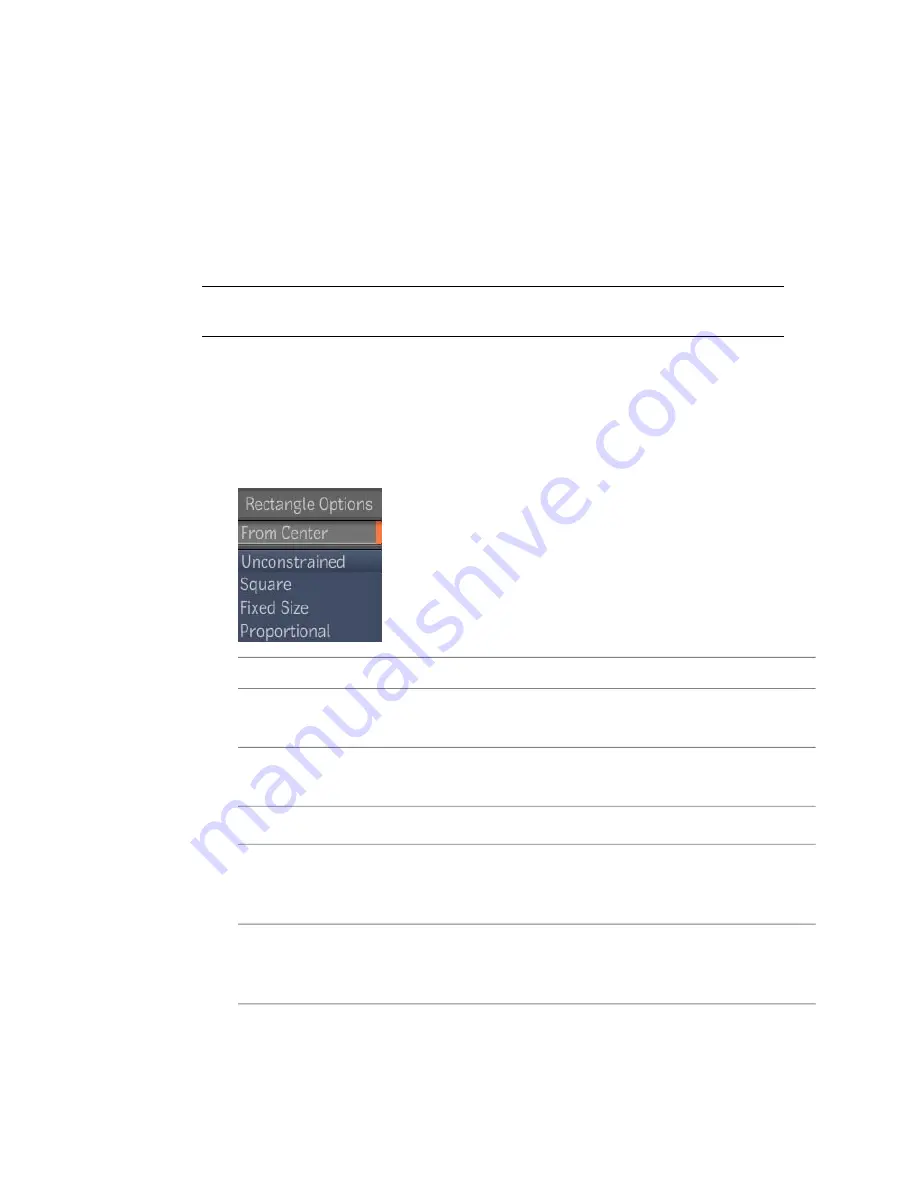
Select Rectangle Options settings if necessary. These options include:
To:
Use:
Click and drag the cursor to draw the mask from the center of
the first mouse/pen click.
From Center
Create an unconstrained mask. Click and drag to draw and change
the shape of the mask.
Unconstrained
Click and drag to draw a perfect square.
Square
Create a rectangular mask based on width and height values you
set. Once the values are set, click the location in the image you
want the shape to appear.
Fixed Size
Create a rectangular mask based on width and height proportions
you set. Once the values are set, click and drag to create the
shape.
Proportional
542 | Chapter 23 Masking
Summary of Contents for 495B1-05A111-1301 - 3ds Max Design 2010
Page 1: ...Composite User Guide ...
Page 16: ...4 ...
Page 18: ...6 ...
Page 88: ...76 ...
Page 92: ...6 A new composition has been created 80 Chapter 4 Start Compositing Now ...
Page 102: ...90 ...
Page 122: ...110 ...
Page 126: ...114 ...
Page 186: ...174 Chapter 9 Getting Familiar with Your Workspace ...
Page 195: ...UdaTextField XML Resource Files 183 ...
Page 196: ...UdaValueEditor UdaMenu 184 Chapter 9 Getting Familiar with Your Workspace ...
Page 197: ...UdaPushedToggle XML Resource Files 185 ...
Page 198: ...UDA Declaration 186 Chapter 9 Getting Familiar with Your Workspace ...
Page 200: ...188 ...
Page 250: ...238 ...
Page 310: ...298 ...
Page 348: ...336 ...
Page 399: ...About Blurs 387 ...
Page 411: ...Output Controls The Output UI allows you to control the following parameters About Blurs 399 ...
Page 450: ...438 ...
Page 478: ...466 ...
Page 520: ...508 ...
Page 548: ...536 ...
Page 578: ...566 ...
Page 596: ...The last step is to add the sun s reflection to the water 584 Chapter 24 Raster Paint ...
Page 606: ...594 ...
Page 670: ...658 ...
Page 710: ... a Tool time cursor b Global time frame markers 698 Chapter 28 Time Tools ...
Page 722: ...710 ...
Page 806: ...794 ...
Page 828: ...816 ...
Page 870: ...858 ...
Page 888: ...876 ...
Page 898: ...886 ...


