Teledyne Continental Motors, Inc.
TM
Non-Overhaul Removal and Replacement
IOF-550 Permold Series Engine Maintenance Manual
10-13
1 April 2007
7.
Seat the starter adapter against the gasket.
8.
Secure the starter adapter assembly to the crankcase with washers, new lock washers
and nuts. Torque the nuts per Appendix B in this manual.
9.
Install the starter motor according to Section 10-3.5 “Starter Motor Installation.”
10.
Perform an “Engine Start” according to the instructions in Chapter 7 of OI-24 to
verify proper starter operation.
10-3.5. Starter Motor Installation
Procedure
WARNING
If all power is not disconnected, a loose or broken wire could
allow the engine to start and the propeller to rotate. Do not
stand or place equipment within the arc of the propeller.
1.
Disconnect engine electrical power; turn the Master Power Switch and Ignition
Switch to the OFF position.
2.
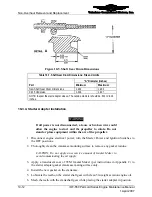
Inspect a new O-ring for the starter motor and verify the O-ring is free of cracks and
is not deformed or brittle. Do not install a deformed, brittle, or cracked O-ring.
3.
Coat the new O-ring with clean 50-weight aviation engine oil and install the O-ring
on the starter motor.
4.
Apply Molyshield Grease to the starter motor drive lug.
5.
Install the starter motor on the mounting studs and ensure that the drive lug aligns
with the slot. Secure the starter motor with two plain washers and two nuts.
6.
Torque the mounting nuts to Appendix B specifications.
7.
Verify the integrity of the electrical cable. Replace frayed or cracked wiring.
8.
Reconnect the electrical cable and aircraft battery in accordance with the airframe
manufacturer’s instructions.
9.
Perform an “Engine Start” according to the instructions in Chapter 7 of OI-24 to
verify proper starter operation.

