Non-Overhaul Removal and Replacement
Teledyne Continental Motors, Inc.
TM
10-56
IOF-550 Permold Series Engine Maintenance Manual
1 April 2007
CAUTION: EGT sensor bend angles greater than 75
°
will
permanently damage the EGT sensor.
7.
If necessary, bend the sensor to avoid contact with surrounding components. Bends
must in a smooth arc not to exceed 75
°
(a minimum of ½-inch radius).
8.
For proper engine operation, route, clamp, support, and protect the engine low voltage
harness wires to prevent chafing, fretting, and wear of the lead wires. Route and
secure the harness according to Appendix C, “Harness Routing.”
9.
Perform a “FADEC Level I Diagnostics” in Chapter 8, Troubleshooting of this
manual to check the FADEC System. If the FADEC System fails this diagnostic
check, troubleshoot the system until the malfunction is corrected.
10.
Perform an “Engine Operational Check” according to the instructions in Chapter 6,
Operational Performance Checks.
10-6.21. Cylinder Head Temperature (CHT) Sensor Removal
Procedure
1.
Locate the faulty CHT Sensor. Sensors leads are designated for specific locations and
identified with a tag on the harness.
2.
Remove the cable ties securing the CHT sensor lead to allow access to the connector.
Discard removed cable ties.
3.
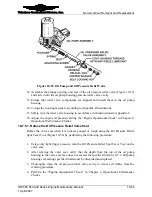
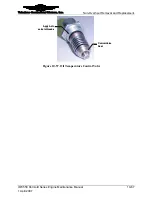
Disconnect the bayonet connector from the adapter by pressing down and at the same
time turning the connector counter-clockwise ¼ turn.
4.
Cut the lead as close as practical to the sensor.
5.
Instructions to prepare the new sensor leads are in Section 10-5.2, “Non-EGT Sensor
and Lead Wire Replacement.”
10-6.22. Cylinder Head Temperature (CHT) Sensor Installation
Procedure
1.
Prepare the wires and install the new sensor according to instructions in Section 10-
5.2, “Non-EGT Sensor and Lead Wire Replacement.”
2.
Inspect the bayonet adapter for damage; replace if necessary.
a.
Remove the damaged adapter by unscrewing it from the cylinder head thermal
well
b.
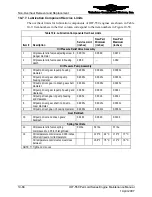
Install a bayonet adapter in the cylinder head’s CHT thermal well. Torque the
bayonet adapter per torque values in Appendix B.
3.
Each CHT sensor is designated for installation into a specific engine cylinder by a tag
indicating the engine cylinder number. For example, CHT (CYL#2) indicates the
sensor is to be installed on Cylinder 2. Install each tagged CHT sensor of the engine
low-voltage harness into the respective cylinder head using the bayonet adapters.
4.
Insert the CHT sensor into the bayonet adapter. Push the CHT sensor connector
against the spring and align the connector slots with adapter pins. Continue pushing
the connector until the spring is fully compressed. Twist the connector clockwise
(CW) to lock it into place. Verify the CHT sensor is securely installed.


