


183
6.5.3 Configuration and operation
When installation and connection are finished, the
HCS-8302MX/FS
General
Controller
for
Booth
Combiners should be configured by front panel menu
operation or the “RoomBoothCombine” software before
the meeting.
6.5.3.1. Configuration
Initial interface:
Press the "MENU" button to go to the main menu,
which includes:
1. Machine Rename
2. Net Setting
3. About
Press the number button to check the status of the
corresponding fiber port (on/off, mode, connection
type).
The fiber port range of HCS-8302MX/FS/06,
HCS-8302MX/FS/12 and HCS-8302MX/FS/24 are
respectively 1-6, 1-12, and 1-24.
1. Machine Rename
Set alias for the HCS-8302MX/FS General Controller
for Booth Combiners with a maximum length of 16
characters or less. Press the “MENU” button to enter
setup, and the “Machine Rename” prompts:
Press the “MENU” button to enter the name setting
interface as in the figure below, the cursor blinks under
the first character, press
the “←/→” button to move the
cursor.
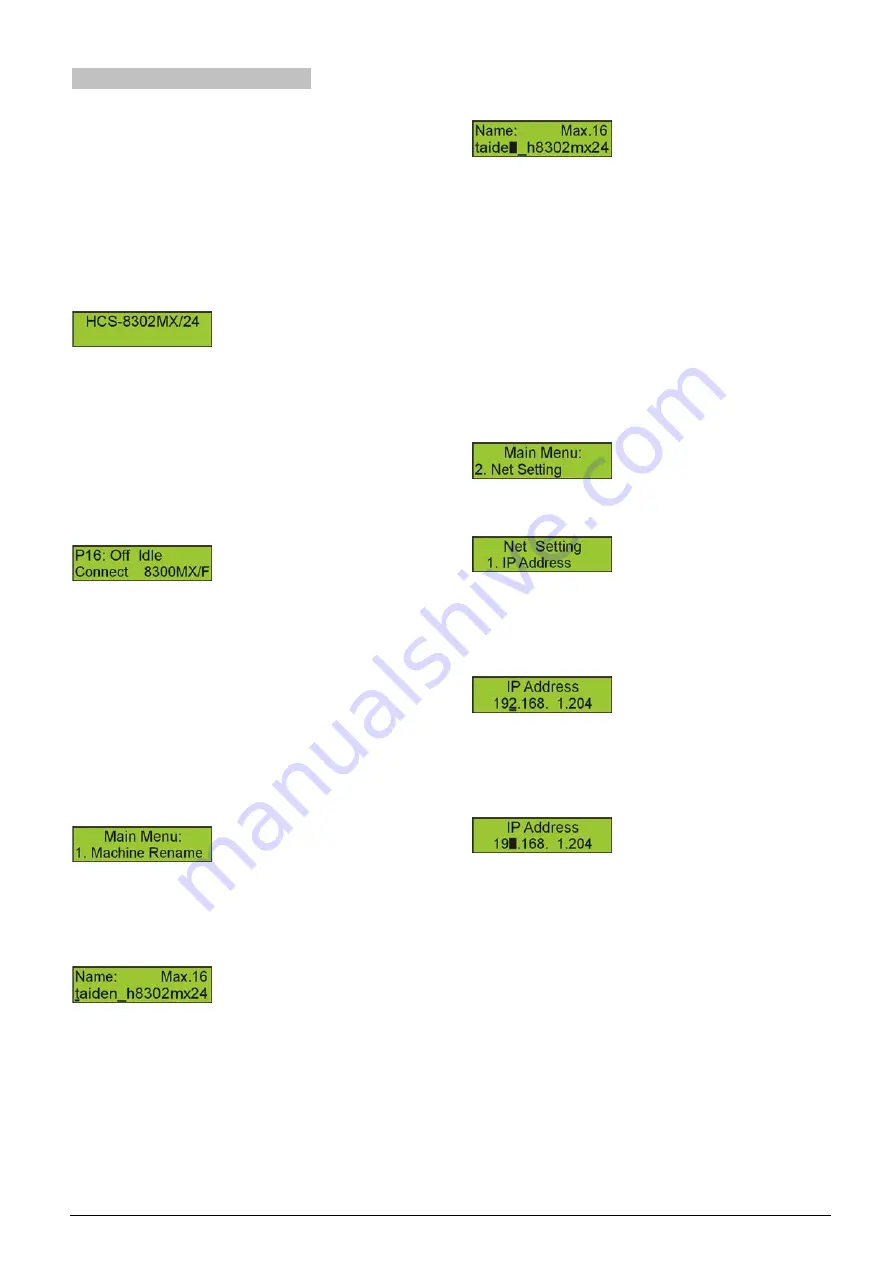
Press the “MENU” button to modify the character as in
the figure below. Press
the “←” button to clear all the
characters after the cursor; press the “
→” button to
select the new characters: A~Z, a~z, 0~9 and ! “ ^ * _ +
= - ( ) { } [ ] < > : ; / ?. Press the “MENU” button to save
at each character.
Press the “EXIT” button to return to the upper level
menu after setting finished.
2. Net setting
The IP address, Subnet mask and Gateway must be
assigned to the HCS-8302MX/FS if connected to a
TCP/IP Ethernet interface.
♦
IP address
Press the “MENU” button to enter the setup menu and
press the “
←/→” until “Net Setting” prompts;
Press the “MENU” button to enter net setting and the
“IP Address” prompts:
Press the “MENU” button to enter the IP address
setting interface as in the figure below, the cursor blinks
under the first parameter, press the
“←/→” button to
move the cursor.
Press the “MENU” button to modify the number as in
the figure below. Press
the “←/→” button to adjust
parameters. Press the “MENU” button to save at each
parameter.
Press the “EXIT” button to return to the upper level
menu after setting finished.
♦
Subnet mask
For the setup of “Subnet mask” proceed such as
described in “IP address”.
♦
Gate way
For the setup of “Gate way” proceed such as described
in “IP address”.
Summary of Contents for hcs-8300
Page 22: ...9 Figure 1 1 6 CongressMatrix TM Software Interface ...
Page 25: ...12 Figure 1 1 10 By using microphone array terminals the conference room looks tidy ...
Page 89: ...76 3 4 2 Installation Figure 3 4 2 Fixing of HCS 8336 SDI monitor ...
Page 93: ...80 B About Display the product information including unit ID serial and version ...
Page 168: ...155 Figure 6 1 3 CMU connecting to infrared language distribution system via HCS 8300MO ...
Page 210: ...197 6 9 2 Connection Figure 6 9 4 Connection between the HCS 8301M and the HCS 8300MAU FS ...
Page 249: ...236 Appendices Custom made cables AppendixⅠ Dedicated 6 PIN Extension Cable ...
Page 250: ...237 Appendix Ⅱ CBL2SS 01 Professional 2 pin Cable for Conference System ...
Page 251: ...238 Appendix Ⅲ CBL4PK 01 Power Adapter Cable ...
Page 252: ...239 Appendix Ⅳ CBL4PT 02 Power Branch Cable ...
Page 253: ...240 Appendix Ⅴ CBL4PS 4 pin Extension Cable ...
Page 254: ...241 Appendix Ⅵ Cat 6 Gigabit Ethernet Cable ...


