


166
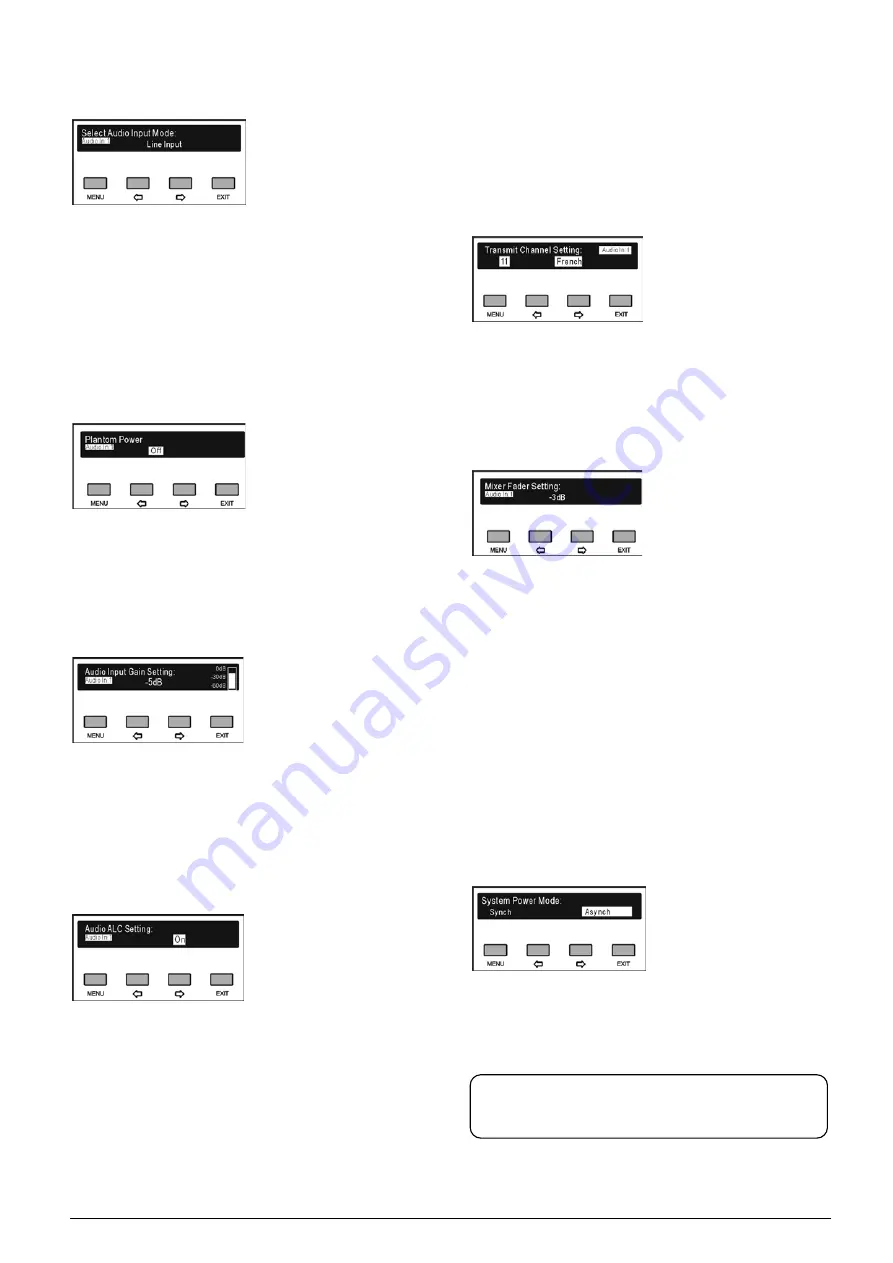
B. Select audio input mode
a). Press the “
/
” button to select audio input mode
between “Line Input” and “External Microphone Input”;
b). Press the “MENU” button to confirm and go to the
next step:
If “External Microphone Input” is selected, then go
to step C;
If “Line Input” is selected, then go to step D;
C. Enable/disable phantom power
a). Press the “
/
” button to enable/disable phantom
power;
b). Press the “MENU” button to confirm and go to step
D;
D. Setup input gain
a). Press the “
/
” button to adjust input gain between
-20 dB - +10 dB and the dynamic level of input channel
will be displayed at the right side;
b). Press the “MENU” button to confirm and go to step
E;
E. Setup audio dynamic compression
a). Press the “
/
” button to enable/disable audio
dynamic compression;
b). Press the “MENU” button to confirm and go to the
next step;
If working mode is set as “Simultaneous
interpretation mode”, then go to step F1;
If working mode is set as “Mix audio mode”, then
go to step F2;
If working mode is set as “CobraTrans” /
“DanteTrans” mode and audio type is set as
“Analog” / “Digital”, configuration is finished. Return
to the upper level menu;
F1. Setup simultaneous interpretation channel
a). Press the “
/
” button to switch between
simultaneous interpretation channels;
b). Press the “MENU” button to save and to finish
configuration. Return to the upper level menu;
F2. Setup mix audio fading
a). Press the “
/
” button to adjust mix audio fading,
range: mute, -30 dB - 0 dB;
b). Press the “MENU” button to save and finish
configuration. Return to the upper level menu.
6.2.3.4 Power mode setting
The power mode of HCS-8300MI Series 8 Channels
Audio Input Interface includes:
“Synchronous”:
Power on/off synchronously with
the CMU or the HCS-8300MO
Series 8 Channels Audio Output
Device;
“Asynchronous
”:
Power on/off independently;
a). Press the “
/
” button to switch between power
modes;
b). Press the “MENU” button to save and return to the
upper level menu.
Note:
New setting will be effective after reboot.
Summary of Contents for hcs-8300
Page 22: ...9 Figure 1 1 6 CongressMatrix TM Software Interface ...
Page 25: ...12 Figure 1 1 10 By using microphone array terminals the conference room looks tidy ...
Page 89: ...76 3 4 2 Installation Figure 3 4 2 Fixing of HCS 8336 SDI monitor ...
Page 93: ...80 B About Display the product information including unit ID serial and version ...
Page 168: ...155 Figure 6 1 3 CMU connecting to infrared language distribution system via HCS 8300MO ...
Page 210: ...197 6 9 2 Connection Figure 6 9 4 Connection between the HCS 8301M and the HCS 8300MAU FS ...
Page 249: ...236 Appendices Custom made cables AppendixⅠ Dedicated 6 PIN Extension Cable ...
Page 250: ...237 Appendix Ⅱ CBL2SS 01 Professional 2 pin Cable for Conference System ...
Page 251: ...238 Appendix Ⅲ CBL4PK 01 Power Adapter Cable ...
Page 252: ...239 Appendix Ⅳ CBL4PT 02 Power Branch Cable ...
Page 253: ...240 Appendix Ⅴ CBL4PS 4 pin Extension Cable ...
Page 254: ...241 Appendix Ⅵ Cat 6 Gigabit Ethernet Cable ...


