Setting Measurement Conditions
3-6
3
Setting procedures
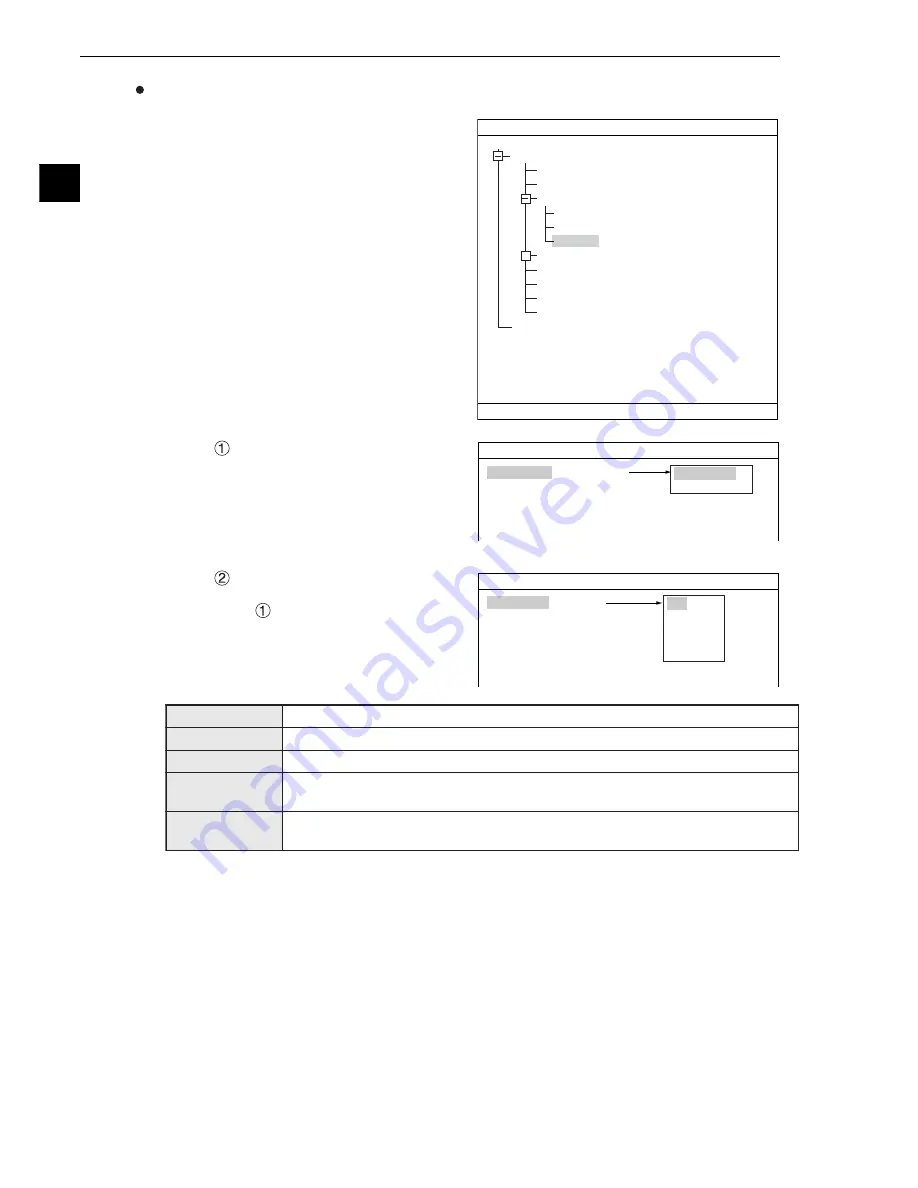
1. On the menu tree, select “MAIN MENU" ->
"OBJECT TYPE COND" -> "TYPE00" ->
"MEA-CND(CAMERA1)" -> "MEAS(NEW)," in
that order. Then, press the SET key.
2. Select "
COLOR MODE" and press the SET
key. On the popup menu, select "COLOR
FILTER" and press the SET key.
3. Select "
COLOR FILTER SET" and press the
SET key and open the sub-menu. On the sub-
menu, select "
FILTER TYPE," and then
select filter type from the popup menu.
* In this example, select "RED" (red filter).
OBJECT TYPE COND
TYPE00
TYPE RUN COND
IMAGE-ADJ
MEA-CND(CAMERA1)
MEAS0
POSI-CORRECT
MEAS(NEW)
MEA-CND(CAMERA2)
FINAL NUM. CALC
FINAL OUTPUT COND
OBJ-TYPE I/0
OBJ-TYPE SYS.
TYPE(NEW)
+
1
COLOR MODE
2
COLOR FILTER SET
3
MEAS SELECTION
COLOR F C1
BRT
SELECT OBJECT TYPE COND
SET
=NEW REGISTRATION ESC=BACK SEL=CHNG IMG TRG=POPUP
1
COLOR MODE
2
COLOR FILTER SET
3
MEAS SELECTION
RED F C1 BRT
MEASUREMENT1 SCREEN COND SAVE
COLOR FILTER
(TO NEXT SUB-MENU)
NO
COLOR FILTER
EXTRACT COLOR
1
FILTER TYPE
RED
RED F C1 BRT
MEASUREMENT1 SCREEN COND SAVE
RED *
GREEN
BLUE
BRIGHT LEV
ANY
RED
Displays red areas more brightly.
GREEN
Displays green areas more brightly.
BLUE
Displays blue areas more brightly.
BRIGHT LEV
Displays areas that are within the specified brightness range (within the specified
upper and lower limits) more brightly.
ANY
Specify the optimum color filter parameters to use, based on the original image
conditions.


