5-4
Degree of Match Inspection
5
SEL=SELECT A MENU ESC=BACK SEL=CHNG IMG TRG=FUNC
RED F C1 BRT
RECTANGLE
X-LINE
Y-LINE
1
REGISTER NO.
00(0
〜
15)
2
MEAS SHAPE (MDL0)
RECTANGLE
3
REFIMG ARE (MDL0)
SET (226.208)
〜
(274.250)
4
SEARCH ARE (MDL0)
SET (216.200)
〜
(295.279)
5
REFIMG
(MDL0)
001 (000~001)
6
DTECT CRD (MDL0)
CENTER (250.229)
7
CONTR.PIXL (MDL0)
1
8
MEAS SHAPE (MDL1)
RECTANGLE
9
REFIMG
ARE (MDL1)
SET (224.208)
〜
(287.271)
0
SEARCH ARE (MDL1)
SET (216.200)
〜
(295.279)
q
REFIMG
(MDL1)
001 (000~001)
w
DTECT CRD (MDL1)
CENTER (250.229)
e
CONTR.PIXL (MDL1)
1
REG COND
SCREEN COND
SAVE DETAIL
*
Make
□
to
■
on the popup menu,
the respective item will be added to
the "REG COND" menu.
■REFERENCE IMG *
■
DTECT COORD
■
CONTR.PIXEL
1
DTECT PRECISION STANDARD
2
REGISTER NO.
00(0~15)
3
MODE
2P-SCH
4
SEARCH
YES
5
MATCHING
AVG-GRAYS
REGISTER NO.
6
MDL 0
7
MDL 1
15
14
13
12
11
10
09
08
07
06
05
04
03
02
01
00
S
S × × × × × × × × × × × ×
× × × × ×
×
×
× × ×
×
× ×
× × ×
× ×
RED F C1 BRT
MEAS CND
SCREEN
COND
SAVE
IMG PRE-PROC
REG-COND
EVALUATION
DST&ANGL
NUM-CALC
OUT
How to set the register conditions
How to enter the REG-COND setting screen
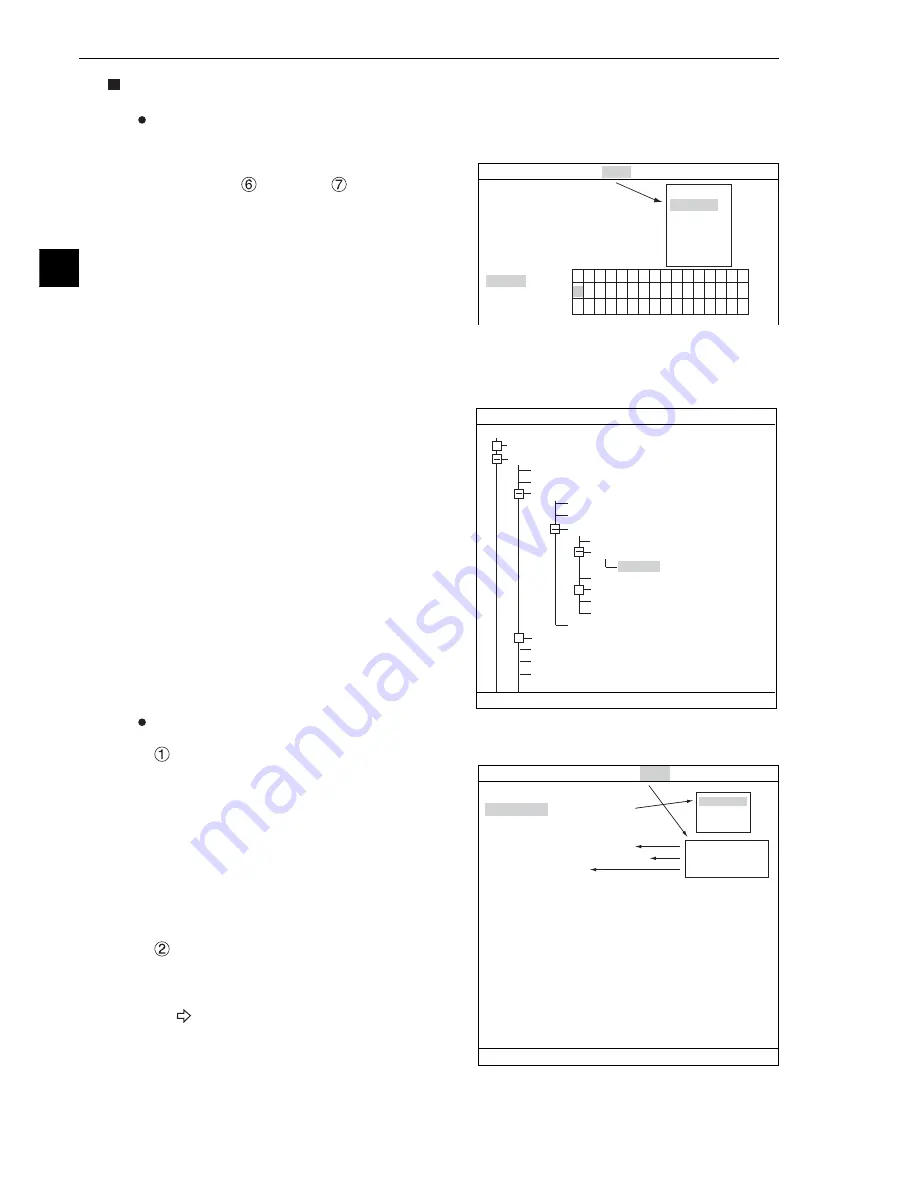
There are three methods for getting to the REG-COND setting screen.
1) On the "MEAS CND" setting screen, move the
cursor to "
MDL 0" or "
MDL 1" and press
the SET key. The cursor will move into the
table. Move the cursor to the "S" column and
press the SET key.
Note: If you press the SET key in the "X"
column, the setting will be invalid.
2) On the "MEAS CND" setting screen, press the TRG/BRT key to move the cursor to the upper
function menu. Select the "COND" item and then select the "REG-COND" item and press the SET
key.
3) On the menu tree, move the cursor to the
"MEAS CND" item, and press the right arrow
key. The sub menu which contains the "REG-
COND" items will appear. Move the cursor to
this item and press the SET key.
How to set register conditions
REGISTER NO.
The currently selected register number is
displayed.
If you want to set the measurement
conditions for a different register number,
press the SET key to highlight the register
number currently selected. Then press the up
and down arrow keys to select the register
number whose measurement conditions you
want to set. Press the SET key to confirm
your selection.
MEAS SHAPE(MLD0)
Select a shape (rectangle, horizontal line, or
vertical line) for the reference image area and
search area.
For details about each shape, see pages
3-15 to 3-19.
1
REGISTER NO.
2
MEAS SHAPE (MDL0)
3
REFIMG ARE
(MDL0)
4
SEARCH ARE (MDL0)
5
REFIMG
(MDL0)
6
DTECT CRD (MDL0)
7
CONTR.PIXL (MDL0)
8
MEAS SHAPE (MDL1)
9
REFIMG
ARE (MDL1)
0
SEARCH ARE (MDL1)
q
REFIMG
(MDL1)
w
DTECT CRD (MDL1)
e
CONTR.PIXL (MDL1)
COLOR F C1 DRK
SELECT OBJECT TYPE COND
OBJECT TYPE COND
TYPE00
TYPE01
TYPE RUN COND
IMAGE-ADJ
MEA-CND(CAMERA1)
MEAS0
POSI-CORRECT
MEAS01(CHK-DEG-MATCH F)
IMG PRE-PROC
MEAS CND
REG-COND
EVALUATION COND
DISTANCE&ANGLE COND
NUM-CALC
OUT-COND
MEAS(NEW)
MEA-CND(CAMERA2)
FINAL NUM. CALC
FINAL OUTPUT COND
OBJ-TYPE I/O
SET=TO NEXT SUB-MENU ESC=BACK SEL=CHNG IMG TRG=POPUP
+
+
+


