•
Goto Waypoint
•
Follow From Here
(only available when waypoint
is part of a route.)
•
Edit Waypoint
•
Erase Waypoint
•
Remove Waypoint
(only available when waypoint
is part of a route.)
•
Move Waypoint
•
Measure
•
Build Route
•
Acquire Target
(only available if Radar overlay is
switched on.)
•
Slew thermal camera
(only available when
thermal camera is connected and operating.)
For active waypoints the following menu items are
available:
•
Stop Goto
•
Restart XTE
•
Advance Waypoint
•
Measure
•
Build Route
•
Acquire Target
(only available if Radar overlay is
switched on.)
•
Slew thermal camera
(only available when
thermal camera is connected and operating.)
Accessing the context menu
You can access the context menu by following the
steps below.
1. Non-touchscreen and HybridTouch displays:
i.
Selecting a location, object or target on-screen
and pressing the
Ok
button.
2. HybridTouch and Touch only displays:
i.
Selecting an object or target on-screen.
ii. Selecting and holding on a location on-screen.
Waypoint placement
Placing a waypoint
You can place a waypoint on a multifunction display
with a touchscreen by following the steps below.
D
11763-2
From the chart, radar or fishfinder application:
1. Select and hold the required location on screen.
The context menu is displayed.
2. Select
Place Waypoint
.
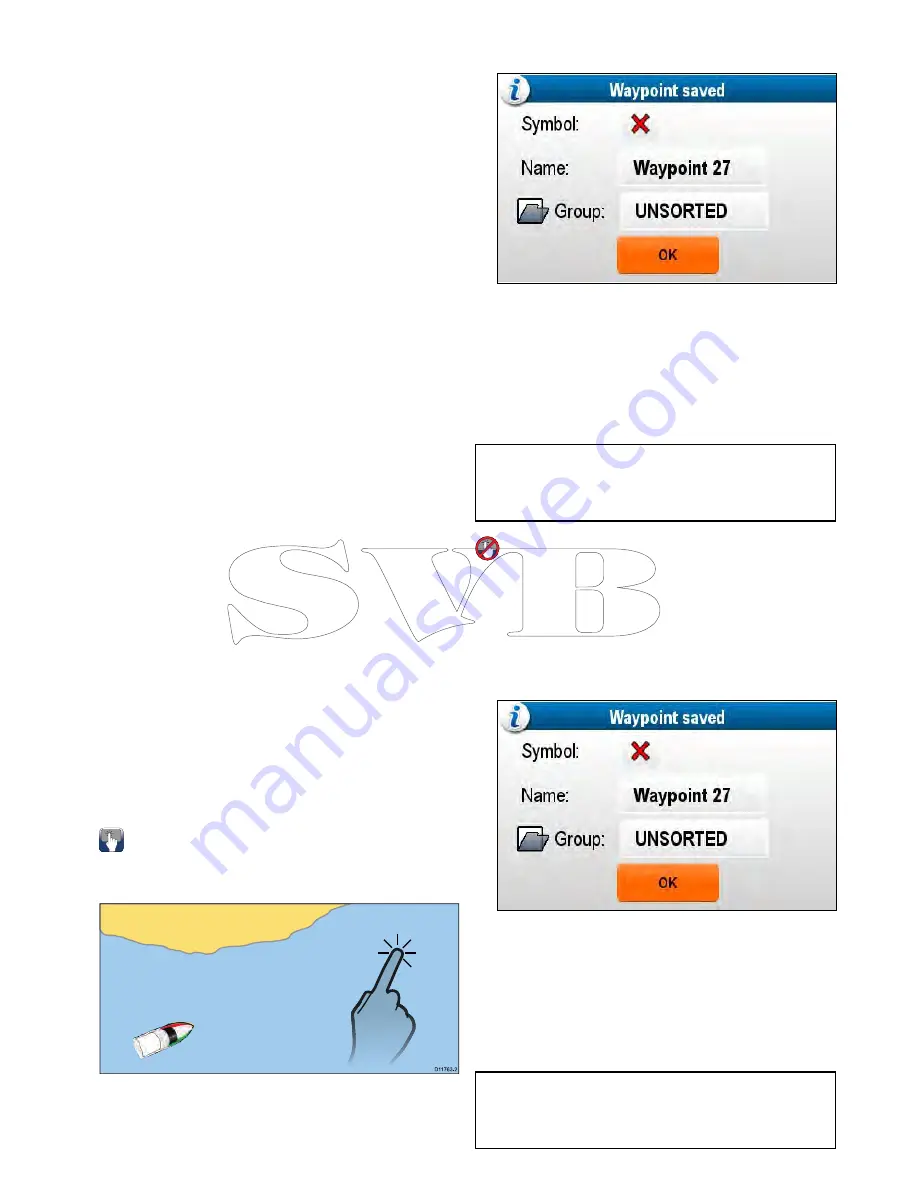
The Waypoint Saved dialog is displayed.
3. Select the
Symbol field
to change the symbol
that will be used to display the waypoint in the
Chart or Radar application.
4. Select the
Name field
to change the name of
the waypoint.
5. Select the
Group field
to change the group that
the waypoint is assigned to.
6. Select
OK
to confirm the waypoint details.
Note:
If there is no user interaction with
the Waypoint saved dialog for approximately 5
seconds then the waypoint is saved with the default
settings and the dialog is closed automatically.
Placing a waypoint
From the chart, radar or fishfinder application:
1. Position the cursor at the required position.
2. Press the
WPT
button.
The context menu is displayed.
3. Select
Place Waypoint
.
The Waypoint Saved dialog is displayed.
4. Select the
Symbol field
to change the symbol
that will be used to display the waypoint in the
Chart or Radar application.
5. Select the
Name field
to change the name of
the waypoint.
6. Select the
Group field
to change the group that
the waypoint is assigned to.
7. Select
OK
to confirm the waypoint details.
Note:
If there is no user interaction with
the Waypoint saved dialog for approximately 5
seconds then the waypoint is saved with the default
settings and the dialog is closed automatically.
Waypoints, Routes and Tracks
209
Summary of Contents for c125
Page 2: ......
Page 14: ...14 a Series c Series e Series ...
Page 41: ...13 GPS receiver 14 Thermal camera 15 Wireless connection Planning the installation 41 ...
Page 48: ...48 a Series c Series e Series ...
Page 80: ...80 a Series c Series e Series ...
Page 118: ...118 a Series c Series e Series ...
Page 184: ...184 a Series c Series e Series ...
Page 188: ...188 a Series c Series e Series ...
Page 206: ...206 a Series c Series e Series ...
Page 228: ...228 a Series c Series e Series ...
Page 290: ...290 a Series c Series e Series ...
Page 310: ...310 a Series c Series e Series ...
Page 340: ...340 a Series c Series e Series ...
Page 374: ...374 a Series c Series e Series ...
Page 422: ...422 a Series c Series e Series ...
Page 436: ...436 a Series c Series e Series ...
Page 462: ...462 a Series c Series e Series ...
Page 463: ......
Page 464: ...www raymarine com ...


