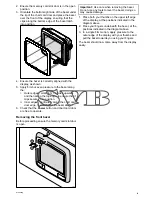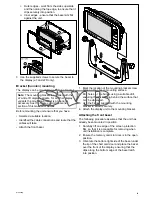
2. Ensure the memory card slot door is in the open
position.
3. Orientate the bottom-right side of the bezel under
the lip of the chart card door and place the bezel
over the front of the display, ensuring that the
clips along the bottom edge of the bezel latch
into position.
D
12586-1
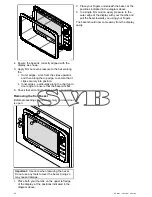
4. Ensure the bezel is correctly aligned with the
display, as shown.
5. Apply firm but even pressure to the bezel along
the:
i.
Outer edges - work from the sides upwards
and then along the top edge, to ensure that it
clips securely into position.
ii. Inner edges - particularly along the chart card
door edge, to ensure that the bezel sits flat.
6. Check that the
Power
button and chart card door
are free to operate.
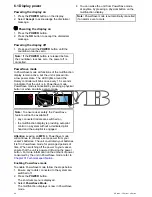
Removing the front bezel
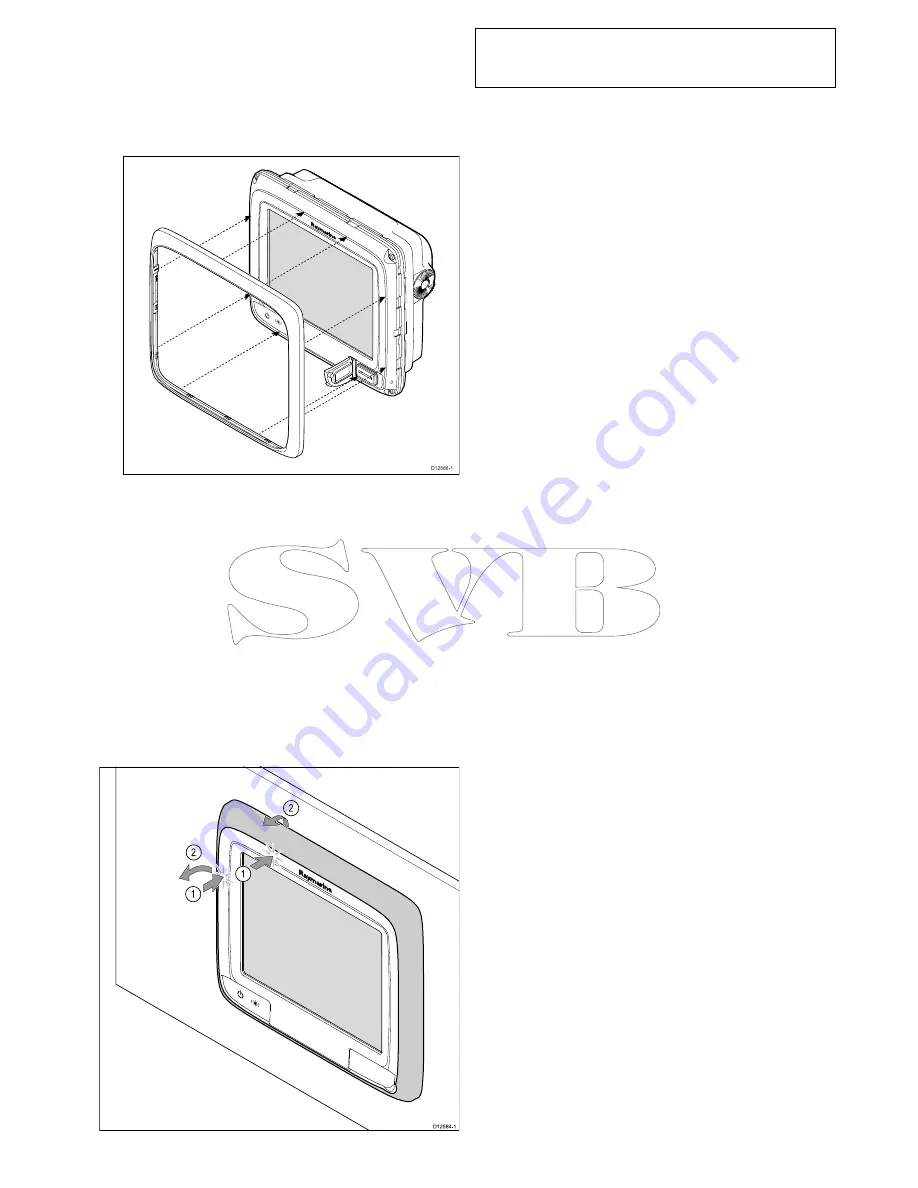
Before proceeding ensure the memory card slot door
is open.
D
12584-1
0
1
1
2
2
2
2
1
2
1
2
1
2
1
2
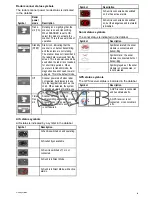
Important:
Use care when removing the bezel.
Do not use any tools to lever the bezel; doing so
may cause damage.
1. Place both your thumbs on the upper left edge
of the display, at the positions indicated in the
diagram above.
2. Place your fingers underneath the bezel, at the
positions indicated in the diagram above.
3. In a single firm motion, apply pressure to the
outer edge of the display with your thumbs and
pull the bezel towards you using your fingers.
The bezel should now come away from the display
easily.
Mounting
83
Summary of Contents for c125
Page 2: ......
Page 14: ...14 a Series c Series e Series ...
Page 41: ...13 GPS receiver 14 Thermal camera 15 Wireless connection Planning the installation 41 ...
Page 48: ...48 a Series c Series e Series ...
Page 80: ...80 a Series c Series e Series ...
Page 118: ...118 a Series c Series e Series ...
Page 184: ...184 a Series c Series e Series ...
Page 188: ...188 a Series c Series e Series ...
Page 206: ...206 a Series c Series e Series ...
Page 228: ...228 a Series c Series e Series ...
Page 290: ...290 a Series c Series e Series ...
Page 310: ...310 a Series c Series e Series ...
Page 340: ...340 a Series c Series e Series ...
Page 374: ...374 a Series c Series e Series ...
Page 422: ...422 a Series c Series e Series ...
Page 436: ...436 a Series c Series e Series ...
Page 462: ...462 a Series c Series e Series ...
Page 463: ......
Page 464: ...www raymarine com ...


