OSD menu options
Setup menus
The setup menus provide a range of tools and
settings to configure the thermal camera.
The menus can be accessed from any controller on
the system. The menus are overlaid onto the video
image.
Note:
The on-screen menus only appear on the
thermal camera image. They are not available
when viewing the visible light image (on dual
payload models).
Menus available
Enable Point
Mode
/
Disable
Point Mode
Selecting Enable Point mode will turn point
mode on, selecting disable point mode
will turn point mode off. Only applies to
models with mechanical stabilization.
Video Setup
This menu is used to set the video
configuration options.
Set Symbology
Settings associated with the status icons.
User
Programmable
Button
Configure the
USER
button on the JCU.
System Setup
Settings to optimize operation for this
particular system / installation.
About / Help
Helpful information and restore to factory
defaults setting.
Exit
Cancels on-screen menu.
Video setup menu
Menu item /
Description
Settings / Operation
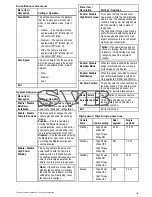
Set Thermal Color
Default
This saves the current color setting as
the default value.
Set Reverse Video
or
Set Video
Polarity
This toggles the infrared image
between white-hot (or red-hot if viewing
a color image) and black-hot.
Enable / Disable
Color Thermal
Video
Enable or disable the thermal color
palettes:
• Enabled – Greyscale, Red, Sepia,
Rainbow and Fusion palettes are
available.
• Disabled – Only Greyscale and Red
palettes are available.
Display Test
Pattern
Use the display test pattern when
setting up the color / contrast settings
for your particular display or monitor.
You can switch through the 4 test
patterns available.
Exit
Set symbology menu
Menu item /
Description
Settings / Operation
Enable / Disable
PC Icon
• Enabled – The PC icon is displayed
whenever a PC is detected on the
network.
• Disabled – The PC icon is not
displayed.
Enable / Disable
JCU Icon
• Enabled – The JCU icon is displayed
whenever a JCU is detected on the
network.
• Disabled – The JCU icon is not
displayed.
Display All Icons
Selecting this menu item enables all
available icons.
Display Minimal
Icons
Selecting this menu item reduces the
icon activity:
• Position, Zoom, Rearview, Pause,
Stabilization disabled and Point
Mode enabled icons are unaffected.
• Home and Scene icons are
displayed only momentarily.
• Other icons are not shown.
Hide All Icons
Selecting this option hides all icons
except for:
• Position indicator
• Rearview mode enabled
• Stabilization disabled
• Point mode enabled
Exit
Returns to the main menu.
364
a Series / c Series / e Series
Summary of Contents for c125
Page 2: ......
Page 14: ...14 a Series c Series e Series ...
Page 41: ...13 GPS receiver 14 Thermal camera 15 Wireless connection Planning the installation 41 ...
Page 48: ...48 a Series c Series e Series ...
Page 80: ...80 a Series c Series e Series ...
Page 118: ...118 a Series c Series e Series ...
Page 184: ...184 a Series c Series e Series ...
Page 188: ...188 a Series c Series e Series ...
Page 206: ...206 a Series c Series e Series ...
Page 228: ...228 a Series c Series e Series ...
Page 290: ...290 a Series c Series e Series ...
Page 310: ...310 a Series c Series e Series ...
Page 340: ...340 a Series c Series e Series ...
Page 374: ...374 a Series c Series e Series ...
Page 422: ...422 a Series c Series e Series ...
Page 436: ...436 a Series c Series e Series ...
Page 462: ...462 a Series c Series e Series ...
Page 463: ......
Page 464: ...www raymarine com ...


