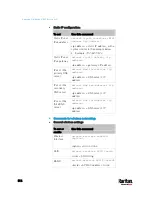


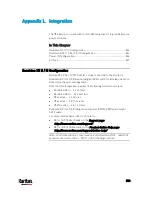


Appendix L: Integration
828
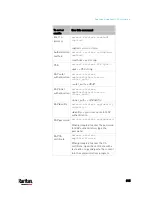
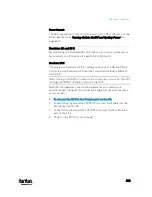
Diagram key
PX rack PDU
D2CIM-PWR
KX III
D2CIM-PWR to rack PDU connection
D2CIM-PWR to KX III target device port via Cat5 cable
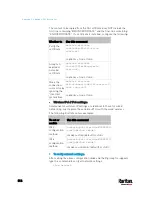
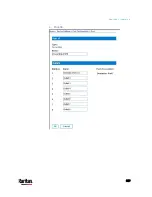
Naming the Rack PDU (Port Page for Power Strips)
Note: PX rack PDUs (power strips) can be named in the PX as well as in
the KX III.
Once a Raritan remote rack PDU is connected to the KX III, it will appear
on the Port Configuration page. Click on the power port name on that
page to access it. The Type and the Name fields are prepopulated.
Note: The (CIM) Type cannot be changed.
The following information is displayed for each outlet on the rack PDU:
[Outlet] Number, Name, and Port Association.
Use this page to name the rack PDU and its outlets. Names can be up to
32 alphanumeric characters and can include special characters.
Note: When a rack PDU is associated with a target server (port), the
outlet name is replaced by the target server name, even if you assigned
another name to the outlet.
To name the rack PDU and outlets:
Note: CommandCenter Secure Gateway does not recognize rack PDU
names containing spaces.
1.
Enter the Name of the rack PDU (if needed).
2.
Change the [Outlet] Name if desired. (Outlet names default to the
outlet #.)
Summary of Contents for PX3-3000 series
Page 5: ......
Page 18: ...Contents xviii Index 841...
Page 93: ...Chapter 4 Connecting External Equipment Optional 69...
Page 787: ...Appendix J RADIUS Configuration Illustration 763 Note If your PX3 uses PAP then select PAP...
Page 792: ...Appendix J RADIUS Configuration Illustration 768 14 The new attribute is added Click OK...
Page 793: ...Appendix J RADIUS Configuration Illustration 769 15 Click Next to continue...
Page 823: ...Appendix K Additional PX3 Information 799...