Chapter 6: Using the Web Interface
212
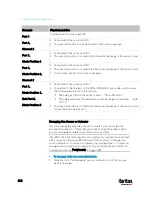
Example
Physical position
Port 1
Connected to the sensor port #1.
Port 1,
Channel 2
Connected to the sensor port #1.
The sensor/actuator is the 2nd channel of the sensor package.
Port 1,
Chain Position 4
Connected to the sensor port #1.
The sensor/actuator is located in the 4th sensor package of the sensor chain.
Port 1,
Chain Position 3,
Channel 2
Connected to the sensor port #1.
The sensor/actuator is located in the 3rd sensor package of the sensor chain.
It is the 2nd channel of the sensor package.
Port 1,
Chain Position 1,
Hub Port 2,
Chain Position 3
Connected to the sensor port #1.
Connected to the 2nd port of the DPX3-ENVHUB4 sensor hub, which shows
the following two pieces of information:
The hub's position in the sensor chain -- "Chain Position 1"
The hub port where this particular sensor package is connected -- "Hub
Port 2"
The sensor/actuator is located in the 3rd sensor package of the sensor chain
connected to the hub's port 2.
Managing One Sensor or Actuator
If you are managing only one sensor or actuator, you can assign the
desired ID number to it. Note that you cannot assign ID numbers when
you are managing multiple sensors/actuators at a time.
Tip: When the total of managed sensors/actuators reaches the maximum
(32), you cannot manage additional ones. The only way to manage any
sensor/actuator is to release or replace any managed ones. To replace a
managed one, assign an ID number to it by following this procedure. To
release any one, see
Peripherals
(on page 200).
To manage only one sensor/actuator:
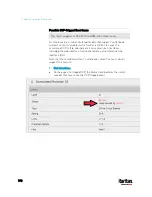
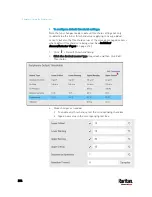
1.
From the list of "unmanaged" sensors/actuators, click the one you
want to manage.
Summary of Contents for PX3-3000 series
Page 5: ......
Page 18: ...Contents xviii Index 841...
Page 93: ...Chapter 4 Connecting External Equipment Optional 69...
Page 787: ...Appendix J RADIUS Configuration Illustration 763 Note If your PX3 uses PAP then select PAP...
Page 792: ...Appendix J RADIUS Configuration Illustration 768 14 The new attribute is added Click OK...
Page 793: ...Appendix J RADIUS Configuration Illustration 769 15 Click Next to continue...
Page 823: ...Appendix K Additional PX3 Information 799...

