


Chapter 2: Rackmount, Inlet and Outlet Connections
13
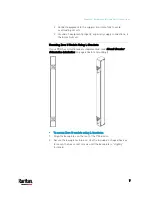
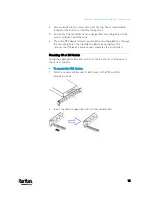
4.
Screw a button in the screw hole near the top. The recommended
torque for the button is 1.96 N·m (20 kgf·cm).
5.
Ensure that the two buttons can engage their mounting holes in the
rack or cabinet simultaneously.
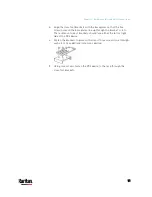
6.
Press the PX3 device forward, pushing the mounting buttons through
the mounting holes, then letting the device drop slightly. This
secures the PX3 device in place and completes the installation.
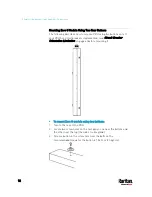
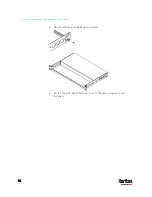
Mounting 1U or 2U Models
Using the appropriate brackets and tools, fasten the 1U or 2U device to
the rack or cabinet.
To mount the PX3 device:
1.
Attach a rackmount bracket to both sides of the PX3 with the
provided screws.
2.
Insert the cable-support bar into rackmount brackets.
Summary of Contents for PX3-3000 series
Page 5: ......
Page 18: ...Contents xviii Index 841...
Page 93: ...Chapter 4 Connecting External Equipment Optional 69...
Page 787: ...Appendix J RADIUS Configuration Illustration 763 Note If your PX3 uses PAP then select PAP...
Page 792: ...Appendix J RADIUS Configuration Illustration 768 14 The new attribute is added Click OK...
Page 793: ...Appendix J RADIUS Configuration Illustration 769 15 Click Next to continue...
Page 823: ...Appendix K Additional PX3 Information 799...


