


Chapter 6: Using the Web Interface
345
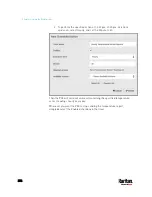
To use a different SMTP server, select the "Use custom settings"
radio button. The fields for customized SMTP settings appear. For
information on each field, see
Configuring SMTP Settings
(on page
5.
Select the webcam that is capturing the images you want sent in the
email.
6.
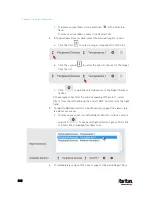
Adjust the values of the following:
Number of Snapshots - the number of snapshots to be taken
when the event occurs. For example, you can specify 10 images
be taken once the event triggers the action.
Snapshots per Mail - the number of snapshots to be sent at one
time in the email.
Time Before First Snapshot - the amount of time in seconds
between when the event is triggered and the webcam begins
taking snapshots.
Time Between Snapshots - the amount of time in seconds
between when each snapshot is taken.
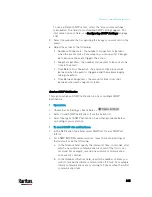
Send an SNMP Notification
This option sends an SNMP notification to one or multiple SNMP
destinations.
Operation:
1.
Choose Device Settings > Event Rules >
.
2.
Select "Send SNMP notification" from the Action list.
3.
Select the type of SNMP notification. See either procedure below
according to your selection.
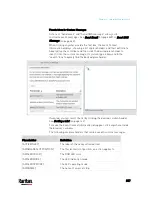
To send SNMP v2c notifications:
1.
In the Notification Type field, select SNMPv2c Trap or SNMPv2c
Inform.
2.
For SNMP INFORM communications, leave the resend settings at
their default or do the following:
a.
In the Timeout field, specify the interval of time, in seconds, after
which a new inform communication is resent if the first is not
received. For example, resend a new inform communication
once every 3 seconds.
b.
In the Number of Retries field, specify the number of times you
want to resend the inform communication if it fails. For example,
inform communications are resent up to 5 times when the initial
communication fails.
Summary of Contents for PX3-3000 series
Page 5: ......
Page 18: ...Contents xviii Index 841...
Page 93: ...Chapter 4 Connecting External Equipment Optional 69...
Page 787: ...Appendix J RADIUS Configuration Illustration 763 Note If your PX3 uses PAP then select PAP...
Page 792: ...Appendix J RADIUS Configuration Illustration 768 14 The new attribute is added Click OK...
Page 793: ...Appendix J RADIUS Configuration Illustration 769 15 Click Next to continue...
Page 823: ...Appendix K Additional PX3 Information 799...