6
In This Chapter
Circuit Breaker Orientation Limitation .......................................................6
Rack-Mounting the PDU..............................................................................6
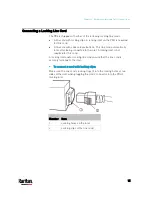
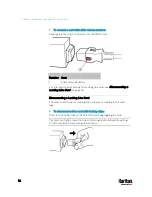
Connecting a Locking Line Cord ............................................................... 15
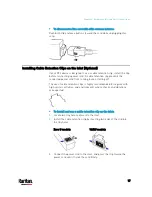
Installing Cable Retention Clips on the Inlet (Optional) ........................... 17
Installing Cable Retention Clips on Outlets (Optional) ............................. 18
Locking Outlets and Cords ........................................................................ 19
Circuit Breaker Orientation Limitation
Usually a PDU can be mounted in any orientation. However, when
mounting a PDU with circuit breakers, you must obey these rules:
Circuit breakers CANNOT face down. For example, do not
horizontally mount a Zero U PDU with circuit breakers on the ceiling.
If a rack is subject to shock in environments such as boats or
airplanes, the PDU CANNOT be mounted upside down. If installed
upside down, shock stress reduces the trip point by 10%.
Note: If normally the line cord is down, upside down means the line
cord is up.
Rack-Mounting the PDU
This chapter describes how to rack mount a PX3 device. Only the most
common rackmount method is displayed. Follow the procedure suitable
for your model.
Rackmount Safety Guidelines
In Raritan products which require rack mounting, follow these
precautions:
Operation temperature in a closed rack environment may be
greater than room temperature. Do not exceed the rated
maximum ambient temperature of the Power Distribution Units.
See
Specifications
(on page 656) in the User Guide.
Ensure sufficient airflow through the rack environment.
Mount equipment in the rack carefully to avoid uneven
mechanical loading.
Chapter 2
Rackmount, Inlet and Outlet
Connections
Summary of Contents for PX3-3000 series
Page 5: ......
Page 18: ...Contents xviii Index 841...
Page 93: ...Chapter 4 Connecting External Equipment Optional 69...
Page 787: ...Appendix J RADIUS Configuration Illustration 763 Note If your PX3 uses PAP then select PAP...
Page 792: ...Appendix J RADIUS Configuration Illustration 768 14 The new attribute is added Click OK...
Page 793: ...Appendix J RADIUS Configuration Illustration 769 15 Click Next to continue...
Page 823: ...Appendix K Additional PX3 Information 799...


