1
8
5
7
5
4
3
2
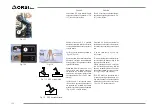
Fig. 80
9
11
10
Fig. 81
13
15
12
16
14
Fig. 82
1
2
Fig. 83
5.8.4 Comandi elettrico
EASY TRONIC
(mod. Agile 320 Vip, Agile 320 Vip LH,
Agile 390 Vip, Agile 390 Vip LH, Agile 450,
Agile 450 LH, Agile 470 P, Agile 470 P LH,
Agile 485 Safety, Agile 485 Safety LH, Al-
pinist 440 LH, Alpinist 500 P LH, Alpinist
500 P Visual LH, Cut 029 Revers, Cut
029 Revers LH, Cut 030 Revers, Cut 030
Revers LH, Leader 505, Leader 655, Per-
formance 455, Performance 510 P, Perfor-
mance 510 PV, Rio 450, Rio 500, Rio 580,
River Compact 355, River Compact 420,
Vigna 615 T)
ATTENZIONE
Invertire il senso di rotazione solamen
-
te a rotore fermo.
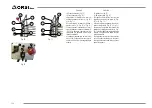
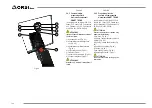
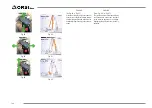
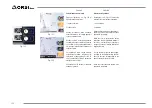
1) Azionamento bracci (“Fig. 80”);
2) Rotazione motore (“Fig. 80”);
3) Antinversione (“Fig. 80”);
4) Fungo di emergenza (“Fig. 80”);
5) Chiave accensione (“Fig. 80”);
6) Led verde: Linea (“Fig. 80”);
7) Led rosso: flottante (“Fig. 80”);
8) Sicurezza (“Fig. 80”);
ATTENZIONE
Attendere 30” prima di riaccendere il
rotore.
Comandi 3 pulsanti
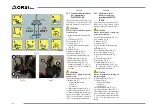
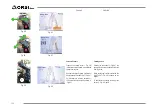
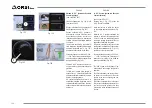
9) Apertura testata (“Fig. 81”);
10) Chiusura testata (“Fig. 81”);
11) Flottante (“Fig. 81”);
Comandi 5 pulsanti
12) Apertura testata (“Fig. 82”);
13) Chiusura testata (“Fig. 82”);
14) Rotazione braccio (“Fig. 82”);
15) Rotazione braccio (“Fig. 82”);
16) Flottante (“Fig. 82”);
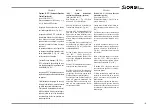
Collegare il filo marrone (1, “Fig. 83”) al
polo positivo e il filo blu (2, “Fig. 83” al polo
negativo della batteria.
5.8.4 Cloche c electric
EASY TRONIC
(mod. Agile 320 Vip, Agile 320 Vip LH,
Agile 390 Vip, Agile 390 Vip LH, Agile 450,
Agile 450 LH, Agile 470 P, Agile 470 P LH,
Agile 485 Safety, Agile 485 Safety LH, Alpi-
nist 440 LH, Alpinist 500 P LH, Alpinist 500
P Visual LH, Cut 029 Revers, Cut 029 Re-
vers LH, Cut 030 Revers, Cut 030 Revers
LH, Leader 505, Leader 655, Performance
455, Performance 510 P, Performance
510 PV, Rio 450, Rio 500, Rio 580, River
Compact 355, River Compact 420, Vigna
615 T)
ATTENTION
Reverse the direction of rotation only
when rotor is stationary.
1) Arm drive (“Fig. 80”);
2) Motor rotation (“Fig. 80”);
3) Anti-inversion (“Fig. 80”);
4) Emergency mushroom (“Fig. 80”);
5) Ignition key (“Fig. 80”);
6) Green LED: Line (“Fig. 80”);
7) Red LED: floating (“Fig. 80”);
8) Security (“Fig. 80”);
ATTENTION
Wait 30 minutes efore turning on the
rotor again.
Controls 3 buttons
9) Head opening (“Fig. 81”);
10) Head closure (“Fig. 81”);
11) Floating (“Fig. 81”);
Controls 5 buttons
12) Head opening (“Fig. 82”);
13) Head closure (“Fig. 82”);
14) Arm rotation (“Fig. 82”);
15) Arm rotation (“Fig. 82”);
16) Floating (“Fig. 82”).
Connect the brown wire (1, “Fig. 83”) to
the positive pole and the blue wire (2, “Fig.
83”) to the negative pole of the battery.
142
ITALIANO
ENGLISH
Summary of Contents for Acrobat 4.4
Page 5: ...River Compact 355 River Compact 420 Royal 550 Royal 660 Royal 650 T Royal 760 T Vigna 615 T 5...
Page 45: ...45 DEUTSCH ESPA OL FRAN AIS ITALIANO ENGLISH...
Page 57: ...57 DEUTSCH ESPA OL FRAN AIS ITALIANO ENGLISH...
Page 227: ...227...
Page 256: ...256...
Page 257: ...257...

