


CPC 100 V1.41
8 - 30
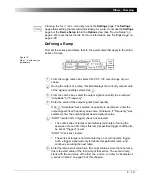
Pressing the S
E T T I N G S
menu key opens the
Settings
page. The
Settings
page allows setting the test cards individually. As a rule, do not use the
Settings
page but the
Device Setup
tab in the
Options
view (see ”Device Setup” on
page 2-33) to set the test cards. For more information, see ”Settings Page” on
page 2-28.
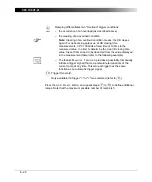
Starting a high-current output
– Set an amplification factor of “0”.
– Press I/O (test start/stop) to output the signal.
– With the measured input value in mind, enter the amplification factor now or
increase the factor slowly using the handwheel.
– Acknowledge this entry by pressing the handwheel or the E
N T E R
key to start
the output.
Depending on the measured input signal, setting the amplification factor
can result in unintentionally high currents. It is strongly recommended to
set the amplification factor to “0” before starting the test.
Summary of Contents for CPC 100
Page 12: ...CPC 100 V1 41 x...
Page 28: ...CPC 100 V1 41 1 16...
Page 90: ...CPC 100 V1 41 3 14...
Page 194: ...CPC 100 V1 41 6 30...
Page 250: ...CPC 100 V1 41 8 32 Figure 24 Settings of Amplifier test card for this example use case...
Page 258: ...CPC 100 V1 41 9 4...
Page 264: ...CPC 100 V1 41 10 6...
Page 282: ...CPC 100 V1 41 12 10 Figure 9 Saving tests with the CPC Editor...
Page 284: ...CPC 100 V1 41 12 12...
Page 312: ...CPC 100 V1 41 14 12...
Page 316: ...CPC 100 V1 41 15 4...
Page 350: ...CPC 100 V1 41 16 34...
Page 372: ...OMICRON Contact Addresses 22...


