CPC 100 V1.41
5 - 6
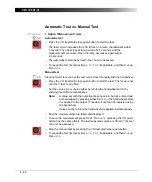
– Press the I/O (test start/stop) push-button to start the test. The focus is set
onto the "V test:" entry field.
– Set the value of your choice either by turning the handwheel and/or by
entering it with the numerical keys.
– Now the measurements are taken and displayed.
– To save the measurement press K
E E P
R
E S U L T S
(pressing the I/O push-
button has the same effect). The last measured values are "frozen", the test
can now be assessed.
– Stop the manual test by pressing the I/O (test start/stop).
– To repeat the test, first press B
A C K
T O
T
O P
, if applicable, and then C
L E A R
R
E S U L T S
.
2. Option "Manual input" selected
Manual test
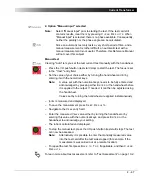
Clearing "Auto" lets you set the test voltage Vtest manually with the handwheel.
– Press the I/O (test start/stop) push-button to start the test. The focus is set
onto the "V test:" entry field.
– Set the value of your choice either by turning the handwheel and/or by
entering it with the numerical keys.
Note:
A value set with the numerical keys needs to be fully entered and
acknowledged by pressing either E
N T E R
or the handwheel before
it is applied to the output. If needed, it can then be adjusted using
the handwheel.
Values set by turning the handwheel are applied instantaneously.
Note:
Select "Manual input" prior to starting the test. If the test card still
contains results, clear them by pressing C
L E A R
R
E S U L T S
.
When "Manual input" is selected, there is no phase available.
Consequently, neither the polarity nor the phase angle can be
calculated.
Since an automatic test only lasts a very short period of time, and a
manual measurement is rather difficult, an automatic test with a
manual measurement is not useful. Therefore, this Reference Manual
will not cover this subject.
Note:
A value set with the numerical keys needs to be fully entered and
acknowledged by pressing either E
N T E R
or the handwheel before
it is applied to the output. If needed, it can then be adjusted using
the handwheel.
Values set by turning the handwheel are applied instantaneously.
Summary of Contents for CPC 100
Page 12: ...CPC 100 V1 41 x...
Page 28: ...CPC 100 V1 41 1 16...
Page 90: ...CPC 100 V1 41 3 14...
Page 194: ...CPC 100 V1 41 6 30...
Page 250: ...CPC 100 V1 41 8 32 Figure 24 Settings of Amplifier test card for this example use case...
Page 258: ...CPC 100 V1 41 9 4...
Page 264: ...CPC 100 V1 41 10 6...
Page 282: ...CPC 100 V1 41 12 10 Figure 9 Saving tests with the CPC Editor...
Page 284: ...CPC 100 V1 41 12 12...
Page 312: ...CPC 100 V1 41 14 12...
Page 316: ...CPC 100 V1 41 15 4...
Page 350: ...CPC 100 V1 41 16 34...
Page 372: ...OMICRON Contact Addresses 22...


