Printing Stamp, Page, Date/Time onto Copies (Stamp) (continued)
10-55
9.
Enter the desired print quantity from the control panel keypad.
See p. 3-10 for details on setting print quantity.
10.
Position original(s) FACE UP in the document feeder or FACE
DOWN on the platen glass.
For details on positioning originals, see p. 3-4 to p. 3-9.
11.
Press [
START
].
When the finisher / trimmer unit / paper exit tray capacity is
exceeded due to the print quantity selected, remove the copied sets
as they exit; otherwise, mishandled paper will occur.
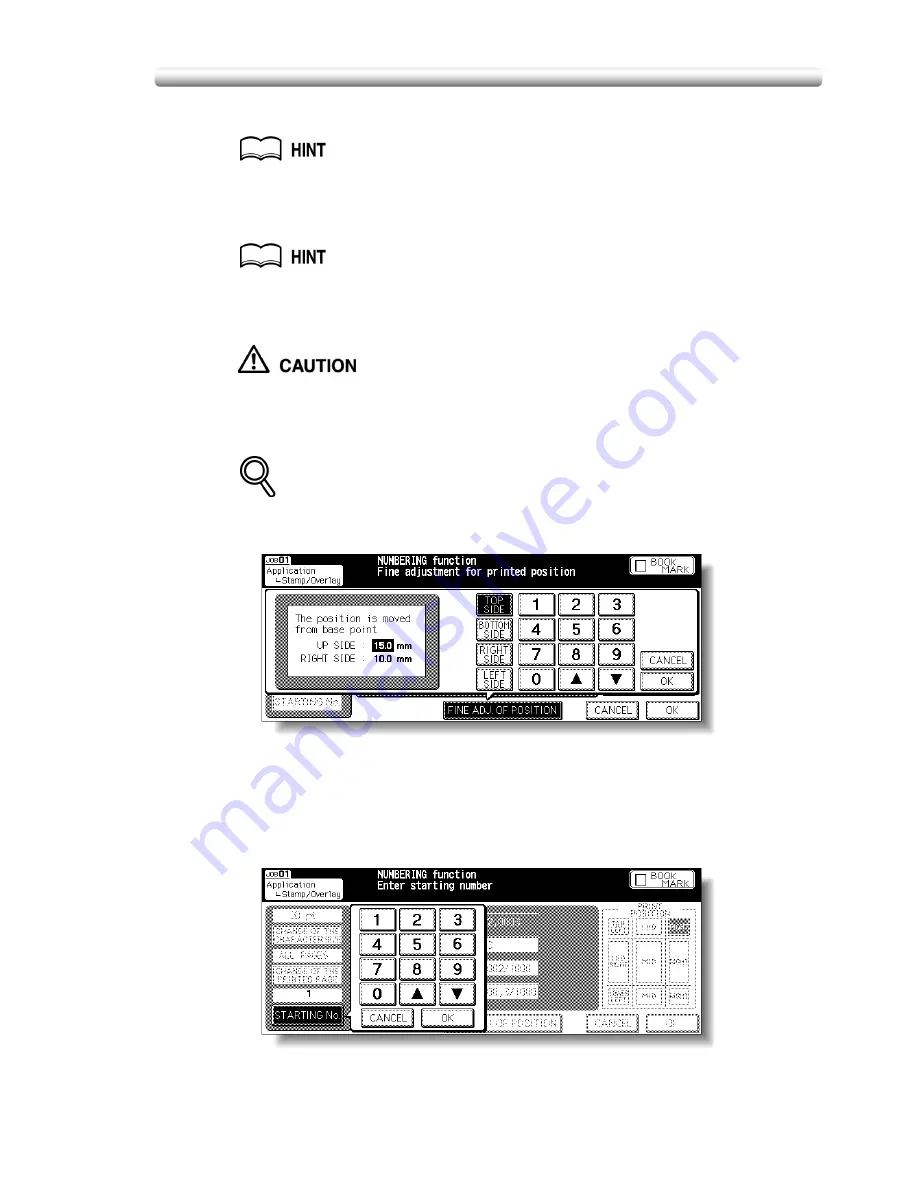
DETAILS: Fine Adjustment Setting Screen
When
FINE ADJ. OF POSITION
is touched, the Fine Adjustment Setting
Screen will be displayed.
Touch
TOP SIDE
,
BOTTOM SIDE
,
RIGHT SIDE
, or
LEFT SIDE
to specify the
direction, then use the touch screen keypad or up/down arrow key to enter the
desired amount, from 0 to 50 mm. Touch
OK
to return to the previous screen.
Starting No. Setting Screen: Available from SET NUMBERING or WATERMARK
NUMBERING
Use the touch screen keypad or up/down arrow key to enter the desired
starting number, then touch
OK
to return to the previous screen.
Summary of Contents for CF5001
Page 1: ...CF5001 User Manual ...
Page 17: ...Basic ...
Page 18: ......
Page 73: ...Positioning Originals continued 3 5 3 Adjust paper guides ...
Page 159: ...Advanced ...
Page 160: ......
Page 168: ...Colour Copy Quality continued 7 8 4 4 Blue ...
Page 170: ...Colour Copy Quality continued 7 10 4 4 Yellow 4 4 Black ...
Page 196: ......
Page 232: ......
Page 302: ......
Page 331: ...12 Section 12 Paper and Original Information Paper Information 12 2 Original Information 12 9 ...
Page 342: ......
Page 364: ......
Page 423: ...Index ...
Page 424: ......
Page 430: ......
Page 431: ...65AN97100 01 ...


