SECTION 3 - CHASSIS & TURNTABLE
3121160
3-11
k.
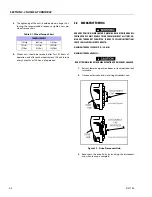
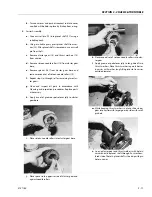
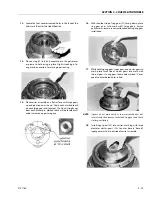
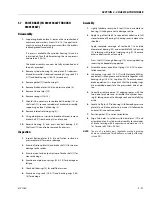
Turn cover over and push disconnect rod into cover
cap. Rod will be held in place by friction from o-ring.
2.
Carrier Assembly.
a.
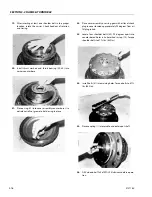
Drive anti-roll pin (19) into planet shaft (17) using a
suitable punch.
b.
Using a suitable press, press planet shaft from car-
rier (13). After planet shaft is removed, drive anti-roll
pin from shaft.
c.
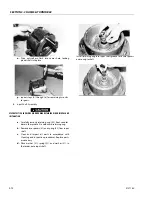
Remove cluster gear (18) and thrust washers (14)
from carriers.
d.
Remove sixteen needle rollers (15) from cluster gear
bore.
e.
Remove spacer (16) from cluster gear bore and
remove second set of sixteen needle rollers (15).
f.
Repeat steps (a) through (e) for remaining two clus-
ter gears.
g.
Clean and inspect all parts in accordance with
Cleaning and Inspection procedures. Replace parts
as necessary.
h.
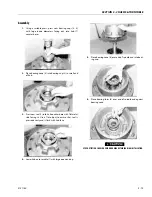
Apply a coat of grease or petroleum jelly to cluster
gear bore.
i.
Place sixteen needle rollers into cluster gear bore.
j.
Place spacer into opposite side of cluster gear and
against needle rollers.
k.
Place second set of sixteen needle rollers into clus-
ter gear.
l.
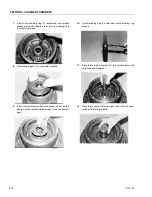
Apply grease or petroleum jelly to tang side of two
thrust washers. Place thrust washers against bosses
in carrier with washer tang fitting into slot in carrier
outside diameter.
m.
While keeping thrust washers in place, slide cluster
gear into carrier with larger gear on side with small
pin hole.
n.
Line up cluster gear and thrust washers with hole in
carrier and slide planet shaft through. Ensure cham-
fered side of hole in planet shaft is lined up with pin
hole in carrier.
Summary of Contents for 740AJ
Page 2: ......
Page 55: ...SECTION 3 CHASSIS TURNTABLE 3121160 3 3 This page left blank intentionally...
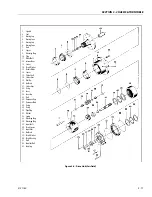
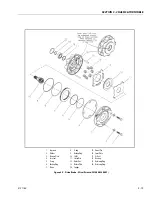
Page 116: ...SECTION 3 CHASSIS TURNTABLE 3 64 3121160 Figure 3 44 Swing Hub Prior to SN 0300074383...
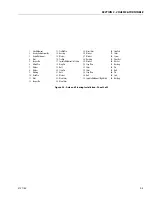
Page 203: ...SECTION 3 CHASSIS TURNTABLE 3121160 3 151 Figure 3 77 EFI Component Location...
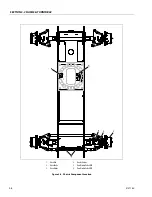
Page 206: ...SECTION 3 CHASSIS TURNTABLE 3 154 3121160 Figure 3 78 ECM EPM Identification ECM EPM...
Page 224: ...SECTION 3 CHASSIS TURNTABLE 3 172 3121160 Figure 3 83 Deutz EMR 2 Troubleshooting Flow Chart...
Page 228: ...SECTION 3 CHASSIS TURNTABLE 3 176 3121160 Figure 3 87 EMR 2 Engine Plug Pin Identification...
Page 229: ...SECTION 3 CHASSIS TURNTABLE 3121160 3 177 Figure 3 88 EMR 2 Vehicle Plug Pin Identification...
Page 230: ...SECTION 3 CHASSIS TURNTABLE 3 178 3121160 Figure 3 89 EMR2 Fault Codes Sheet 1 of 5...
Page 231: ...SECTION 3 CHASSIS TURNTABLE 3121160 3 179 Figure 3 90 EMR2 Fault Codes Sheet 2 of 5...
Page 232: ...SECTION 3 CHASSIS TURNTABLE 3 180 3121160 Figure 3 91 EMR2 Fault Codes Sheet 3 of 5...
Page 233: ...SECTION 3 CHASSIS TURNTABLE 3121160 3 181 Figure 3 92 EMR2 Fault Codes Sheet 4 of 5...
Page 234: ...SECTION 3 CHASSIS TURNTABLE 3 182 3121160 Figure 3 93 EMR2 Fault Codes Sheet 5 of 5...
Page 303: ...SECTION 4 BOOM PLATFORM 3121160 4 31 Figure 4 20 Rotator Assembly HELAC...
Page 460: ...SECTION 5 BASIC HYDRAULIC INFORMATION AND SCHEMATICS 5 116 3121160 NOTES...
Page 467: ...SECTION 6 JLG CONTROL SYSTEM 3121160 6 7 Figure 6 2 ADE Block Diagram...
Page 534: ...SECTION 6 JLG CONTROL SYSTEM 6 74 3121160 NOTES...
Page 580: ...SECTION 7 BASIC ELECTRICAL INFORMATION SCHEMATICS 7 46 3121160 NOTES...
Page 581: ......

