SECTION 5 - BASIC HYDRAULIC INFOR
M
ATION AND SCHE
M
ATICS
3121160
5-53
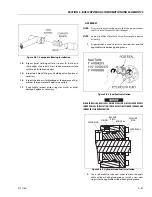
2.
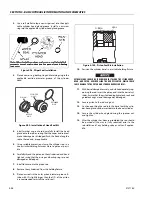
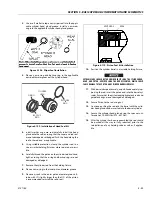
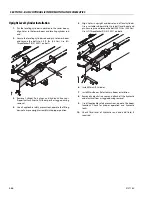
Use a soft mallet to tap a new wiper seal into the appli-
cable cylinder head gland groove. Install a new wear
ring into the applicable cylinder head gland groove.
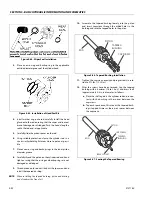
3.
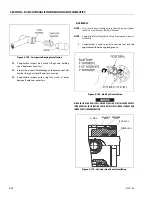
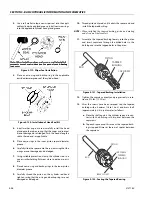
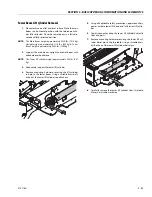
Place a new o-ring and backup ring in the applicable
outside diameter groove of the cylinder head.
4.
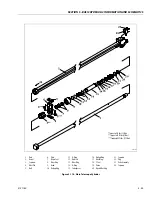
Install washer ring onto rod, carefully install the head
gland onto the rod, ensuring that the wiper and rod seal
are not damaged or dislodged. Push the head along the
rod to the rod end, as applicable.
5.
Using suitable protection, clamp the cylinder rod in a
vise or similar holding fixture as close to piston as possi-
ble.
6.
Carefully thread the piston on the cylinder rod and hand
tight, ensuring that the o-ring and backup rings are not
damaged or dislodged.
7.
Remove the cylinder rod from the holding fixture.
8.
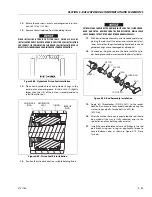
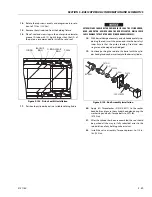
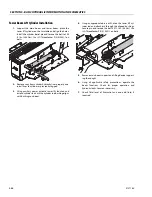
Place a new o-ring in the inner piston diameter groove.
9.
Place new seals in the outer piston diameter groove. (A
tube, with I.D. slightly larger than the O.D. of the piston
is recommended to install the solid seal.)
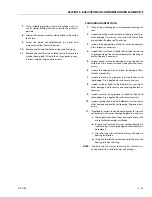
10.
Position the cylinder barrel in a suitable holding fixture.
EXTREME CARE SHOULD BE TAKEN WHEN INSTALLING THE CYLINDER ROD,
HEAD, AND PISTON. AVOID PULLING THE ROD OFF-CENTER, WHICH COULD
CAUSE DAMAGE TO THE PISTON AND CYLINDER BARREL SURFACES.
11.
With barrel clamped securely, and while adequately sup-
porting the rod, insert the piston end into the barrel cyl-
inder. Ensure that the piston loading hydrolock seals and
guidelock rings are not damaged or dislodged.
12.
Secure Piston to the rod using nut.
13.
Continue pushing the rod into the barrel until the cylin-
der head gland can be inserted into the barrel cylinder.
14.
Secure the cylinder head gland using the spanner nut.
Torque to 275-300 ft.lbs (373- 407 Nm).
15.
After the cylinder has been reassembled, the rod should
be pushed all the way in (fully retracted) prior to the
reinstallation of any holding valve or valves, if applica-
ble.
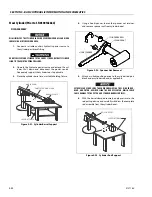
Figure 5-108. Wiper Seal Installation
CYLINDER
HEAD
RETAINER
RING
O-RING
BACKUP
RING
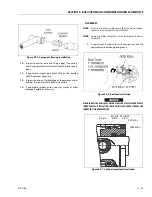
Figure 5-109. Installation of Head Seal Kit
Figure 5-110. Piston Seal Kit Installation
SPLIT SEAL
SEAL
Summary of Contents for 740AJ
Page 2: ......
Page 55: ...SECTION 3 CHASSIS TURNTABLE 3121160 3 3 This page left blank intentionally...
Page 116: ...SECTION 3 CHASSIS TURNTABLE 3 64 3121160 Figure 3 44 Swing Hub Prior to SN 0300074383...
Page 203: ...SECTION 3 CHASSIS TURNTABLE 3121160 3 151 Figure 3 77 EFI Component Location...
Page 206: ...SECTION 3 CHASSIS TURNTABLE 3 154 3121160 Figure 3 78 ECM EPM Identification ECM EPM...
Page 224: ...SECTION 3 CHASSIS TURNTABLE 3 172 3121160 Figure 3 83 Deutz EMR 2 Troubleshooting Flow Chart...
Page 228: ...SECTION 3 CHASSIS TURNTABLE 3 176 3121160 Figure 3 87 EMR 2 Engine Plug Pin Identification...
Page 229: ...SECTION 3 CHASSIS TURNTABLE 3121160 3 177 Figure 3 88 EMR 2 Vehicle Plug Pin Identification...
Page 230: ...SECTION 3 CHASSIS TURNTABLE 3 178 3121160 Figure 3 89 EMR2 Fault Codes Sheet 1 of 5...
Page 231: ...SECTION 3 CHASSIS TURNTABLE 3121160 3 179 Figure 3 90 EMR2 Fault Codes Sheet 2 of 5...
Page 232: ...SECTION 3 CHASSIS TURNTABLE 3 180 3121160 Figure 3 91 EMR2 Fault Codes Sheet 3 of 5...
Page 233: ...SECTION 3 CHASSIS TURNTABLE 3121160 3 181 Figure 3 92 EMR2 Fault Codes Sheet 4 of 5...
Page 234: ...SECTION 3 CHASSIS TURNTABLE 3 182 3121160 Figure 3 93 EMR2 Fault Codes Sheet 5 of 5...
Page 303: ...SECTION 4 BOOM PLATFORM 3121160 4 31 Figure 4 20 Rotator Assembly HELAC...
Page 460: ...SECTION 5 BASIC HYDRAULIC INFORMATION AND SCHEMATICS 5 116 3121160 NOTES...
Page 467: ...SECTION 6 JLG CONTROL SYSTEM 3121160 6 7 Figure 6 2 ADE Block Diagram...
Page 534: ...SECTION 6 JLG CONTROL SYSTEM 6 74 3121160 NOTES...
Page 580: ...SECTION 7 BASIC ELECTRICAL INFORMATION SCHEMATICS 7 46 3121160 NOTES...
Page 581: ......

