SECTION 3 - CHASSIS & TURNTABLE
3-98
3121160
Motor and Brake Assembly
NOTE:
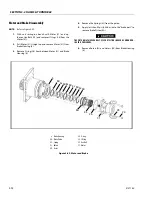
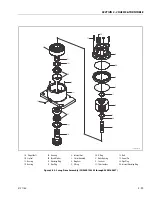
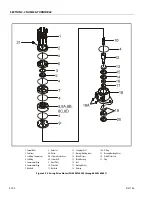
Refer to Figure 3-49.
1.
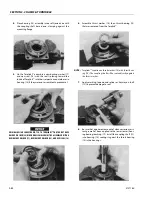
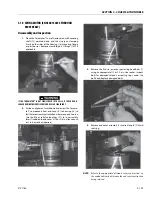
Alternate Stators (8K) (O.D. lobes) with Rotors (8J) (I.D.
splines) into bore of Brake Housing (6). starting with a
Stator (8K) and ending with a Stator (8K).
2.
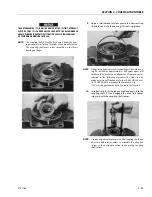
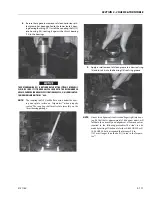
Grease the O-rings (8F) & (8D) and Backup rings (8H) &
(8E). and place them in their respective grooves in the
Brake Housing (6) and Piston (8A). Make sure the Backup
rings are correctly positioned.
3.
Apply grease sparingly to the Piston O.D. (8A) and the
bore of the Brake Housing (6). Insert Piston (8A) into
Brake Housing (6) be sure not to damage the O-rings.
4.
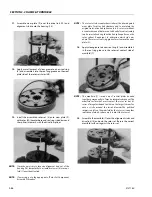
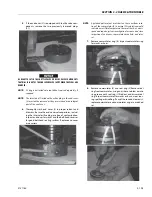
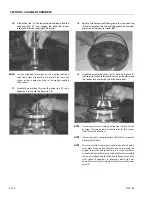
Install Springs (8L) into the spring pockets of the Piston
(8A).
5.
Test the brake and perform the roll test. Remove the
Brake Test Plate.
6.
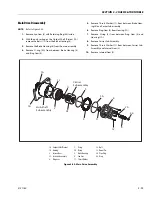
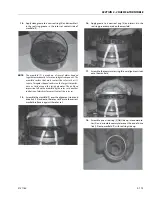
Install the O-ring (26) onto the pilot of the Motor (31),
use grease to keep the O-ring in place.
7.
Place Motor (31) into Brake pilot, and line up holes.
8.
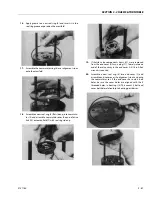
Assemble Lift Lugs (28) onto Hex Bolts (29). Assemble
Hex Bolts (29) with Lift Lugs (28) through the Motor (31)
and Brake (6) against Motor flange.
Torque to 80-100 ft. lbs. (108-136 Nm).
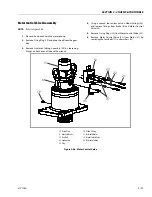
Motor Control Valve Assembly
NOTE:
1.
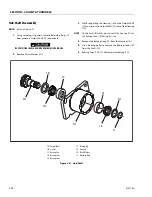
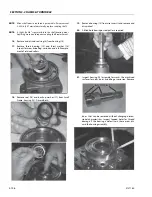
Lay assembly down with motor ports facing up. Remove
the two plastic plugs in the motor ports, being careful
not to lose the O-ring in each port. Assemble the Motor
control Valve (32) onto the Motor (31) with Bolt (21) and
Lock Washers (22). Torque Bolts (21) to 23-27 ft. lbs. (31-
37 Nm).
NOTE:
Be sure to align the holes in the control valve with the
motor ports.
2.
Install Elbow Fittings (30) into Brake (6). Do not tighten
jam nuts.
3.
Install Elbow Fittings (30) into Motor Control Valve (32).
Do not tighten jam nuts.
4.
Assemble Tube (35) into Elbow Fittings (30) and torque
to 13-15 ft.lbs (18-20 Nm). Tighten the jam nuts on the
Elbow Fittings (30) and torque to 13-15 ft. lbs.
(18-20 Nm).
5.
Install one O-ring Plug (23) into Motor Control Valve (32)
and torque to 30-31 ft. lbs. (41-42 Nm).
6.
Pressure test brake, tube and control valve connections
by applying 3000 psi (207 bar) pressure to the open port
in the Motor Control Valve (32) and holding for 1 minute.
Check for leaks al the control-valve-motor interface and
the tube connections. Release pressure and install the
remaining O-ring Plug (23) into Motor Control Valve (32)
and torque to 30-31 ft. lbs. (41-42 Nm).
Summary of Contents for 740AJ
Page 2: ......
Page 55: ...SECTION 3 CHASSIS TURNTABLE 3121160 3 3 This page left blank intentionally...
Page 116: ...SECTION 3 CHASSIS TURNTABLE 3 64 3121160 Figure 3 44 Swing Hub Prior to SN 0300074383...
Page 203: ...SECTION 3 CHASSIS TURNTABLE 3121160 3 151 Figure 3 77 EFI Component Location...
Page 206: ...SECTION 3 CHASSIS TURNTABLE 3 154 3121160 Figure 3 78 ECM EPM Identification ECM EPM...
Page 224: ...SECTION 3 CHASSIS TURNTABLE 3 172 3121160 Figure 3 83 Deutz EMR 2 Troubleshooting Flow Chart...
Page 228: ...SECTION 3 CHASSIS TURNTABLE 3 176 3121160 Figure 3 87 EMR 2 Engine Plug Pin Identification...
Page 229: ...SECTION 3 CHASSIS TURNTABLE 3121160 3 177 Figure 3 88 EMR 2 Vehicle Plug Pin Identification...
Page 230: ...SECTION 3 CHASSIS TURNTABLE 3 178 3121160 Figure 3 89 EMR2 Fault Codes Sheet 1 of 5...
Page 231: ...SECTION 3 CHASSIS TURNTABLE 3121160 3 179 Figure 3 90 EMR2 Fault Codes Sheet 2 of 5...
Page 232: ...SECTION 3 CHASSIS TURNTABLE 3 180 3121160 Figure 3 91 EMR2 Fault Codes Sheet 3 of 5...
Page 233: ...SECTION 3 CHASSIS TURNTABLE 3121160 3 181 Figure 3 92 EMR2 Fault Codes Sheet 4 of 5...
Page 234: ...SECTION 3 CHASSIS TURNTABLE 3 182 3121160 Figure 3 93 EMR2 Fault Codes Sheet 5 of 5...
Page 303: ...SECTION 4 BOOM PLATFORM 3121160 4 31 Figure 4 20 Rotator Assembly HELAC...
Page 460: ...SECTION 5 BASIC HYDRAULIC INFORMATION AND SCHEMATICS 5 116 3121160 NOTES...
Page 467: ...SECTION 6 JLG CONTROL SYSTEM 3121160 6 7 Figure 6 2 ADE Block Diagram...
Page 534: ...SECTION 6 JLG CONTROL SYSTEM 6 74 3121160 NOTES...
Page 580: ...SECTION 7 BASIC ELECTRICAL INFORMATION SCHEMATICS 7 46 3121160 NOTES...
Page 581: ......

