This effect works with 8-bpc color.
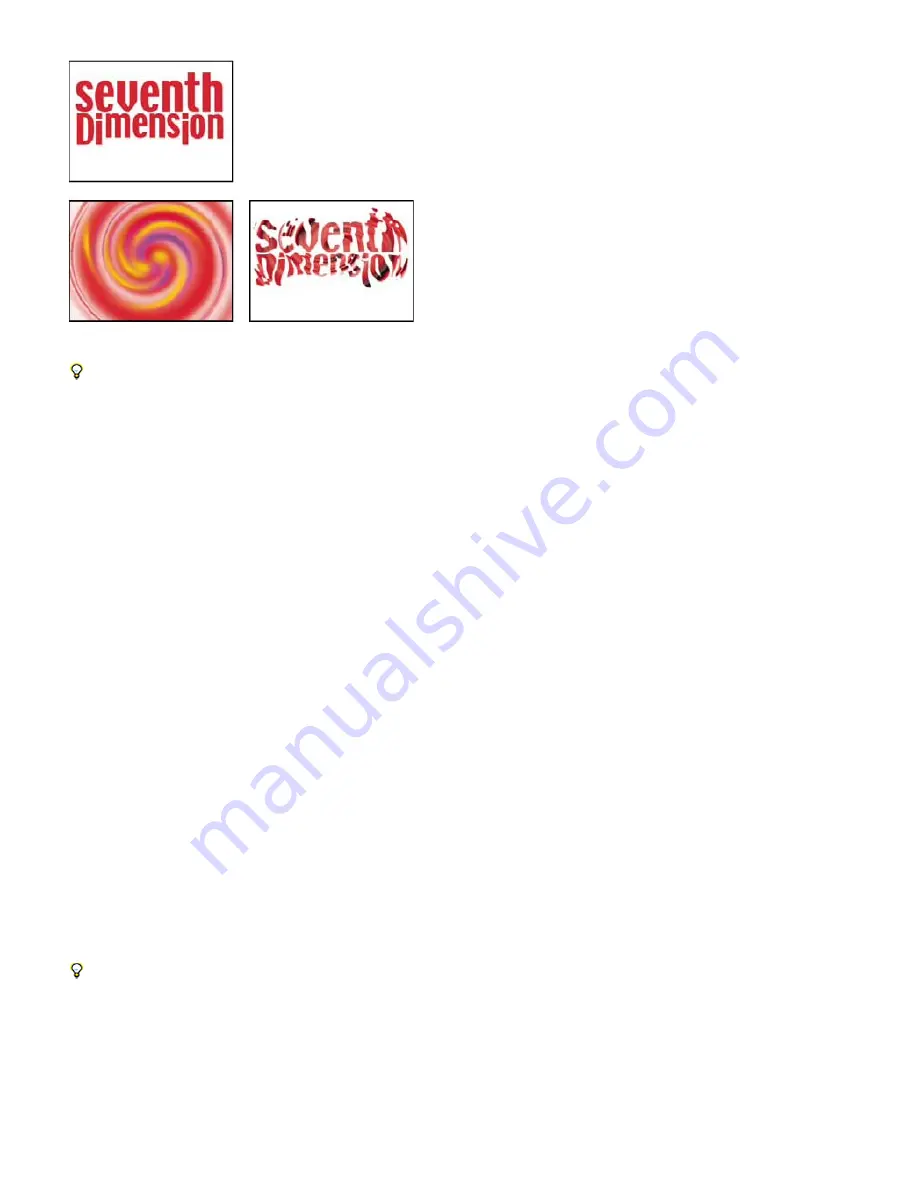
Original (upper-left), and with Bottom set to the text layer (lower-left) and Water Surface set to the whirl layer with Surface Opacity set to 0%
(lower-right)
To get the most realistic results from Caustics, render the Bottom layer separately, with Render Caustics enabled and Surface Opacity at 0.
Then precompose, and use the resulting layer as the Bottom layer for another Caustics effect with Render Caustics off. With this process you
can offset, scale, or otherwise manipulate the Bottom layer in the precomposed composition, and thus simulate lighting that doesn’t come from
straight overhead.
Bottom controls
The Bottom controls specify the appearance of the bottom of the body of water:
Bottom
Specifies the layer at the bottom of the body of water. This layer is the image that is distorted by the effect, unless Surface Opacity is
100%.
Scaling
Makes the bottom layer larger or smaller. If the edges of the bottom layer show, because of the refraction of the light through the waves,
scale up the bottom layer. Scaling down is useful for tiling a layer to make a complex pattern.
Repeat Mode
Specifies how a scaled-down bottom layer is tiled. Once uses only one tile, basically turning tiling off. Tiles uses the traditional tiling
method of abutting the right edge of one bottom layer tile to the left edge of another bottom layer tile. This option works well if the bottom layer
contains a repeating pattern, like a logo, that needs to read a certain way. Reflected abuts each edge of a bottom layer tile to a mirrored copy of
the tile. This option can eliminate a hard edge where the two tiles meet.
If Layer Size Differs
Specifies how to handle the bottom layer when it is smaller than the composition.
Blur
Specifies the amount of blur applied to the bottom layer. To make the bottom sharp, set this control to 0. Higher values make the bottom
appear increasingly blurry, especially where the water is deeper.
Water controls
Water Surface
Specifies the layer to use as the surface of the water. Caustics uses the luminance of this layer as a height map for generating a
3D water surface. Light pixels are high, and dark pixels are low. You can use a layer created by using the Wave World or Radio Waves effect;
precompose the layer before using it with Caustics.
Wave Height
Adjusts the relative height of the waves. Higher values make the waves steeper and the surface displacement more dramatic. Lower
values smooth the Caustics surface.
Smoothing
Specifies the roundness of the waves by blurring the water surface layer. High values eliminate detail. Low values show imperfections
in the water surface layer.
Water Depth
Specifies depth. A small disturbance in shallow water moderately distorts the view of the bottom, but the same disturbance in deep
water distorts the view greatly.
Refractive Index
Affects the way the light bends as it passes through the liquid. A value of 1 does not distort the bottom. The default value of 1.2
accurately simulates water. To add distortion, increase the value.
Surface Color
Specifies the color of the water.
Surface Opacity
Controls how much of the bottom layer is visible through the water. If you want a milky effect, increase the Surface Opacity and
Light Intensity values; a value of 0 results in a clear liquid.
Set Surface Opacity to 1.0 to perfectly reflect a sky later. With a suitable texture map, you can use this technique to create the effect of liquid
mercury.
Caustics Strength
Displays the caustics, the concentrations of light on the bottom surface, caused by the lensing effect of the water waves. This
control changes the way everything looks: The dark spots of the waves get much darker, and the light spots get much lighter. If you don’t set a
value for this control, the effect distorts the bottom layer when the waves pass over it, but it doesn’t render the lighting effect.
Sky controls
Sky
Specifies the layer above the water. Scaling makes the sky layer larger or smaller. If the edges of the sky layer show, scale the layer up.
Scaling down is useful for tiling a layer to make a complex pattern.
Summary of Contents for 12040118 - After Effects Standard
Page 1: ...ADOBE AFTER EFFECTS Help and tutorials...
Page 2: ...What s New...
Page 21: ......
Page 23: ...Legal Notices Online Privacy Policy...
Page 27: ...Workspace and workflow...
Page 29: ...Legal Notices Online Privacy Policy...
Page 36: ......
Page 42: ...Importing from Adobe After Effects Legal Notices Online Privacy Policy...
Page 76: ...Projects and compositions...
Page 92: ...Importing footage...
Page 97: ...Legal Notices Online Privacy Policy...
Page 102: ......
Page 128: ...Layers and properties...
Page 140: ......
Page 171: ...Views and previews...
Page 185: ...Animation and Keyframes...
Page 206: ...Legal Notices Online Privacy Policy...
Page 241: ...Color...
Page 257: ...Legal Notices Online Privacy Policy...
Page 258: ...Drawing painting and paths...
Page 293: ...Text...
Page 314: ......
Page 325: ...Transparency and compositing...
Page 336: ...Legal Notices Online Privacy Policy...
Page 345: ...Effects and animation presets...
Page 380: ...Legal Notices Online Privacy Policy...
Page 513: ...Legal Notices Online Privacy Policy...
Page 514: ...Markers...
Page 518: ......
Page 524: ...Memory storage performance...
Page 544: ...Expressions and automation...
Page 560: ...Legal Notices Online Privacy Policy...
Page 582: ...Rendering and Exporting...
Page 601: ...Legal Notices Online Privacy Policy...
Page 603: ......


