To the top
Color & Alpha
Specifies that the effect fills the RGB and alpha channels of the fill area with the new color.
Straight Color
Specifies that the effect fills only the RGB channels of the fill area with the new color.
Transparency
Specifies that the effect fills only the transparent areas near the fill point. You must set a fill point in a transparent area for
this option to work.
Opacity
Specifies that the effect fills only the opaque areas near the fill point. You must set a fill point in an opaque area for this option to
work.
Alpha Channel
Specifies that the effect fills either the opaque or transparent areas in the whole image, depending upon the alpha
channel value at the point you set the fill point.
Tolerance
How far the color values of a pixel can be from the Fill Point color values and still match. Higher values expand the range of pixels that
the effect fills.
View Threshold
Shows what pixels match—that is, which pixels are within the Tolerance value of the color values of the Fill Point pixel. This
option is especially useful in tracking leaks. If a small gap exists, the color can flow over and fill areas not intended to be filled.
Stroke
How the effect treats the edges of the filled area:
Antialias
Anti-aliases the edges of the filled area.
Feather
Creates a feathered edge for the filled area. Feather Softness values create a more gradually disappearing edge.
Spread
Expands the area of the fill color. The Spread Radius value indicates the number of pixels the fill color extends beyond the edge
of the fill area.
Choke
Contracts the area of the fill color. The Spread Radius value indicates the number of pixels the fill color shrinks from the edge of
the fill area.
Stroke
Confines the fill to only the border of the selected area. The Stroke Width value indicates the width of the stroke, in pixels.
Color
The fill color.
Opacity
Opacity of the filled area.
Blending Mode
The blending mode to use to composite the result of the effect on top of the original layer. All of these blending modes operate
like the blending modes in the Timeline panel, except for Fill Only. Use Fill Only to show only the fill.
Note: If you apply multiple instances of Paint Bucket to a layer, be sure not to set more than one to use the Fill Only blending mode. If you set
more than one instance to use this blending mode, only the first application of the effect is shown.
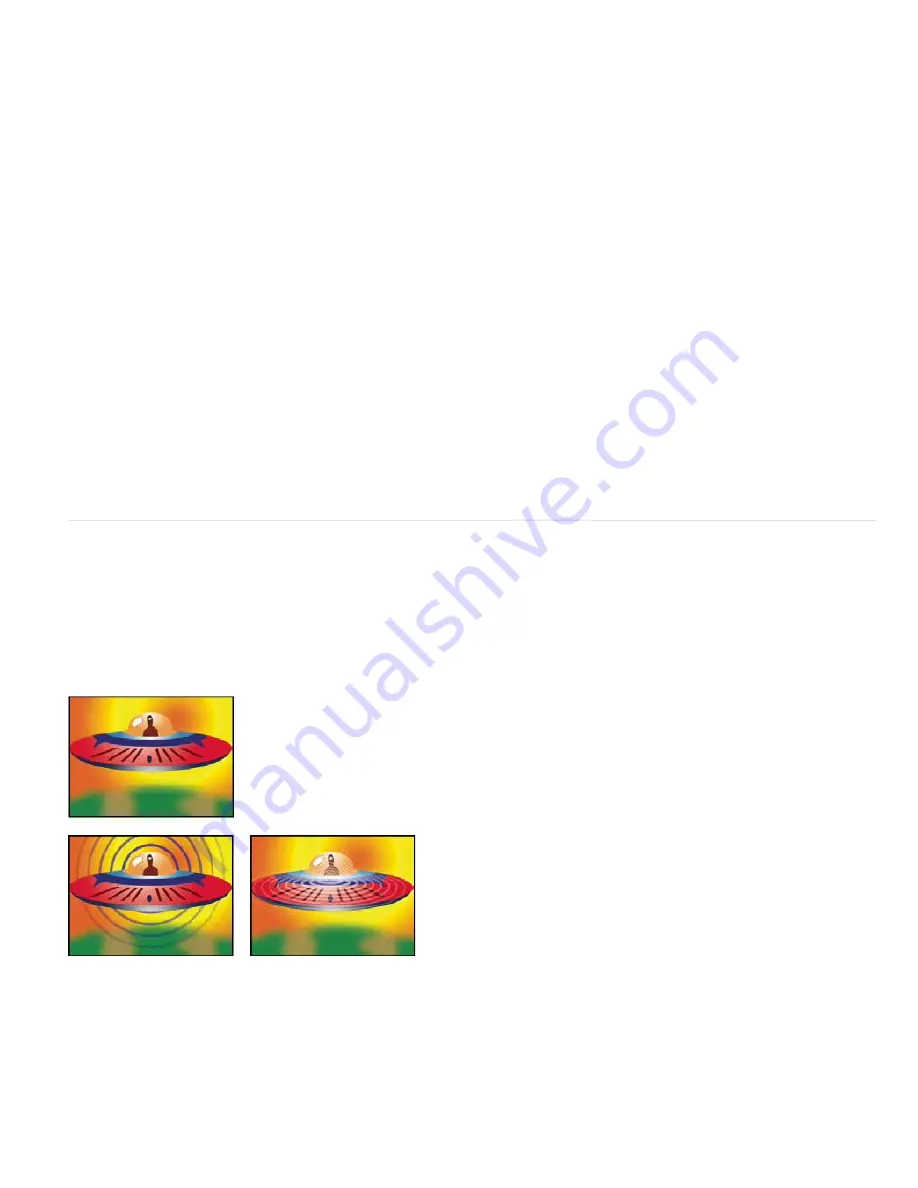
Radio Waves effect
The Radio Waves effect creates radiating waves from a stationary or animated effect control point. You can use this effect to generate pond
ripples, sound waves, or intricate geometric patterns. Use the Reflection control to make the shapes bounce off the sides of the layer. You can
also use Radio Waves to create realistic wave displacement maps that work well with the Caustics effect.
Satya Meka provides a video tutorial and some tips for using the Radio Waves effect on
his website
. Satya demonstrates animation of the mask
that the radio wave shape is based on. He also demonstrates that you can get smooth, organic contours (rather than discrete waves) by using a
very high value for Frequency, together with carefully chosen Fade-in Time and Fade-out Time settings.
This effect works with 8-bpc color.
Polygon wave type with square stroke profile (lower-left), and Image Contour wave type with Sine stroke profile (lower-right)
Producer Point
The point from which the waves appear.
Parameters Are Set At
Specifies whether parameters can be animated for individual waves. Birth specifies that each wave maintains the same
parameter settings over time. Each Frame specifies that the waves change as the parameters change. For example, if you create a star wave with
an animated rotation property, select Birth to offset each star from the previous one to create a twisting tunnel, or select Each Frame to make all
the stars rotate in unison as the rotation property changes.
Render Quality
Controls the quality of the output. Radio Waves creates smooth, anti-aliased shapes by rendering high-resolution versions of the
shapes and then scaling them down by oversampling. For example, to create a 100x100-pixel image, it may generate a 400x400-pixel image and
then scale it down using 4x oversampling. Oversampling provides high-quality results but results in long render times. This option works only with
Best quality mode.
Summary of Contents for 12040118 - After Effects Standard
Page 1: ...ADOBE AFTER EFFECTS Help and tutorials...
Page 2: ...What s New...
Page 21: ......
Page 23: ...Legal Notices Online Privacy Policy...
Page 27: ...Workspace and workflow...
Page 29: ...Legal Notices Online Privacy Policy...
Page 36: ......
Page 42: ...Importing from Adobe After Effects Legal Notices Online Privacy Policy...
Page 76: ...Projects and compositions...
Page 92: ...Importing footage...
Page 97: ...Legal Notices Online Privacy Policy...
Page 102: ......
Page 128: ...Layers and properties...
Page 140: ......
Page 171: ...Views and previews...
Page 185: ...Animation and Keyframes...
Page 206: ...Legal Notices Online Privacy Policy...
Page 241: ...Color...
Page 257: ...Legal Notices Online Privacy Policy...
Page 258: ...Drawing painting and paths...
Page 293: ...Text...
Page 314: ......
Page 325: ...Transparency and compositing...
Page 336: ...Legal Notices Online Privacy Policy...
Page 345: ...Effects and animation presets...
Page 380: ...Legal Notices Online Privacy Policy...
Page 513: ...Legal Notices Online Privacy Policy...
Page 514: ...Markers...
Page 518: ......
Page 524: ...Memory storage performance...
Page 544: ...Expressions and automation...
Page 560: ...Legal Notices Online Privacy Policy...
Page 582: ...Rendering and Exporting...
Page 601: ...Legal Notices Online Privacy Policy...
Page 603: ......


