Note:
2. Click where you want to place the next vertex. To create a curved segment, drag the direction line handle to create the curve that you want.
To reposition a vertex after you’ve clicked to place it but before you’ve released the mouse button, hold the spacebar while dragging.
The last vertex that you add appears as a solid square, indicating that it is selected. Previously added vertices become hollow, and
deselected, as you add more vertices.
3. Repeat step 2 until you are ready to complete the path.
4. Complete the path by doing one of the following:
To close the path, place the pointer over the first vertex and, when a closed circle icon appears next to the pointer
, click the vertex.
You can also close a path by double-clicking the last vertex or choosing Layer > Mask And Shape Path > Closed.
To leave the path open, activate a different tool, or press F2 to deselect the path.
Draw straight manual Bezier path segments with the Pen tool
The simplest path that you can draw with the Pen tool is a straight line, made by clicking with the Pen tool to create two vertices. By continuing to
click, you create a path made of straight line segments connected by corner points.
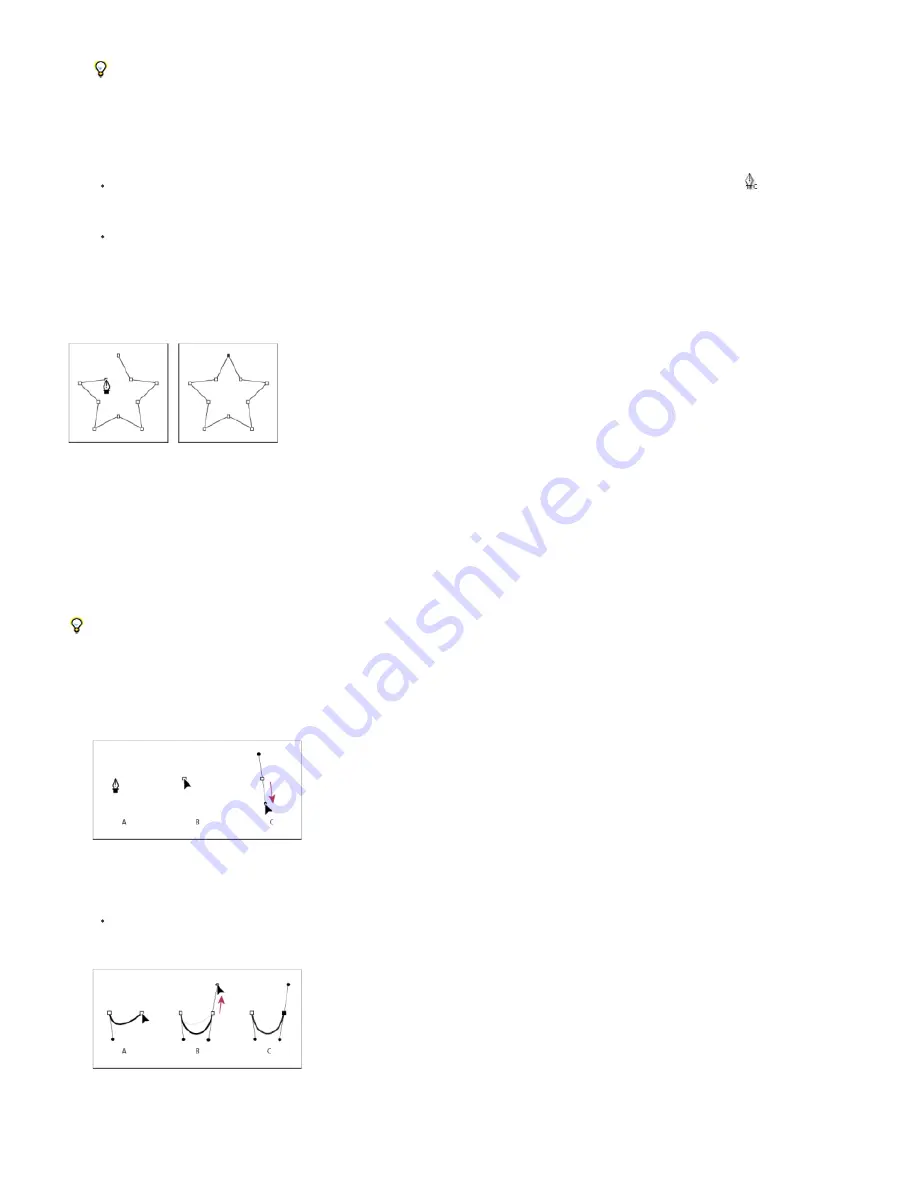
Clicking with Pen tool creates straight segments.
1. Place the Pen tool where you want the straight segment to begin, and click to place a vertex. (Do not drag.)
2. Click again where you want the segment to end. (Shift-click to constrain the angle between segments at the corner point to a whole multiple
of 45°.)
3. Continue clicking to set vertices for additional straight segments.
Draw curved manual Bezier path segments with the Pen tool
You create a curved path segment by dragging direction lines. The length and direction of the direction lines determine the shape of the curve.
Shift-drag to constrain the angle of the direction lines to whole multiples of 45°. Alt-drag (Windows) or Option-drag (Mac OS) to modify only the
outgoing direction line.
1. Place the Pen tool where you want the curve to begin, and hold the mouse button down.
A vertex appears, and the Pen tool pointer changes to an arrowhead.
2. Drag to modify the length and direction of both direction lines for a vertex, and then release the mouse button.
Drawing the first vertex in a curved path
A. Placing the Pen tool B. Starting to drag (mouse button pressed) C. Dragging to extend direction lines
3. Place the Pen tool where you want the curved segment to end, and do one of the following:
To create a C-shaped curve, drag in the direction opposite from the direction that you dragged the previous direction line, and then
release the mouse button.
Drawing the second vertex in a curved path
A. Starting to drag B. Dragging away from previous direction line, creating a C curve C. Result after releasing mouse button
Summary of Contents for 12040118 - After Effects Standard
Page 1: ...ADOBE AFTER EFFECTS Help and tutorials...
Page 2: ...What s New...
Page 21: ......
Page 23: ...Legal Notices Online Privacy Policy...
Page 27: ...Workspace and workflow...
Page 29: ...Legal Notices Online Privacy Policy...
Page 36: ......
Page 42: ...Importing from Adobe After Effects Legal Notices Online Privacy Policy...
Page 76: ...Projects and compositions...
Page 92: ...Importing footage...
Page 97: ...Legal Notices Online Privacy Policy...
Page 102: ......
Page 128: ...Layers and properties...
Page 140: ......
Page 171: ...Views and previews...
Page 185: ...Animation and Keyframes...
Page 206: ...Legal Notices Online Privacy Policy...
Page 241: ...Color...
Page 257: ...Legal Notices Online Privacy Policy...
Page 258: ...Drawing painting and paths...
Page 293: ...Text...
Page 314: ......
Page 325: ...Transparency and compositing...
Page 336: ...Legal Notices Online Privacy Policy...
Page 345: ...Effects and animation presets...
Page 380: ...Legal Notices Online Privacy Policy...
Page 513: ...Legal Notices Online Privacy Policy...
Page 514: ...Markers...
Page 518: ......
Page 524: ...Memory storage performance...
Page 544: ...Expressions and automation...
Page 560: ...Legal Notices Online Privacy Policy...
Page 582: ...Rendering and Exporting...
Page 601: ...Legal Notices Online Privacy Policy...
Page 603: ......


