GUI Reference
R&S
®
ZNA
363
User Manual 1178.6462.02 ─ 12
When you switch to a different
, existing limit lines are preserved. With a
different sweep variable, however, the limit lines cannot be
and the corre-
cannot be executed.
If you want to define limit lines for the new sweep variable, you first have to
existing limit lines for the old sweep variable.
Controls on the Define Limit Lines Dialog
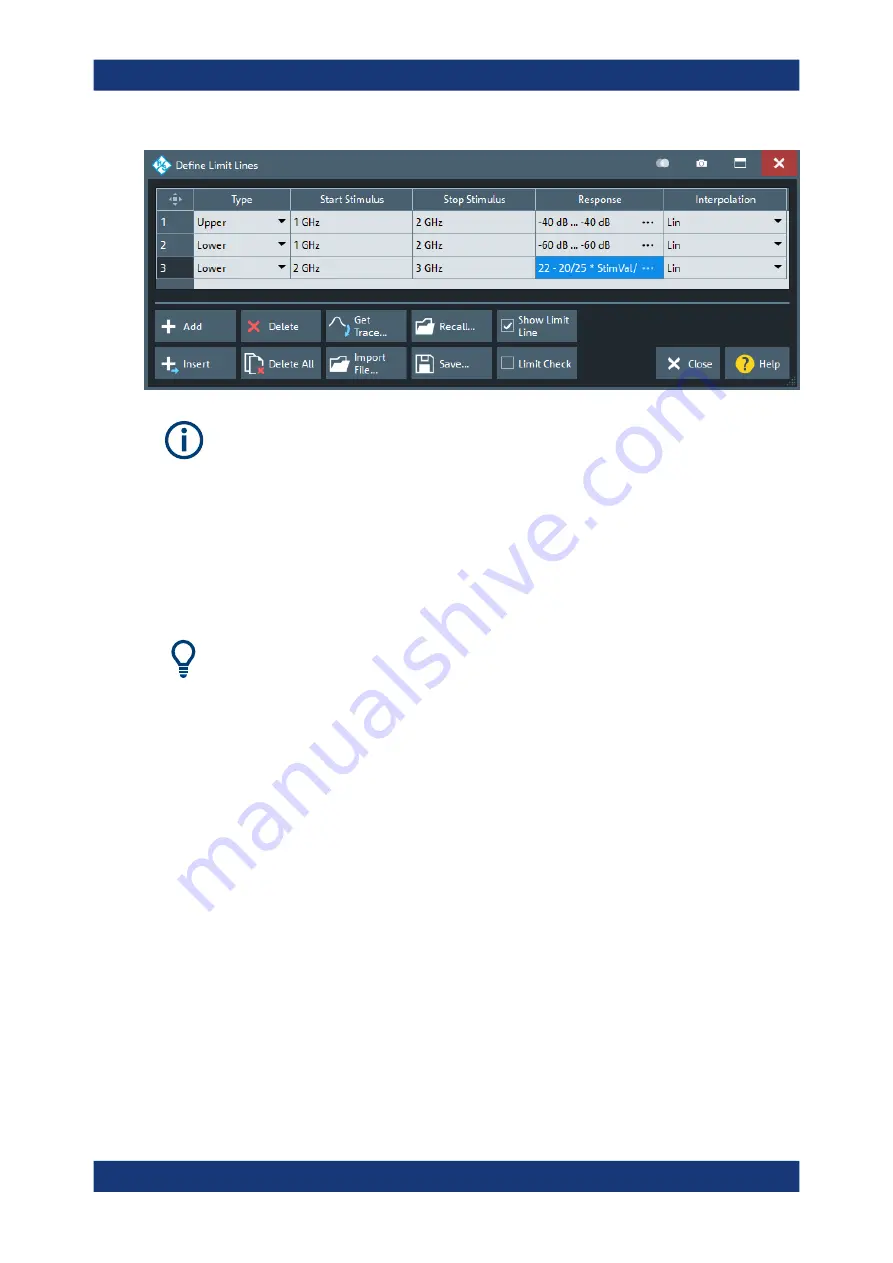
The "Define Limit Lines" dialog contains a table to edit the individual segments of the
limit lines. The buttons below the table extend or shorten the segment list.
Creating limit lines with minimum effort
Choose one of the following methods to create and handle limit lines efficiently:
●
To define limit lines with only a few segments, select "Add" and edit each segment
in the
individually.
●
Select a data or memory trace as a limit line ("Import Trace...") or import a trace
stored in a file ("Import File...").
●
Save your limit lines to a file so you can reuse or modify them later sessions ("Save
Limit Line...", "Recall Limit Line...").
Segment List
Defines the individual limit line segments.
The table contains an automatically assigned current number for each segment plus
the following editable columns:
●
"Type" indicates whether the segment belongs to an "Upper" or a "Lower" limit line,
or if the limit check at the segment is switched "Off". Switching off the limit check
does not delete the segment but changes its screen color.
●
"Start Stimulus" is the stimulus (x-axis) value of the first point of the segment.
●
"Stop Stimulus" is the stimulus (x-axis) value of the last point of the segment.
●
"Response"
–
For a limit line segment that is defined as linear functions of the stimulus,
"Response" displays the y-axis values at the start and stop stimulus (x-axis)
values.
Lines Softtool


